> ## Documentation Index
> Fetch the complete documentation index at: https://docs.blaxel.ai/llms.txt
> Use this file to discover all available pages before exploring further.
# Run OpenClaw on Blaxel
> Deploy and run OpenClaw, an open-source coding agent harness, inside a Blaxel sandbox with persistent volume storage and live preview URLs.
This tutorial explains how to deploy and run [OpenClaw](https://openclaw.ai) on Blaxel.
OpenClaw can be manually installed and configured to run inside a Blaxel sandbox.
## Prerequisites
Before starting, ensure you have:
* a [Blaxel account](https://blaxel.ai)
* an API key from any of the [supported model providers](https://docs.openclaw.ai/concepts/model-providers)
* a Python development environment
## Create a sandbox
1. [Download and install the Blaxel CLI](https://docs.blaxel.ai/cli-reference/introduction#install) and log in to your Blaxel account:
```shell theme={null}
bl login
```
2. In a new directory, install the Blaxel [Python SDK](https://github.com/blaxel-ai/sdk-python) (there's also a [TypeScript SDK](https://github.com/blaxel-ai/sdk-typescript)):
```shell theme={null}
python3 -m venv .venv
source .venv/bin/activate
pip install blaxel
```
3. Create a script named `main.py` in the same directory:
```python theme={null}
import asyncio
import os
import sys
from datetime import datetime, timedelta, UTC
from blaxel.core import SandboxInstance
async def main():
# Create sandbox
sandbox = await SandboxInstance.create_if_not_exists({
"name": "openclaw-sandbox",
"image": "blaxel/node:latest",
"memory": 4096,
"region": "us-pdx-1",
})
# Create preview
preview = await sandbox.previews.create_if_not_exists({
"metadata": {"name": "openclaw-gateway"},
"spec": {
"port": 18789,
"public": False,
}
})
# Create preview token
# Valid for 24 hours
expires_at = datetime.now(UTC) + timedelta(minutes=1440)
token = await preview.tokens.create(expires_at)
# Get preview URL and token
print(f"Preview URL: {preview.spec.url}")
print(f"Token: {token}")
if __name__ == "__main__":
asyncio.run(main())
```
This script:
* creates a new Blaxel sandbox named `openclaw-sandbox` using Blaxel's Node.js base image;
* opens the sandbox port 18789, which OpenClaw uses for WebSocket and HTTP connections; and
* creates a preview URL for the service running on that port;
* creates an access token for the preview URL, valid for 24 hours.
4. Run the script to create the sandbox and preview URL:
```shell theme={null}
python main.py
```
Once complete, the script displays the generated preview URL (for example, `https://b186....preview.bl.run`) and preview URL access token (for example, `cbba622560db78e...`). Note these values, as you will require them in subsequent steps.
## Install and configure OpenClaw
1. Connect to the Blaxel sandbox terminal:
```shell theme={null}
bl connect sandbox openclaw-sandbox
```
2. Execute the following commands to install OpenClaw in the sandbox:
```shell theme={null}
apk add curl bash make cmake g++ build-base linux-headers jq
npm install -g openclaw@latest
```
For detailed installation instructions, refer to the [OpenClaw documentation](https://docs.openclaw.ai/install).
3. Configure OpenClaw:
```shell theme={null}
openclaw onboard
```
Read and accept the security warning to proceed.
Select the **Quickstart** mode to proceed. You will be prompted for more information, including choosing a model provider, channels, skills and hooks.
At minimum, you must select a model provider and model and enter the required API key. All other steps are optional and can be skipped if you don't have the details yet.
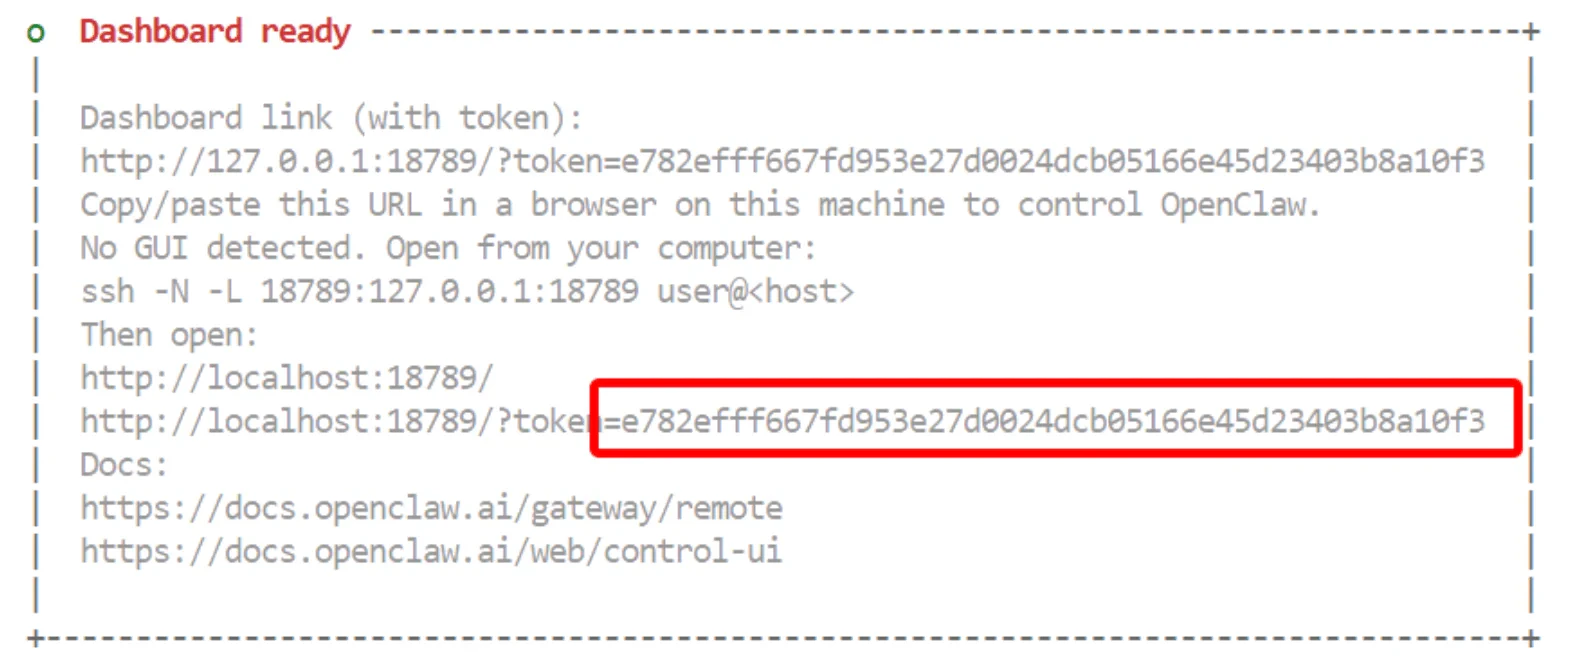
4. Once the configuration process is complete, OpenClaw will display status output. This will usually include a message that `systemd` services are unavailable. This is expected as, for performance reasons, Blaxel sandboxes do not include the `systemd` process manager.
5. The status output also displays a tokenized dashboard link. Note the dashboard token (for example, `e782efff66...`), as it will be required in the next step.
 ## Configure OpenClaw Gateway access
1. Edit the OpenClaw configuration file at `/blaxel/.openclaw/openclaw.json` and add the preview URL to the list of allowed origins:
```json theme={null}
"gateway": {
"controlUi": {
"allowedOrigins": ["https://b186....preview.bl.run"]
},
// ...
}
```
An alternative way to do this is with `jq`:
```shell theme={null}
jq '.gateway.controlUi = {"allowedOrigins":["https://b186....preview.bl.run"]}' /blaxel/.openclaw/openclaw.json > /blaxel/.openclaw/openclaw.json.new && mv /blaxel/.openclaw/openclaw.json.new /blaxel/.openclaw/openclaw.json
```
2. Start the OpenClaw Gateway service manually, and keep it running.
```shell theme={null}
openclaw gateway --bind lan --verbose
```
Confirm that you see log messages like the ones below about the Gateway service starting and listening for requests:
```shell theme={null}
14:25:22 [gateway] agent model: google/gemini-2.5-flash-preview-09-2025
14:25:22 [gateway] listening on ws://0.0.0.0:18789 (PID 1660)
14:25:22 [gateway] log file: /tmp/openclaw/openclaw-2026-02-06.log
14:25:22 [ws] → event health seq=1 clients=0 presenceVersion=1 healthVersion=2
```
**IMPORTANT: This is the OpenClaw Gateway process. Make sure that it is running for the rest of these instructions.**
3. Browse to the sandbox preview URL, remembering to also include the preview URL access token in the URL string - for example, `https://b186....preview.bl.run?bl_preview_token=cbba...`. This displays the OpenClaw Control UI.
4. Navigate to the **Overview** page and enter the dashboard token in the **Gateway Token** field.
## Configure OpenClaw Gateway access
1. Edit the OpenClaw configuration file at `/blaxel/.openclaw/openclaw.json` and add the preview URL to the list of allowed origins:
```json theme={null}
"gateway": {
"controlUi": {
"allowedOrigins": ["https://b186....preview.bl.run"]
},
// ...
}
```
An alternative way to do this is with `jq`:
```shell theme={null}
jq '.gateway.controlUi = {"allowedOrigins":["https://b186....preview.bl.run"]}' /blaxel/.openclaw/openclaw.json > /blaxel/.openclaw/openclaw.json.new && mv /blaxel/.openclaw/openclaw.json.new /blaxel/.openclaw/openclaw.json
```
2. Start the OpenClaw Gateway service manually, and keep it running.
```shell theme={null}
openclaw gateway --bind lan --verbose
```
Confirm that you see log messages like the ones below about the Gateway service starting and listening for requests:
```shell theme={null}
14:25:22 [gateway] agent model: google/gemini-2.5-flash-preview-09-2025
14:25:22 [gateway] listening on ws://0.0.0.0:18789 (PID 1660)
14:25:22 [gateway] log file: /tmp/openclaw/openclaw-2026-02-06.log
14:25:22 [ws] → event health seq=1 clients=0 presenceVersion=1 healthVersion=2
```
**IMPORTANT: This is the OpenClaw Gateway process. Make sure that it is running for the rest of these instructions.**
3. Browse to the sandbox preview URL, remembering to also include the preview URL access token in the URL string - for example, `https://b186....preview.bl.run?bl_preview_token=cbba...`. This displays the OpenClaw Control UI.
4. Navigate to the **Overview** page and enter the dashboard token in the **Gateway Token** field.
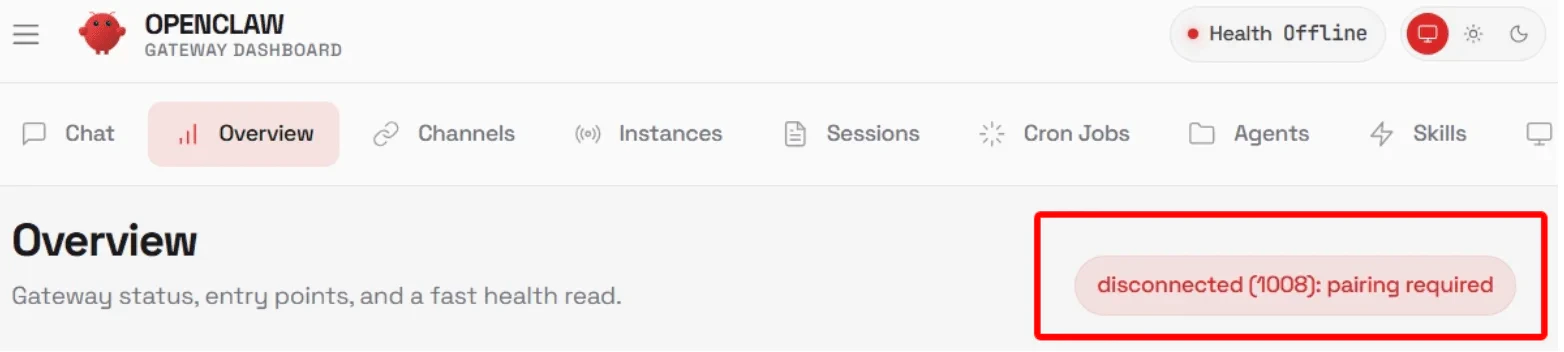
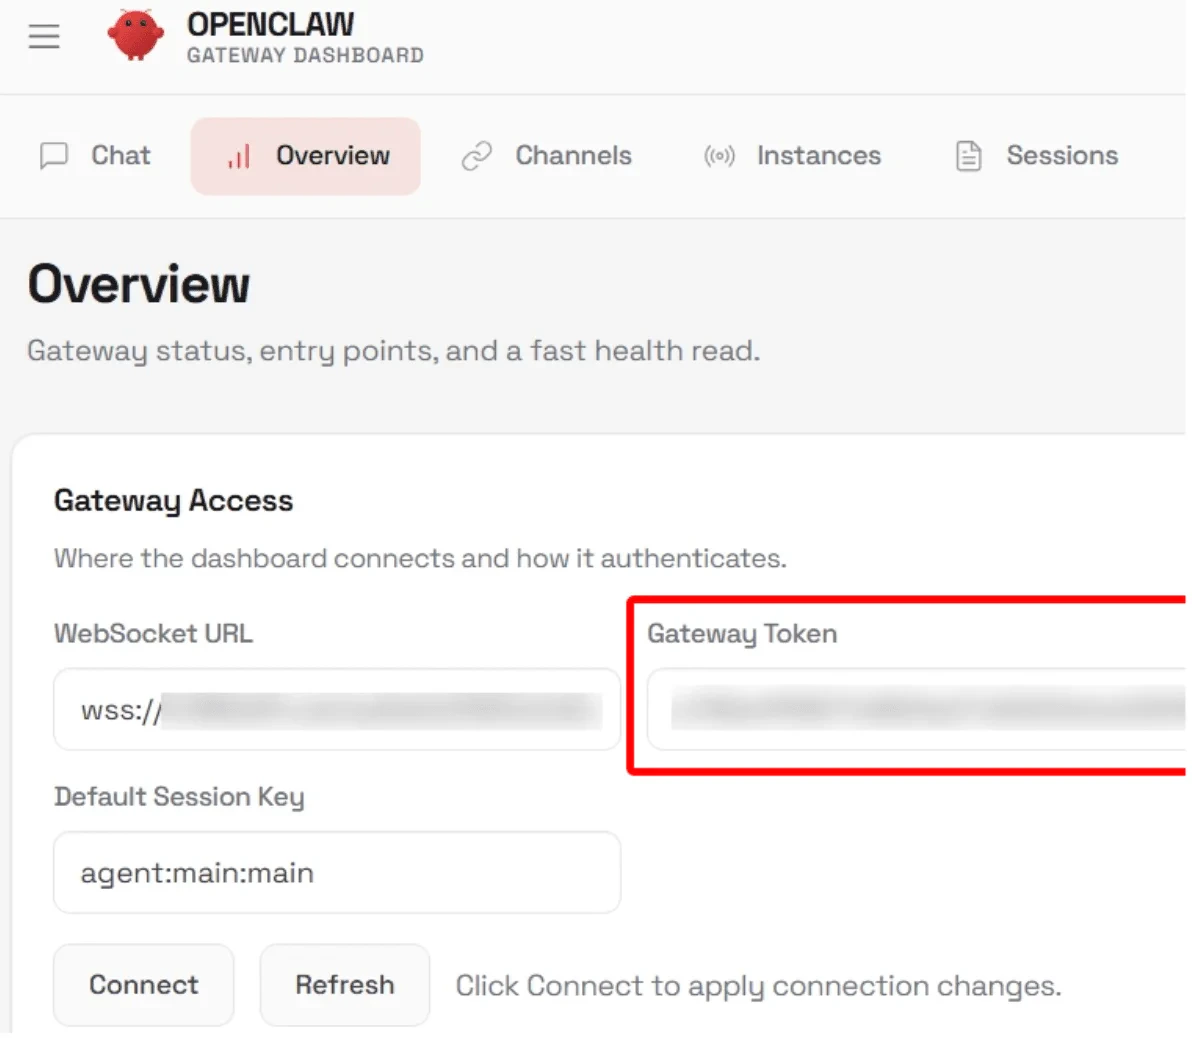 5. The Control UI also displays the error `pairing required`. This is because the OpenClaw Gateway requires a [one-time pairing approval](https://docs.openclaw.ai/web/control-ui#device-pairing-first-connection) for connections from a new browser/device.
 6. Connect to the sandbox terminal **in a separate terminal window** (to not kill the gateway process running):
```shell theme={null}
bl connect sandbox openclaw-sandbox
```
7. List the available pairing requests:
```shell theme={null}
openclaw devices list
```
8. Typically, there will only be one pending pairing request. Approve it using its request identifier:
```shell theme={null}
openclaw devices approve f06d4e9b...
```
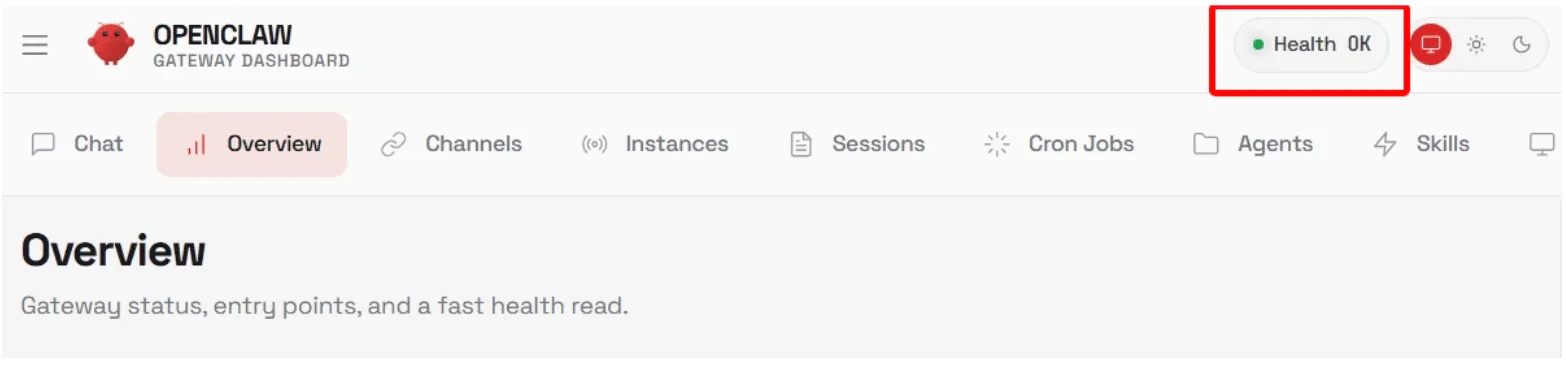
9. Browse to the sandbox preview URL again. The Control UI should now be fully functional and ready to accept requests, verified by the health check in the top right corner.
6. Connect to the sandbox terminal **in a separate terminal window** (to not kill the gateway process running):
```shell theme={null}
bl connect sandbox openclaw-sandbox
```
7. List the available pairing requests:
```shell theme={null}
openclaw devices list
```
8. Typically, there will only be one pending pairing request. Approve it using its request identifier:
```shell theme={null}
openclaw devices approve f06d4e9b...
```
9. Browse to the sandbox preview URL again. The Control UI should now be fully functional and ready to accept requests, verified by the health check in the top right corner.
 ## Test OpenClaw
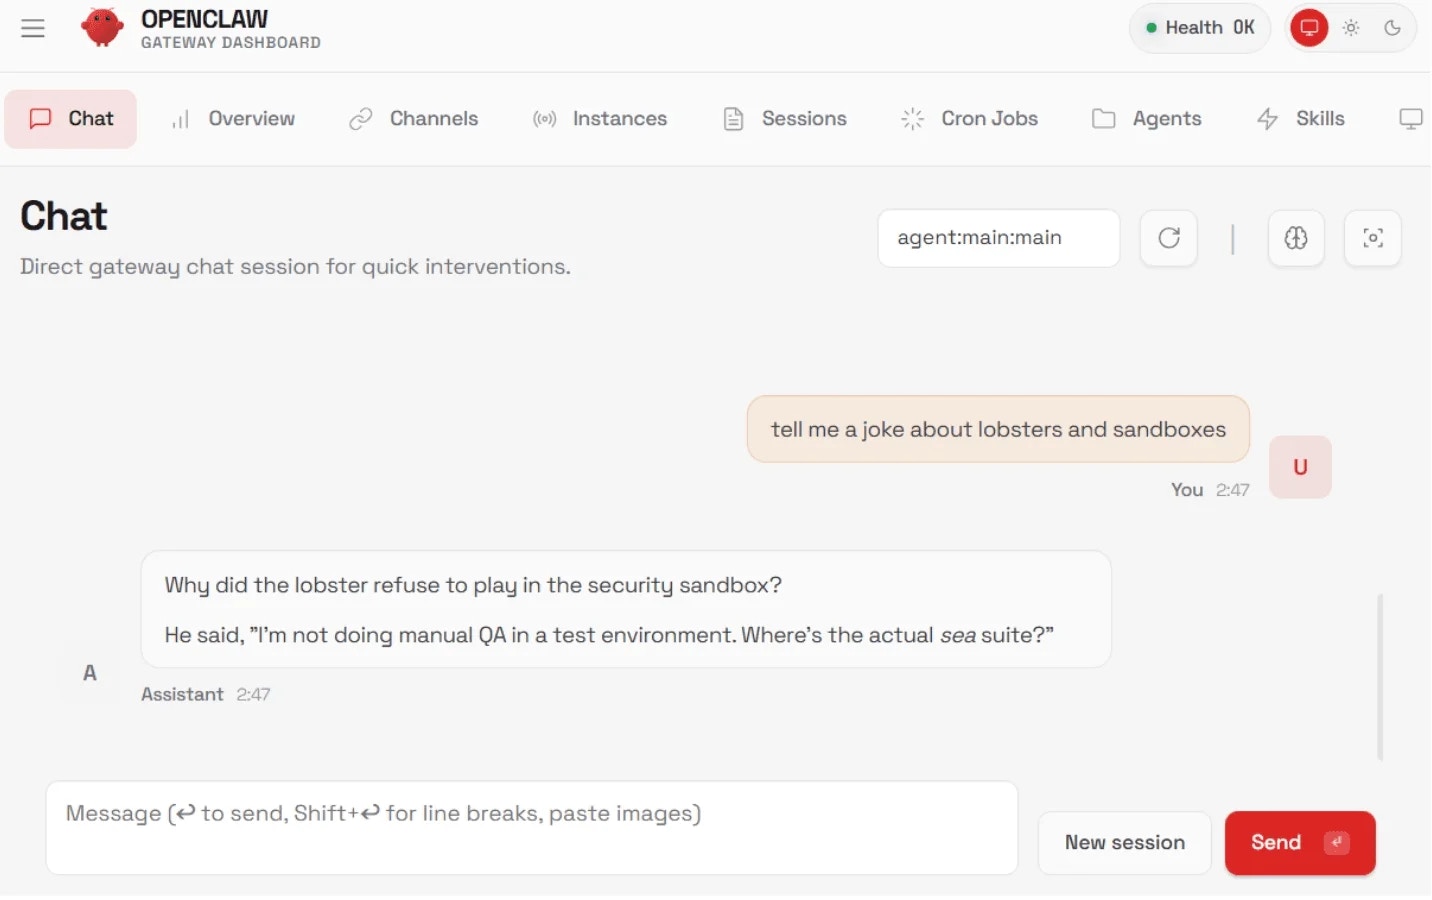
Navigate to the **Chat** page, enter a prompt, and wait for a reply to confirm that the OpenClaw agent is working:
## Test OpenClaw
Navigate to the **Chat** page, enter a prompt, and wait for a reply to confirm that the OpenClaw agent is working:
 ## Configure OpenClaw channels
OpenClaw supports multiple channels. To enable them, configure them through the Control UI after connecting, or add them to the `openclaw.json` file.
As mentioned earlier, the OpenClaw Gateway process must remain running while you interact with the agent. However, if you end your interactive shell session with the Blaxel sandbox, the Gateway process will terminate automatically as well. To keep the Gateway process running even if you're not in an active shell session with the sandbox, create and execute the following script:
```python theme={null}
import asyncio
import os
import sys
from blaxel.core import SandboxInstance
async def main():
# Get sandbox
sandbox = await SandboxInstance.get("openclaw-sandbox")
# Start process
process = await sandbox.process.exec({
"name": "start-openclaw-gateway",
"command": "openclaw gateway --bind lan --verbose",
"restart_on_failure": True,
"max_restarts": 5
})
if __name__ == "__main__":
asyncio.run(main())
```
## Configure OpenClaw channels
OpenClaw supports multiple channels. To enable them, configure them through the Control UI after connecting, or add them to the `openclaw.json` file.
As mentioned earlier, the OpenClaw Gateway process must remain running while you interact with the agent. However, if you end your interactive shell session with the Blaxel sandbox, the Gateway process will terminate automatically as well. To keep the Gateway process running even if you're not in an active shell session with the sandbox, create and execute the following script:
```python theme={null}
import asyncio
import os
import sys
from blaxel.core import SandboxInstance
async def main():
# Get sandbox
sandbox = await SandboxInstance.get("openclaw-sandbox")
# Start process
process = await sandbox.process.exec({
"name": "start-openclaw-gateway",
"command": "openclaw gateway --bind lan --verbose",
"restart_on_failure": True,
"max_restarts": 5
})
if __name__ == "__main__":
asyncio.run(main())
```