# Deploy agents
Source: https://docs.blaxel.ai/Agents/Deploy-an-agent
Ship your custom AI agents on Blaxel in a few clicks.
Blaxel Agents Hosting lets you bring your agent code **and deploys it as a serverless auto-scalable endpoint** — no matter your development framework.
The main way to deploy an agent on Blaxel is by **using Blaxel CLI.** This method is detailed down below on the page. Alternatively you can [**connect a GitHub repository**](Github-integration): any push to the *main* branch will automatically update the deployment on Blaxel — or deploy from a variety of **pre-built templates** on the Blaxel Console.
## Deploy an agent with Blaxel CLI
This section assumes you have developed an agent locally, as presented [in this documentation](Develop-an-agent), and are ready to deploy it.
[Blaxel SDK](../sdk-reference/introduction) provides methods to programmatically access and integrate various resources hosted on Blaxel into your agent's code, such as: [model APIs](../Models/Overview), [tool servers](../Functions/Overview), [sandboxes](../Sandboxes/Overview), [batch jobs](../Jobs/Overview), or [other agents](Overview). The SDK handles authentication, secure connection management and telemetry automatically.
This packaging makes Blaxel **fully agnostic of the framework** used to develop your agent and doesn’t prevent you from deploying your software on another platform.
Read [this guide first](Develop-an-agent) on how to leverage the Blaxel SDK when developing a custom agent to deploy.
### Serve locally
You can serve the agent locally in order to make the entrypoint function (by default: `main.py` / `main.ts`) available on a local endpoint.
Run the following command to serve the agent:
```bash
bl serve
```
Calling the provided endpoint will execute the agent locally while sandboxing the core agent logic, function calls and model API calls exactly as it would be when deployed on Blaxel. Add the flag `--hotreload` to get live changes.
```bash
bl serve --hotreload
```
### Deploy on production
You can deploy the agent in order to make the entrypoint function (by default: `main.py` / `main.ts`) **callable on a global endpoint**. When deploying to Blaxel, your workloads are served optimally to dramatically accelerate cold-start and latency while enforcing your [deployment policies](../Model-Governance/Policies).
Run the following command to build and deploy a local agent on Blaxel:
```bash
bl deploy
```
When making a deployment using Blaxel CLI (`bl deploy`), the new traffic routing depends on the `--traffic` option. Without this option specified, Blaxel will automatically deploy the new revision with full traffic (100%) if the previous deployment was the latest revision. Otherwise, it will create the revision without deploying it (0% traffic).
Specify which sub-directory to deploy with the `--directory` (`-d`) option:
```bash
bl deploy -d myfolder/mysubfolder
```
This allows for [deploying multiple agents/servers/jobs from the same repository](Deploy-multiple) with shared dependencies.
### Customize an agent deployment
You can set custom parameters for an agent deployment (e.g. specify the agent name, etc.) in the `blaxel.toml` file at the root of your directory.
This file is used to configure the deployment of the agent on Blaxel. The only mandatory parameter is the `type` so Blaxel knows which kind of entity to deploy. Others are not mandatory but allow you to customize the deployment.
```toml
name = "my-agent"
workspace = "my-workspace"
type = "agent"
agents = []
functions = ["blaxel-search"]
models = ["gpt-4o-mini"]
[env]
DEFAULT_CITY = "San Francisco"
[runtime]
timeout = 900
memory = 1024
[[triggers]]
id = "trigger-async-my-agent"
type = "http-async"
[triggers.configuration]
path = "agents/my-agent/async" # This will create this endpoint on the following base URL: https://run.blaxel.ai/{YOUR-WORKSPACE}
retry = 1
[[triggers]]
id = "trigger-my-agent"
type = "http"
[triggers.configuration]
path = "agents/my-agent/sync"
retry = 1
authenticationType = "public"
```
* `name`, `workspace`, and `type` fields are optional and serve as default values. Any bl command run in the folder will use these defaults rather than prompting you for input.
* `agents`, `functions`, and `models` fields are also optional. They specify which resources to deploy with the agent. These resources are preloaded during build, eliminating runtime dependencies on the Blaxel control plane and dramatically improving performance.
* `[env]` section defines environment variables that the agent can access via the SDK. Note that these are NOT [secrets](Variables-and-secrets).
* `[runtime]` section allows to override agent deployment parameters: timeout (in s) or memory (in MB) to allocate.
* `[[triggers]]` and `[triggers.configuration]` sections defines ways to send requests to the agent. You can create both [synchronous and asynchronous](Query-agents) trigger endpoints. You can also make them either private (default) or public.
A private synchronous HTTP endpoint is always created by default, even if you don’t define any trigger here.
### Deploy with a Dockerfile
While Blaxel uses predefined, optimized container images to build and deploy your code, you can also deploy your agent using your own [Dockerfile](https://docs.docker.com/reference/dockerfile/).
Deploy resources using a custom Dockerfile.
### Deploy from GitHub
You can connect a GitHub repository to Blaxel to automatically deploy updates whenever changes are pushed to the *main* branch.
Learn how to synchronize your GitHub repository to automatically deploy updates.
## Reference for deployment life-cycle
### Deploying an agent
Deploying an agent will create the associated agent deployment. At this time:
* it is [reachable](Query-agents) through a specific endpoint
* it does not consume resources [until it is actively being invoked and processing inferences](Query-agents)
* its status can be monitored either on the console or using the CLI/APIs
### Choosing the infrastructure generation
Blaxel offers two [infrastructure generations](../Infrastructure/Gens). When deploying a workload, you can select between *Mk 2 infrastructure*—which provides stable, globally distributed container-based workloads—and *Mk 3* (in Alpha), which delivers ultra-fast cold starts. Choose the generation that best fits your specific requirements.
### Maximum runtime
* Deployed agents have a runtime limit after which executions time out. This timeout duration is determined by your chosen [infrastructure generation](../Infrastructure/Gens). For Mk 2 generation, the **maximum timeout is 10 minutes**.
### Managing revisions
As you iterate on software development, you will need to update the version of an agent that is currently deployed and used by your consumers. Every time you build a new version of your agent, this creates a **revision**. Blaxel stores the 10 latest revisions for each object.

Revisions are atomic builds of your deployment that can be either deployed (accessible via the inference endpoint) or not. This system enables you to:
* **rollback a deployment** to its exact state from an earlier date
* create a revision without immediate deployment to **prepare for a future release**
* implement progressive rollout strategies, such as **canary deployments**
Important: Revisions are not the same as versions. You cannot use revisions to return to a previous configuration and branch off from it. For version control, use your preferred system (such as GitHub) alongside Blaxel.
Deployment revisions are updated following a **blue-green** paradigm. The Global Inference Network will wait for the new revision to be completely up and ready before routing requests to the new deployment. You can also set up a **canary deployment** to split traffic between two revisions (maximum of two).

When making a deployment using Blaxel CLI (`bl deploy`), the new traffic routing depends on the `--traffic` option. Without this option specified, Blaxel will automatically deploy the new revision with full traffic (100%) if the previous deployment was the latest revision. Otherwise, it will create the revision without deploying it (0% traffic).
### Executions and inference requests
**Executions** (a.k.a inference executions) are ephemeral invocations of agent deployments by a [consumer](Query-agents). Because Blaxel is serverless, an agent deployment is only materialized onto one of the execution locations when it actively receives and processes requests. Workload placement and request routing is fully managed by the Global Agentics Network, as defined by your [environment policies](../Model-Governance/Policies).
Read more about [querying agents in this documentation](Query-agents).
### Deactivating an agent deployment
Any agent deployment can be deactivated at any time. When deactivated, it will **no longer be reachable** through the inference endpoint and will stop consuming resources.
Agents can be deactivated and activated at any time from the Blaxel console, or via [API](https://docs.blaxel.ai/api-reference/agents/update-agent-by-name) or [CLI](https://docs.blaxel.ai/cli-reference/bl_apply).
## Agent deployment reference
The `bl deploy` command generates a YAML configuration manifest automatically and deploys it to Blaxel's hosting infrastructure. You can also create custom manifest files in the `.blaxel` folder and deploy them using the following command:
```
bl apply -f ./my-agent-deployment.yaml
```
Read our [reference for agent deployments](https://docs.blaxel.ai/api-reference/agents/get-agent-by-name).
Learn how to run consumers’ inference requests on your agent.
# Deploy with a Dockerfile
Source: https://docs.blaxel.ai/Agents/Deploy-dockerfile
Ship your AI applications on Blaxel using a custom Dockerfile.
Blaxel allows you to customize your deployments ([agents](Overview), [MCP servers](../Functions/Overview), and [batch jobs](../Jobs/Overview)) using a Dockerfile at the root level of your project.
## Overview
By default, Blaxel builds and deploys your application using predefined container images optimized for agent workloads. However, you may need to:
* Install additional system dependencies
* Configure custom environment settings
* Use specific versions of runtime environments
* Include proprietary libraries or tools
A Dockerfile at the root of your project gives you full control over the container image that will run your workload on Blaxel's infrastructure.
1. Navigate to the root directory of your Blaxel project ([agent](Overview), [MCP server](../Functions/Overview), and [batch job](../Jobs/Overview))
2. Create a file named `Dockerfile` (case-sensitive)
## Dockerfile Structure
Your Dockerfile should follow these guidelines for compatibility with Blaxel's infrastructure:
```Dockerfile Python
# Start from a base Python image
FROM python:3.12-slim
# Set working directory
WORKDIR /blaxel
# Install system dependencies (if needed)
RUN apt-get update && apt-get install -y \\
build-essential \\
# Add any other system dependencies here \\
&& rm -rf /var/lib/apt/lists/*
# Copy requirements first for better caching
COPY pyproject.toml uv.lock /blaxel/
RUN pip install uv && uv sync --refresh
# Copy application code
COPY . .
# Set env variable to use the virtual environment
ENV PATH="/blaxel/python/.venv/bin:$PATH"
# Command to run when container starts, it need to provide a server running on port 80 for agent and MCP server
ENTRYPOINT [".venv/bin/python3", "-m", "src"]
```
```Dockerfile TypeScript/JavaScript
# Start from a Node.js base image
FROM node:22-alpine
# Set working directory
WORKDIR /blaxel
# Copy package files for better caching
COPY package.json pnpm-lock.yaml /blaxel/
RUN npx pnpm install
# Copy application code
COPY . .
# Command to run when container starts, it need to provide a server running on port 80 for agent and MCP server
ENTRYPOINT ["npx", "pnpm", "start"]
```
### Entrypoint
The entrypoint must start a server running on **port 80** for [agents](Overview) and [MCP servers](../Functions/Overview).
For [batch jobs](../Jobs/Overview), the entrypoint must run a function that terminates—if it runs infinitely, your job will continue until it hits the execution timeout.
### Environment variables
[Environment variables](Variables-and-secrets) configured in the Blaxel platform will be automatically injected into your container at runtime. You do not need to specify them in your Dockerfile.
## Test locally
Before deploying to Blaxel, you can test your Dockerfile locally.
```bash
# Build the Docker image
docker build -t my-blaxel-app .
# Run the container locally
docker run -p 1338:1338 my-blaxel-app
```
## Deploy
When a Dockerfile is present at the root of your project, Blaxel will use it to build a custom container image for your deployment. Deploy your application with the Blaxel CLI as usual.
```bash
bl deploy
```
## Deploy multiple resources with shared files
Using a custom Dockerfile allows for [deploying multiple agents/servers/jobs from the same repository](Deploy-multiple) with shared dependencies.
Deploy multiple resources with shared context from a single repository.
# Deploy multiple resources
Source: https://docs.blaxel.ai/Agents/Deploy-multiple
Deploy multiple resources with shared context from a mono-repo.
You can use a **shared context from a same single repository** to deploy multiple resources, mixing [agents](Overview), [MCP servers](../Functions/Overview), [batch jobs](../Jobs/Overview), etc.
## Deploying multiple resources
With the `--directory` (`-d`) parameter in `bl deploy`, you can specify a subfolder containing your `blaxel.toml` and `Dockerfile`.
The `Dockerfile` defines how your deployment context is built and as such is required if you want to ensure proper mounting of shared dependencies between your different services.
This enables such mono-repo structure with shared libraries:
```
myrepo
|- myagent
|- src
|- blaxel.toml
|- Dockerfile
|- myotheragent
|- src
|- blaxel.toml
|- Dockerfile
|- mymcpserver
|- src
|- blaxel.toml
|- Dockerfile
|- shared
|- sharedfile
```
No changes are required to your `blaxel.toml`. However, in your `Dockerfile`, paths **must be relative** to the root context. For example, replace `COPY src src` with`COPY myagent/src src`
This allows you to reference shared resources:
```
COPY myagent/src src
COPY shared shared
```
### Deploy
To deploy, run these commands from the root folder:
```bash
bl deploy -d myagent
bl deploy -d myotheragent
bl deploy -d mymcpserver
```
For a complete example, see our [sample repository](https://github.com/drappier-charles/multiagent).
# Development guide
Source: https://docs.blaxel.ai/Agents/Develop-an-agent
Run any custom AI agent on Blaxel.
You can **develop agents however you want** — either using a framework such as LangChain, Google ADK or AI SDK; or using just custom code — and deploy the agents to Blaxel with our developer tools ([Blaxel CLI](../cli-reference/introduction), GitHub action, etc.).
[Blaxel SDK](../sdk-reference/introduction) provides methods to programmatically access and integrate various resources hosted on Blaxel into your agent's code, such as: [model APIs](../Models/Overview), [tool servers](../Functions/Overview), [sandboxes](../Sandboxes/Overview), [batch jobs](../Jobs/Overview), or [other agents](Overview). The SDK handles authentication, secure connection management and telemetry automatically.
This packaging makes Blaxel **fully agnostic of the framework** used to develop your agent and doesn’t prevent you from deploying your software on another platform.
## Overview of the development/deployment process
Blaxel’s development paradigm is designed to have a minimal footprint on your usual development process.
Your custom code remains platform-agnostic: you can deploy it on Blaxel or through traditional methods like Docker containers on VMs or Kubernetes clusters. When you deploy on Blaxel (CLI command `bl deploy`), Blaxel runs a specialized build process that integrates your code with its [Global Agentics Network](../Infrastructure/Global-Inference-Network) features.
At this time, Blaxel only supports custom agents developed in TypeScript or Python.
Here is a high-level overview of how agents can be built and deployed using Blaxel:
1. **Initialize a new project by creating a local git repository**. This will contain your agent's logic and connections, as well as all required dependencies. For quick setup, use [Blaxel CLI](../cli-reference/introduction) command `bl create-agent-app`, which creates a pre-scaffolded local repository ready for development that you can deploy to Blaxel in one command.
2. **Develop and test your agent iteratively in a local environment**.
1. Develop your agent logic however you want (using an agentic framework or any custom TypeScript/Python code). Write your own functions as needed. Use Blaxel SDK commands to connect to resources from Blaxel such as model APIs and tool servers.
2. Use Blaxel CLI command `bl serve` to serve your agent on your local machine. The execution workflow—including agent logic, functions, and model API calls—is broken down and sandboxed exactly as it would be when served on Blaxel.
3. **Deploy your agent**. Use Blaxel CLI command `bl deploy` to build and deploy your agent on Blaxel. You can manage a development & production life-cycle by deploying multiple agents, with the according prefix or label.
## Develop an agent on Blaxel
Check out the following guide to learn how to develop and deploy an agent using your preferred programming language on Blaxel.
Develop your AI agents in TypeScript using the Blaxel SDK.
Develop your AI agents in Python using the Blaxel SDK.
Learn how to deploy your custom AI agents on Blaxel as a serverless endpoint.
# Develop agents in Python
Source: https://docs.blaxel.ai/Agents/Develop-an-agent-py
Use the Blaxel SDK to develop and run a custom agent in Python.
You can bring your **custom agents developed in Python** and deploy them to Blaxel with our developer tools ([Blaxel CLI](../cli-reference/introduction), GitHub action, etc.). You can develop agents using frameworks like LangChain, Google ADK, OpenAI Agents SDK; or your own custom code.
### Quickstart
It is required to [have *uv* installed](https://docs.astral.sh/uv/getting-started/installation/) to use the following command.
You can quickly **initialize a new project from scratch** by using CLI command `bl create-agent-app`.
```bash
bl create-agent-app myagent
```
This will create a pre-scaffolded local repo where your entire code can be added. You can choose the base agentic framework for the template.
In the generated folder, you'll find a standard server in the entrypoint file `main.py`. While you typically won't need to modify this file, you can add specific logic there if needed. Your main work will focus on the `agent.py` file. Blaxel's development paradigm lets you leverage its hosting capabilities without modifying your agent's core logic.
### Requirements & limitations
Agents Hosting have few requirements or limitations:
* The only requirement to deploy an app on Agents Hosting is that it exposes an HTTP API server which is bound on `BL_SERVER_HOST` (for the host) and `BL_SERVER_PORT` (for the port). **These two environment variables are required for the host+port combo.**
* You can use [express](https://expressjs.com/), [fastify](https://fastify.dev/), [FastAPI](https://fastapi.tiangolo.com/), etc. for this.
* Deployed agents have a runtime limit after which executions time out. This timeout duration is determined by your chosen [infrastructure generation](../Infrastructure/Gens). For Mk 2 generation, the **maximum timeout is 10 minutes**.
* The synchronous endpoint has a timeout of **100 seconds** for keeping the connection open when no data flows through the API. If your agent streams back responses, the 100-second timeout resets with each chunk streamed. For example, if your agent processes a request for 5 minutes while streaming data, the connection stays open. However, if it goes 100 seconds without sending any data — even while calling external APIs — the connection will timeout.
## Accessing resources with Blaxel SDK
[Blaxel SDK](../sdk-reference/introduction) provides methods to programmatically access and integrate various resources hosted on Blaxel into your agent's code, such as: [model APIs](../Models/Overview), [tool servers](../Functions/Overview), [sandboxes](../Sandboxes/Overview), [batch jobs](../Jobs/Overview), or [other agents](Overview). The SDK handles authentication, secure connection management and telemetry automatically.
### Connect to a model API
Blaxel SDK provides a helper to connect to a [model API](../Models/Overview) defined on Blaxel from your code. This allows you to avoid managing a connection with the model API by yourself. Credentials remain stored securely on Blaxel.
```python
from blaxel.models import bl_model
model = await bl_model("Model-name-on-Blaxel").to_...();
```
Convert the retrieved model to the format of the framework you want to use with the `.to_...()` function.
Available frameworks :
* [LangChain](https://python.langchain.com/docs/concepts/chat_models/) : `to_langchain()`
* [CrewAI](https://docs.crewai.com/concepts/llms) : `to_crewai()`
* [LlamaIndex](https://docs.llamaindex.ai/en/stable/module_guides/models/llms/) : `to_llamaindex()`
* [OpenAI Agents](https://github.com/openai/openai-agents-python): `to_openai()`
* [Pydantic AI Agents](https://github.com/pydantic/pydantic-ai): `to_pydantic()`
* [Google ADK](https://github.com/google/adk-python/blob/main/src/google/adk/models/lite_llm.py): `to_google_adk()`
For example, to connect to model `my-model` in a *LlamaIndex* agent:
```python
from blaxel.models import bl_model
model = await bl_model("my-model").to_llamaindex()
```
### Connect to tools
Blaxel SDK provides a helper to connect to [pre-built or custom tool servers (MCP servers)](../Functions/Overview) hosted on Blaxel from your code. This allows you to avoid managing a connection with the server by yourself. Credentials remain stored securely on Blaxel. The following method retrieves all the tools discoverable in the tool server.
```python
from blaxel.tools import bl_tools
await bl_tools(['Tool-Server-name-on-Blaxel']).to_...()
```
Like for a model, convert the retrieved tools to the format of the framework you want to use with the `.to_...()` function. Available frameworks are `to_langchain()` ([LangChain](https://python.langchain.com/api_reference/core/tools/langchain_core.tools.structured.StructuredTool.html)), `to_llamaindex()` ([LlamaIndex](https://docs.llamaindex.ai/en/stable/module_guides/deploying/agents/tools/)), `to_crewai()` ([CrewAI](https://docs.crewai.com/concepts/tools)), `to_openai()` ([OpenAI Agents](https://github.com/openai/openai-agents-python)), `to_pydantic()` ([PydanticAI Agents](https://github.com/pydantic/pydantic-ai)) and `to_google_adk()` ([Google ADK](https://github.com/google/adk-python/blob/main/src/google/adk/tools/base_tool.py)).
You can develop agents by **mixing tools defined locally in your agents, and tools defined as remote servers**. Using separated tools prevents monolithic designs which make maintenance easier in the long run. Let's look at a practical example combining remote and local tools. The code below uses two tools:
1. `blaxel-search`: A remote tool server on Blaxel providing web search functionality (learn how to create your own MCP servers [here](../Functions/Create-MCP-server))
2. `weather`: A local tool that accepts a city parameter and returns a mock weather response (always "sunny")
```python agent.py (LangChain)
from typing import AsyncGenerator
from blaxel.models import bl_model
from blaxel.tools import bl_tools
from langchain.tools import tool
from langchain_core.messages import AIMessageChunk
from langgraph.prebuilt import create_react_agent
@tool
def weather(city: str) -> str:
"""Get the weather in a given city"""
return f"The weather in {city} is sunny"
async def agent(input: str) -> AsyncGenerator[str, None]:
prompt = "You are a helpful assistant that can answer questions and help with tasks."
tools = await bl_tools(["blaxel-search"]).to_langchain() + [weather]
model = await bl_model("gpt-4o-mini").to_langchain()
agent = create_react_agent(model=model, tools=tools, prompt=prompt)
messages = {"messages": [("user", input)]}
async for chunk in agent.astream(messages, stream_mode=["updates", "messages"]):
type_, stream_chunk = chunk
# This is to stream the response from the agent, filtering response from tools
if type_ == "messages" and len(stream_chunk) > 0 and isinstance(stream_chunk[0], AIMessageChunk):
msg = stream_chunk[0]
if msg.content:
if not msg.tool_calls:
yield msg.content
# This to show a call has been made to a tool, usefull if you want to show the tool call in your interface
if type_ == "updates":
if "tools" in stream_chunk:
for msg in stream_chunk["tools"]["messages"]:
yield f"Tool call: {msg.name}\n"
```
```python agent.py (LlamaIndex)
from typing import AsyncGenerator
from blaxel.models import bl_model
from blaxel.tools import bl_tools
from llama_index.core.agent.workflow import AgentStream, ReActAgent
from llama_index.core.tools import FunctionTool
async def weather(city: str) -> str:
"""Get the weather in a given city"""
return f"The weather in {city} is sunny"
async def agent(input: str) -> AsyncGenerator[str, None]:
prompt = "You are a helpful assistant that can answer questions and help with tasks."
tools = await bl_tools(["blaxel-search"]).to_llamaindex() + [FunctionTool.from_defaults(async_fn=weather)]
model = await bl_model("gpt-4o-mini").to_llamaindex()
agent = ReActAgent(llm=model, tools=tools, system_prompt=prompt)
async for event in agent.run(input).stream_events():
if isinstance(event, AgentStream):
yield event.delta
```
```python agent.py (CrewAI)
# We have to apply nest_asyncio because crewai is not compatible with async
import nest_asyncio
nest_asyncio.apply()
from typing import AsyncGenerator
from blaxel.models import bl_model
from blaxel.tools import bl_tools
from crewai import Agent, Crew, Task
from crewai.tools import tool
@tool("Weather")
def weather(city: str) -> str:
"""Get the weather in a given city"""
return f"The weather in {city} is sunny"
async def agent(input: str) -> AsyncGenerator[str, None]:
tools = await bl_tools(["blaxel-search"]).to_crewai() + [weather]
model = await bl_model("gpt-4o-mini").to_crewai()
agent = Agent(
role="Weather Researcher",
goal="Find the weather in a city",
backstory="You are an experienced weather researcher with attention to detail",
llm=model,
tools=tools,
verbose=True,
)
crew = Crew(
agents=[agent],
tasks=[Task(description="Find weather", expected_output=input, agent=agent)],
verbose=True,
)
result = crew.kickoff()
yield result.raw
```
```python agent.py (OpenAI Agents)
from typing import AsyncGenerator
from agents import Agent, RawResponsesStreamEvent, Runner, function_tool
from blaxel.models import bl_model
from blaxel.tools import bl_tools
from openai.types.responses import ResponseTextDeltaEvent
@function_tool()
async def weather(city: str) -> str:
"""Get the weather in a given city"""
return f"The weather in {city} is sunny"
async def agent(input: str) -> AsyncGenerator[str, None]:
tools = await bl_tools(["blaxel-search"]).to_openai() + [weather]
model = await bl_model("gpt-4o-mini").to_openai()
agent = Agent(
name="blaxel-agent",
model=model,
tools=tools,
instructions="You are a helpful assistant.",
)
result = Runner.run_streamed(agent, input)
async for event in result.stream_events():
if isinstance(event, RawResponsesStreamEvent) and isinstance(event.data, ResponseTextDeltaEvent):
yield event.data.delta
```
```python agent.py (Pydantic AI Agents)
from typing import AsyncGenerator
from blaxel.models import bl_model
from blaxel.tools import bl_tools
from pydantic_ai import Agent, CallToolsNode, Tool
from pydantic_ai.messages import ToolCallPart
from pydantic_ai.models import ModelSettings
def weather(city: str) -> str:
"""Get the weather in a given city"""
return f"The weather in {city} is sunny"
async def agent(input: str) -> AsyncGenerator[str, None]:
prompt = "You are a helpful assistant that can answer questions and help with tasks."
tools = await bl_tools(["blaxel-search"]).to_pydantic() + [Tool(weather)]
model = await bl_model("gpt-4o-mini").to_pydantic()
agent = Agent(model=model, tools=tools, model_settings=ModelSettings(temperature=0), system_prompt=prompt)
async with agent.iter(input) as agent_run:
async for node in agent_run:
if isinstance(node, CallToolsNode):
for part in node.model_response.parts:
if isinstance(part, ToolCallPart):
yield(f"Tool call: {part.tool_name}\n")
else:
yield part.content + "\n"
```
```python agent.py (Google ADK)
from logging import getLogger
from typing import AsyncGenerator
from blaxel.models import bl_model
from blaxel.tools import bl_tools
from google.adk.agents import Agent
from google.adk.runners import Runner
from google.adk.sessions import InMemorySessionService
from google.genai import types
logger = getLogger(__name__)
# @title Define the get_weather Tool
def get_weather(city: str) -> dict:
"""Get the weather in a given city"""
return f"The weather in {city} is sunny"
APP_NAME = "research_assistant"
session_service = InMemorySessionService()
async def agent(input: str, user_id: str = "default", session_id: str = "default") -> AsyncGenerator[str, None]:
description = "You are a helpful assistant that can answer questions and help with tasks."
prompt = """
You are a helpful weather assistant. Your primary goal is to provide current weather reports. "
When the user asks for the weather in a specific city,
You can also use a research tool to find more information about anything.
Analyze the tool's response: if the status is 'error', inform the user politely about the error message.
If the status is 'success', present the weather 'report' clearly and concisely to the user.
Only use the tool when a city is mentioned for a weather request.
"""
tools = await bl_tools(["blaxel-search"], timeout_enabled=False).to_google_adk() + [get_weather]
model = await bl_model("sandbox-openai").to_google_adk()
agent = Agent(model=model, name=APP_NAME, description=description, instruction=prompt, tools=tools)
# Create the specific session where the conversation will happen
if not session_service.get_session(app_name=APP_NAME, user_id=user_id, session_id=session_id):
session_service.create_session(
app_name=APP_NAME,
user_id=user_id,
session_id=session_id
)
logger.info(f"Session created: App='{APP_NAME}', User='{user_id}', Session='{session_id}'")
runner = Runner(
agent=agent,
app_name=APP_NAME,
session_service=session_service,
)
logger.info(f"Runner created for agent '{runner.agent.name}'.")
content = types.Content(role="user", parts=[types.Part(text=input)])
async for event in runner.run_async(user_id=user_id, session_id=session_id, new_message=content):
# Key Concept: is_final_response() marks the concluding message for the turn.
if event.is_final_response():
if event.content and event.content.parts:
# Assuming text response in the first part
yield event.content.parts[0].text
elif event.actions and event.actions.escalate: # Handle potential errors/escalations
yield f"Agent escalated: {event.error_message or 'No specific message.'}"
```
### Connect to another agent (multi-agent chaining)
Rather than using a "quick and dirty" approach where you would combine all your agents and capabilities into a single deployment, Blaxel provides a structured development paradigm based on two key principles:
* Agents can grow significantly in complexity. Monolithic architectures make long-term maintenance difficult.
* Individual agents should be reusable across multiple projects.
Blaxel supports a microservice architecture for handoffs, allowing you to call one agent from another using `bl_agent().run()` rather than combining all functionality into a single codebase.
```bash
from blaxel.agents import bl_agent
first_agent_response = await bl_agent("first_agent").run(input);
second_agent_response = await bl_agent("second_agent").run(first_agent_response);
```
## Customize the agent deployment
You can set custom parameters for an agent deployment (e.g. specify the agent name, etc.) in the `blaxel.toml` file at the root of your directory.
Read the file structure section down below for more details.
## Instrumentation
Instrumentation happens automatically when workloads run on Blaxel. To enable telemetry, simply require the SDK in your project's entry point.
```bash
import blaxel
```
When agents and tools are deployed on Blaxel, request logging and tracing happens automatically.
To add your own custom logs that you can view in the Blaxel Console, use the Python default logger.
```bash
import logging
logger = getLogger(__name__)
logger.info("Hello, world!");
```
## Template directory reference
### Overview
```bash
pyproject.toml # Mandatory. This file is the standard pyproject.toml file, it defines dependencies.
blaxel.toml # This file lists configurations dedicated to Blaxel to customize the deployment. It is not mandatory.
.blaxel # This folder allows you to define custom resources using the Blaxel API specifications. These resources will be deployed along with your agent.
├── blaxel-search.yaml # Here, blaxel-search is a sandbox Web search tool we provide so you can develop your first agent. It has a low rate limit, so we recommend you use a dedicated MCP server for production.
src/
└── main.py # This file is the standard entrypoint of the project. It is used to start the server and create an endpoint bound with agent.py file.
├── agent.py # This file is the main file of your agent. It is loaded from main.py. In the template, all the agent logic is implemented here.
```
### blaxel.toml
This file is used to configure the deployment of the agent on Blaxel. The only mandatory parameter is the `type` so Blaxel knows which kind of entity to deploy. Others are not mandatory but allow you to customize the deployment.
```toml
name = "my-agent"
workspace = "my-workspace"
type = "agent"
agents = []
functions = ["blaxel-search"]
models = ["gpt-4o-mini"]
[env]
DEFAULT_CITY = "San Francisco"
[runtime]
timeout = 900
memory = 1024
[[triggers]]
id = "trigger-async-my-agent"
type = "http-async"
[triggers.configuration]
path = "agents/my-agent/async" # This will create this endpoint on the following base URL: https://run.blaxel.ai/{YOUR-WORKSPACE}
retry = 1
[[triggers]]
id = "trigger-my-agent"
type = "http"
[triggers.configuration]
path = "agents/my-agent/sync"
retry = 1
authenticationType = "public"
```
* `name`, `workspace`, and `type` fields are optional and serve as default values. Any bl command run in the folder will use these defaults rather than prompting you for input.
* `agents`, `functions`, and `models` fields are also optional. They specify which resources to deploy with the agent. These resources are preloaded during build, eliminating runtime dependencies on the Blaxel control plane and dramatically improving performance.
* `[env]` section defines environment variables that the agent can access via the SDK. Note that these are NOT [secrets](Variables-and-secrets).
* `[runtime]` section allows to override agent deployment parameters: timeout (in s) or memory (in MB) to allocate.
* `[[triggers]]` and `[triggers.configuration]` sections defines ways to send requests to the agent. You can create both [synchronous and asynchronous](Query-agents) trigger endpoints. You can also make them either private (default) or public.
A private synchronous HTTP endpoint is always created by default, even if you don’t define any trigger here.
Additionally, you can define an `[entrypoint]` section to specify how Blaxel is going to start your server:
```toml
...
[entrypoint]
prod = "python src/main.py"
dev = "fastapi dev"
...
```
* `prod`: this is the command that will be used to serve your agent
```bash
python src/main.py
```
* `dev`: same as prod in dev mode, it will be used with the command `--hotreload`. Example:
```bash
fastapi dev
```
This `entrypoint` section is optional. If not specified, Blaxel will automatically detect in the agent’s content and configure your agent startup settings.
## Troubleshooting
### Wrong port or host
```
Default STARTUP TCP probe failed 1 time consecutively for container "agent" on port 80. The instance was not started.
Connection failed with status DEADLINE_EXCEEDED.
```
If you encounter this error when deploying your agent on Blaxel, ensure that your agent properly exposes an API server that binds to a host and port with the **required** environment variables: `BL_SERVER_HOST` & `BL_SERVER_PORT`. Blaxel automatically injects these variables during deployment.
Learn how to deploy your custom AI agents on Blaxel as a serverless endpoint.
# Develop agents in TypeScript
Source: https://docs.blaxel.ai/Agents/Develop-an-agent-ts
Use the Blaxel SDK to develop and run a custom agent in TypeScript.
You can bring your **custom agents developed in TypeScript** and deploy them to Blaxel with our developer tools ([Blaxel CLI](../cli-reference/introduction), GitHub action, etc.). You can develop agents using frameworks like LangChain, AI SDK, Mastra; or your own custom code.
## Quickstart
It is required to have *npm* installed to use the following command.
You can quickly **initialize a new project from scratch** by using CLI command `bl create-agent-app`.
```bash
bl create-agent-app myagent
```
This will create a pre-scaffolded local repo where your entire code can be added. You can choose the base agentic framework for the template.
In the generated folder, you'll find a standard server in the entrypoint file `index.ts`. While you typically won't need to modify this file, you can add specific logic there if needed. Your main work will focus on the `agent.ts` file. Blaxel's development paradigm lets you leverage its hosting capabilities without modifying your agent's core logic.
### Requirements & limitations
Agents Hosting have few requirements or limitations:
* The only requirement to deploy an app on Agents Hosting is that it exposes an HTTP API server which is bound on `BL_SERVER_HOST` (for the host) and `BL_SERVER_PORT` (for the port). **These two environment variables are required for the host+port combo.**
* You can use [express](https://expressjs.com/), [fastify](https://fastify.dev/), [FastAPI](https://fastapi.tiangolo.com/), etc. for this.
* Deployed agents have a runtime limit after which executions time out. This timeout duration is determined by your chosen [infrastructure generation](../Infrastructure/Gens). For Mk 2 generation, the **maximum timeout is 10 minutes**.
* The synchronous endpoint has a timeout of **100 seconds** for keeping the connection open when no data flows through the API. If your agent streams back responses, the 100-second timeout resets with each chunk streamed. For example, if your agent processes a request for 5 minutes while streaming data, the connection stays open. However, if it goes 100 seconds without sending any data — even while calling external APIs — the connection will timeout.
## Accessing resources with Blaxel SDK
[Blaxel SDK](../sdk-reference/introduction) provides methods to programmatically access and integrate various resources hosted on Blaxel into your agent's code, such as: [model APIs](../Models/Overview), [tool servers](../Functions/Overview), [sandboxes](../Sandboxes/Overview), [batch jobs](../Jobs/Overview), or [other agents](Overview). The SDK handles authentication, secure connection management and telemetry automatically.
### Connect to a model API
Blaxel SDK provides a helper to connect to a [model API](../Models/Overview) defined on Blaxel from your code. This allows you to avoid managing a connection with the model API by yourself. Credentials remain stored securely on Blaxel.
```tsx
///Comment
import "@blaxel/telemetry"
import { blModel } from "@blaxel/{FRAMEWORK_NAME}";
const model = await blModel("Model-name-on-Blaxel");
```
The model is automatically converted to your chosen framework's format based on the `FRAMEWORK_NAME` specified in the import.
Available frameworks :
* [LangChain/LangGraph](https://v03.api.js.langchain.com/classes/_langchain_core.language_models_chat_models.BaseChatModel.html) : `langgraph`
* [LlamaIndex](https://ts.llamaindex.ai/docs/llamaindex/modules/tool) : `llamaindex`
* [VercelAI](https://sdk.vercel.ai/docs/ai-sdk-core/tools-and-tool-calling) : `vercel`
* [Mastra](https://mastra.ai/docs/reference/agents/createTool): `mastra`
For example, to connect to model `my-model` in a *LlamaIndex* agent:
```tsx
import { blModel } from "@blaxel/llamaindex";
const model = await blModel("my-model");
```
### Connect to tools
Blaxel SDK provides a helper to connect to [pre-built or custom tool servers (MCP servers)](../Functions/Overview) hosted on Blaxel from your code. This allows you to avoid managing a connection with the server by yourself. Credentials remain stored securely on Blaxel. The following method retrieves all the tools discoverable in the tool server.
```tsx
import { blTools } from "@blaxel/{FRAMEWORK_NAME}";
await blTools(['Tool-Server-name-on-Blaxel'])
```
Like for a model, the retrieved tools are automatically converted to the format of the framework you want to use based on the Blaxel SDK package imported. Available frameworks are `langgraph` ([LangChain/LangGraph](https://v03.api.js.langchain.com/classes/_langchain_core.tools.StructuredTool.html)), `llamaindex` ([LlamaIndex](https://ts.llamaindex.ai/docs/llamaindex/modules/tool)), `vercel` ([Vercel AI](https://sdk.vercel.ai/docs/ai-sdk-core/tools-and-tool-calling)) and `mastra` ([Mastra](https://mastra.ai/docs/reference/agents/createTool)).
You can develop agents by **mixing tools defined locally in your agents, and tools defined as remote servers**. Using separated tools prevents monolithic designs which make maintenance easier in the long run. Let's look at a practical example combining remote and local tools. The code below uses two tools:
1. `blaxel-search`: A remote tool server on Blaxel providing web search functionality (learn how to create your own MCP servers [here](../Functions/Create-MCP-server))
2. `weather`: A local tool that accepts a city parameter and returns a mock weather response (always "sunny")
```typescript agent.ts (Vercel AI)
import { blModel, blTools } from '@blaxel/vercel';
import { streamText, tool } from 'ai';
import { z } from 'zod';
interface Stream {
write: (data: string) => void;
end: () => void;
}
export default async function agent(input: string, stream: Stream): Promise {
const response = streamText({
experimental_telemetry: { isEnabled: true },
// Load model API dynamically from Blaxel:
model: await blModel("gpt-4o-mini"),
tools: {
// Load tools dynamically from Blaxel:
...await blTools(['blaxel-search']),
// And here's an example of a tool defined locally for Vercel AI:
"weather": tool({
description: "Get the weather in a specific city",
parameters: z.object({
city: z.string(),
}),
execute: async (args: { city: string }) => {
console.debug("TOOL CALLING: local weather", args);
return `The weather in ${args.city} is sunny`;
},
}),
},
system: "You are an agent that will give the weather when a city is provided, and also do a quick search about this city.",
messages: [
{ role: 'user', content: input }
],
maxSteps: 5,
});
for await (const delta of response.textStream) {
stream.write(delta);
}
stream.end();
}
```
```typescript agent.ts (LlamaIndex)
import { blModel, blTools } from '@blaxel/llamaindex';
import { agent, AgentStream, tool, ToolCallLLM } from "llamaindex";
import { z } from "zod";
interface Stream {
write: (data: string) => void;
end: () => void;
}
export default async function myagent(input: string, stream: Stream): Promise {
const streamResponse = agent({
// Load model API dynamically from Blaxel:
llm: await blModel("gpt-4o-mini") as unknown as ToolCallLLM,
// Load tools dynamically from Blaxel:
tools: [...await blTools(['blaxel-search']),
// And here's an example of a tool defined locally for LlamaIndex:
tool({
name: "weather",
description: "Get the weather in a specific city",
parameters: z.object({
city: z.string(),
}),
execute: async (input) => {
console.debug("TOOL CALLING: local weather", input)
return `The weather in ${input.city} is sunny`;
},
})
],
systemPrompt: "If the user asks for the weather, use the weather tool.",
}).run(input);
for await (const event of streamResponse) {
if (event instanceof AgentStream) {
for (const chunk of event.data.delta) {
stream.write(chunk);
}
}
}
stream.end();
}
```
```typescript agent.ts (LangChain/LangGraph)
import { blModel, blTools } from '@blaxel/langgraph';
import { HumanMessage } from "@langchain/core/messages";
import { tool } from "@langchain/core/tools";
import { createReactAgent } from "@langchain/langgraph/prebuilt";
import { z } from "zod";
interface Stream {
write: (data: string) => void;
end: () => void;
}
export default async function agent(input: string, stream: Stream): Promise {
const streamResponse = await createReactAgent({
// Load model API dynamically from Blaxel:
llm: await blModel("gpt-4o-mini"),
prompt: "If the user asks for the weather, use the weather tool.",
// Load tools dynamically from Blaxel:
tools: [
...await blTools(['blaxel-search']),
// And here's an example of a tool defined locally for LangChain:
tool(async (input: any) => {
console.debug("TOOL CALLING: local weather", input)
return `The weather in ${input.city} is sunny`;
},{
name: "weather",
description: "Get the weather in a specific city",
schema: z.object({
city: z.string(),
})
})
],
}).stream({
messages: [new HumanMessage(input)],
});
for await (const chunk of streamResponse) {
if(chunk.agent) for(const message of chunk.agent.messages) {
stream.write(message.content)
}
}
stream.end();
}
```
```typescript agent.ts (Mastra)
import { blModel, blTools } from "@blaxel/mastra";
import { createTool } from "@mastra/core/tools";
import { Agent } from "@mastra/core/agent";
import { z } from "zod";
interface Stream {
write: (data: string) => void;
end: () => void;
}
export default async function agent(
input: string,
stream: Stream
): Promise {
const agent = new Agent({
name: "blaxel-agent-mastra",
// Load model API dynamically from Blaxel:
model: await blModel("sandbox-openai"),
// Load tools dynamically from Blaxel:
tools: {
...(await blTools(["blaxel-search"])),
// And here's an example of a tool defined locally for Mastra:
weatherTool: createTool({
id: "weatherTool",
description: "Get the weather in a specific city",
inputSchema: z.object({
city: z.string(),
}),
outputSchema: z.object({
weather: z.string(),
}),
execute: async ({ context }) => {
return { weather: `The weather in ${context.city} is sunny` };
},
}),
},
instructions: "If the user asks for the weather, use the weather tool.",
});
const response = await agent.stream([{ role: "user", content: input }]);
for await (const delta of response.textStream) {
stream.write(delta);
}
stream.end();
}
```
### Connect to another agent (multi-agent chaining)
Rather than using a "quick and dirty" approach where you would combine all your agents and capabilities into a single deployment, Blaxel provides a structured development paradigm based on two key principles:
* Agents can grow significantly in complexity. Monolithic architectures make long-term maintenance difficult.
* Individual agents should be reusable across multiple projects.
Blaxel lets you organize your software with a microservice architecture for handoffs, allowing you to call one agent from another using `blAgent().run()` rather than combining all functionality into a single codebase.
```tsx
import { blAgent } from "@blaxel/core";
const myFirstAgentResponse = await blAgent("firstAgent").run(input);
const mySecondAgentResponse = await blAgent("secondAgent").run(myFirstAgentResponse);
```
## Customize the agent deployment
You can set custom parameters for an agent deployment (e.g. specify the agent name, etc.) in the `blaxel.toml` file at the root of your directory.
Read the file structure section down below for more details.
## Instrumentation
Instrumentation happens automatically when workloads run on Blaxel. To enable telemetry, simply require the SDK in your project's entry point.
```tsx
import "@blaxel/telemetry";
```
When agents and tools are deployed on Blaxel, request logging and tracing happens automatically.
To add your own custom logs that you can view in the Blaxel Console, use the default console logger or any logging library (pino, winston, …).
```tsx
console.info("my-log")
```
## Template directory reference
### Overview
```
package.json # Mandatory. This file is the standard package.json file, it defines the entrypoint of the project and dependencies.
blaxel.toml # This file lists configurations dedicated to Blaxel to customize the deployment. It is not mandatory.
tsconfig.json # This file is the standard tsconfig.json file, only needed if you use TypeScript.
.blaxel # This folder allows you to define custom resources using the Blaxel API specifications. These resources will be deployed along with your agent.
├── blaxel-search.yaml # Here, blaxel-search is a sandbox Web search tool we provide so you can develop your first agent. It has a low rate limit, so we recommend you use a dedicated MCP server for production.
src/
└── index.ts # This file is the standard entrypoint of the project. It is used to start the server and create an endpoint bound with agent.ts file.
├── agent.ts # This file is the main file of your agent. It is loaded from index.ts. In the template, all the agent logic is implemented here.
```
### package.json
Here the most notable imports are the scripts. They are used for the `bl serve` and `bl deploy` commands.
```json
{
"name": "name",
"version": "1.0.0",
"description": "",
"keywords": [],
"license": "MIT",
"author": "cdrappier",
"scripts": {
"start": "tsx src/index.ts",
"prod": "node dist/index.js",
"dev": "tsx watch src/index.ts",
"build": "tsc"
},
"dependencies": {
"@ai-sdk/openai": "^1.2.5",
"@blaxel/sdk": "0.1.1-preview.9",
"ai": "^4.1.61",
"fastify": "^5.2.1",
"zod": "^3.24.2"
},
"devDependencies": {
"@types/express": "^5.0.1",
"@types/node": "^22.13.11",
"tsx": "^4.19.3",
"typescript": "^5.8.2"
}
}
```
Depending of what you do, all of the `scripts` are not required. With TypeScript, all 4 of them are used.
* `start` : start the server locally through the TypeScript command, to avoid having to build the project when developing.
* `build` : build the project. It is done automatically when deploying.
* `prod` : start the server remotely from the dist folder, the project needs to be have been built before.
* `dev` : same as start, but with hotreload. It's useful when developing locally, each file change is reflected immediately.
The remaining fields in package.json follow standard JavaScript/TypeScript project conventions. Feel free to add any dependencies you need, but keep in mind that devDependencies are only used during the build process and are removed afterwards.
### blaxel.toml
This file is used to configure the deployment of the agent on Blaxel. The only mandatory parameter is the `type` so Blaxel knows which kind of entity to deploy. Others are not mandatory but allow you to customize the deployment.
```toml
name = "my-agent"
workspace = "my-workspace"
type = "agent"
agents = []
functions = ["blaxel-search"]
models = ["gpt-4o-mini"]
[env]
DEFAULT_CITY = "San Francisco"
[runtime]
timeout = 900
memory = 1024
[[triggers]]
id = "trigger-async-my-agent"
type = "http-async"
[triggers.configuration]
path = "agents/my-agent/async" # This will create this endpoint on the following base URL: https://run.blaxel.ai/{YOUR-WORKSPACE}
retry = 1
[[triggers]]
id = "trigger-my-agent"
type = "http"
[triggers.configuration]
path = "agents/my-agent/sync"
retry = 1
authenticationType = "public"
```
* `name`, `workspace`, and `type` fields are optional and serve as default values. Any bl command run in the folder will use these defaults rather than prompting you for input.
* `agents`, `functions`, and `models` fields are also optional. They specify which resources to deploy with the agent. These resources are preloaded during build, eliminating runtime dependencies on the Blaxel control plane and dramatically improving performance.
* `[env]` section defines environment variables that the agent can access via the SDK. Note that these are NOT [secrets](Variables-and-secrets).
* `[runtime]` section allows to override agent deployment parameters: timeout (in s) or memory (in MB) to allocate.
* `[[triggers]]` and `[triggers.configuration]` sections defines ways to send requests to the agent. You can create both [synchronous and asynchronous](Query-agents) trigger endpoints. You can also make them either private (default) or public.
A private synchronous HTTP endpoint is always created by default, even if you don’t define any trigger here.
## Troubleshooting
### Wrong port or host
```
Default STARTUP TCP probe failed 1 time consecutively for container "agent" on port 80. The instance was not started.
Connection failed with status DEADLINE_EXCEEDED.
```
If you encounter this error when deploying your agent on Blaxel, ensure that your agent properly exposes an API server that binds to a host and port with the **required** environment variables: `BL_SERVER_HOST` & `BL_SERVER_PORT`. Blaxel automatically injects these variables during deployment.
For example, if your current server code looks something like this:
```tsx
app.listen({ port: Number(process.env.PORT) || 3000 }, (err, addr) =>
...
```
Then change to:
```tsx
const port = parseInt(env.BL_SERVER_PORT || "80");
const host = env.BL_SERVER_HOST || "0.0.0.0";
app.listen({ host, port }, (err, addr) =>
...
```
Learn how to deploy your custom AI agents on Blaxel as a serverless endpoint.
# Deploy from GitHub
Source: https://docs.blaxel.ai/Agents/Github-integration
Automatically deploy your GitHub repository with Blaxel.
As your project is ready to go to production, a typical way to manage CI/CD for your agents is to synchronize them with a GitHub repo. You can connect a GitHub repository to Blaxel to automatically deploy updates whenever changes are pushed to the *main* branch.
This integration is only available to deploy [agents](Overview).
## Set up GitHub integration
The simplest way to start is connecting your GitHub repository through the Blaxel Console.

Requirements:
* Authenticate with a GitHub account that **shares the same public email address** as your current Blaxel login
This creates a GitHub action in your repository that connects to your Blaxel workspace to automatically launch a deployment when a push is made on the *main* branch.
### Deploy from a specific branch
At the moment, you can only deploy from *main*. Reach out to Blaxel if you need to deploy from other branches.
# Integrate in your apps
Source: https://docs.blaxel.ai/Agents/Integrate-in-apps
Integrate and use Blaxel agents in your applications and communication platforms.
An agent deployed on Blaxel can be consumed through various downstream applications, including web apps and front-end UIs.
## Integrate in your application
You’ll need:
* An **API key**: generate an [API key for a service account in your workspace](../Security/Service-accounts). Permissions will be scoped to the permissions given to the service account.
* The [**inference URL**](Query-agents) for the agent.
Use these code snippets to integrate your agent in your JavaScript, TypeScript or Python applications.
Make sure to not expose your API key publicly.
```javascript JavaScript
const response = await fetch("https://run.blaxel.ai/YOUR-WORKSPACE/agents/YOUR-AGENT", {
method: "POST",
headers: {
"Content-Type": "application/json",
"Authorization": `Bearer `
},
body: JSON.stringify({
inputs: "Hello, world!"
})
});
const data = await response.text();
console.log(data);
```
```typescript TypeScript
const response = await fetch("https://run.blaxel.ai/YOUR-WORKSPACE/agents/YOUR-AGENT", {
method: "POST",
headers: {
"Content-Type": "application/json",
"Authorization": `Bearer `
},
body: JSON.stringify({
inputs: "Hello, world!"
})
});
const data: string = await response.text();
console.log(data);
```
```python Python
import requests
response = requests.post(
"https://run.blaxel.ai/YOUR-WORKSPACE/agents/YOUR-AGENT",
headers={
"Content-Type": "application/json",
"Authorization": "Bearer "
},
json={
"inputs": "Hello, world!"
}
)
data = response.text
print(data)
```
## Downstream integrations
Below you'll find examples of tested integrations that show how to use your agents with external services.
Turn your Blaxel agent (built with LangGraph) into an agent-native application in minutes.
Orchestrate Blaxel agents using n8n workflows.
Monetize your Blaxel agents using Pactory marketplace.
### Full list
[n8n](Integrate-in-apps/n8n)
[CopilotKit](Integrate-in-apps/CopilotKit)
# CopilotKit integration
Source: https://docs.blaxel.ai/Agents/Integrate-in-apps/CopilotKit
Turn your Blaxel agent (built with LangGraph) into an agent-native application in 10 minutes.
This tutorial will walk you through how to use [CopilotKit](https://www.copilotkit.ai/) to **create complete copilots that leverage Blaxel agents in your frontend**. Turn your MCP servers, models and agents hosted on Blaxel into [CopilotKit CoAgents](https://docs.copilotkit.ai/coagents) that provide full user interaction.
This tutorial is based on a Python LangGraph agent.
## Requirements
* One or several [MCP servers](../../Functions/Overview), hosted on Blaxel
* A [model API](../../Models/Overview), connected on Blaxel
## Step 1: Create a LangGraph agent
You can quickly **initialize a new project from scratch** by using CLI command `bl create-agent-app`.
```bash
bl create-agent-app myagent
```
This will create a pre-scaffolded local repo where your entire code can be added. You can choose the base agentic framework for the template.
Develop your LangGraph agent, using [Blaxel SDK](../Develop-an-agent-py) to connect to Blaxel AI gateway for model APIs and MCP servers, and making sure to add a **memory checkpointer**. You can copy-paste the following code snippet into `agent.py` to get started:
```python agent.py
from typing import AsyncGenerator
from blaxel.models import bl_model
from blaxel.tools import bl_tools
from langchain.tools import tool
from langgraph.prebuilt import create_react_agent
from langgraph.checkpoint.memory import MemorySaver
@tool
def weather(city: str) -> str:
"""Get the weather in a given city"""
print(f"Getting weather for {city}")
return f"The weather in {city} is sunny"
async def agent():
prompt = "You are a helpful assistant that can answer questions and help with tasks."
tools = await bl_tools(["blaxel-search"]).to_langchain() + [weather]
model = await bl_model("sandbox-openai").to_langchain()
# Create memory checkpointer
memory = MemorySaver()
# Create the agent with checkpointing
agent = create_react_agent(
model=model,
tools=tools,
prompt=prompt,
checkpointer=memory
)
return agent
```
## Step 2: Use CopilotKit integration to serve your agent
Next, use CopilotKit's FastAPI integration to serve your LangGraph agent. You can directly modify `main.py` from the scaffolded directory by copy-pasting the following code.
```python main.py
import os
from contextlib import asynccontextmanager
from logging import getLogger
import uvicorn
from fastapi import FastAPI
from opentelemetry.instrumentation.fastapi import FastAPIInstrumentor
from server.error import init_error_handlers
from server.middleware import init_middleware
from copilotkit.integrations.fastapi import add_fastapi_endpoint
from copilotkit import CopilotKitRemoteEndpoint, LangGraphAgent
from agent import agent
logger = getLogger(__name__)
@asynccontextmanager
async def lifespan(app: FastAPI):
logger.info(f"Server running on port {os.getenv('BL_SERVER_PORT', 80)}")
try:
# Initialize the graph
graph = await agent()
# Initialize the SDK
sdk = await get_sdk(graph)
# Store in app state
app.state.sdk = sdk
# Add CopilotKit endpoint
add_fastapi_endpoint(app, sdk, "/copilotkit", use_thread_pool=False)
yield
logger.info("Server shutting down")
except Exception as e:
logger.error(f"Error during startup: {str(e)}", exc_info=True)
raise
app = FastAPI(lifespan=lifespan)
# Create the SDK after the graph is initialized
async def get_sdk(graph):
sdk = CopilotKitRemoteEndpoint(
agents=[
LangGraphAgent(
name="sample_agent",
description="An agent that can provide weather information and handle other conversational tasks",
graph=graph
)
],
)
return sdk
init_error_handlers(app)
init_middleware(app)
FastAPIInstrumentor.instrument_app(app)
if __name__ == "__main__":
uvicorn.run(
app,
host=os.getenv("BL_SERVER_HOST", "0.0.0.0"),
port=os.getenv("BL_SERVER_PORT", 80),
log_level="critical",
)
```
If you haven’t installed CopilotKit in your Python environment, do it now using *uv*:
```bash
uv add copilotkit
```
## Step 3: Setup CopilotKit
CopilotKit maintains a documentation on deploying CoAgents: we are now at [Step 4 of this tutorial](https://docs.copilotkit.ai/coagents/quickstart/langgraph). The rest of this page will highlight the differences required to integrate with a Blaxel agent, using options “**Self-Hosted Copilot Runtime**” and “**Self hosted (FastAPI)**” for the code snippets when available.
### Install CopilotKit
Make sure to have the latest packages for CopilotKit installed into your frontend.
```shell npm
npm install @copilotkit/react-ui @copilotkit/react-core
```
```shell pnpm
pnpm add @copilotkit/react-ui @copilotkit/react-core
```
```shell yarn
yarn add @copilotkit/react-ui @copilotkit/react-core
```
```shell bun
bun add @copilotkit/react-ui @copilotkit/react-core
```
### **Install Copilot Runtime**
Copilot Runtime is a production-ready proxy for your LangGraph agents. In your frontend, go ahead and install it.
```shell npm
npm install @copilotkit/runtime class-validator
```
```shell pnpm
pnpm add @copilotkit/runtime class-validator
```
```shell yarn
yarn add @copilotkit/runtime class-validator
```
```shell bun
bun add @copilotkit/runtime class-validator
```
## Step 4: Plug your agent to CopilotKit in your front-end
You have two options regarding hosting of the agent:
* local hosting
* hosting on Blaxel
### Local hosting
Run the following command at the root of your agent folder to serve the agent locally:
```bash
bl serve
```
The agent will be available on: `http://localhost:1338/copilotkit` by default.
Now let’s setup a Copilot Runtime endpoint in your application and point your frontend to it. The following tutorial will demonstrate integration with a NextJS application. Check out [CopilotKit’s documentation (step 6)](https://docs.copilotkit.ai/coagents/quickstart/langgraph?copilot-hosting=self-hosted\&lg-deployment-type=Local+\(LangGraph+Studio\)\&package-manager=bun\&component=CopilotSidebar\&endpoint-type=Next.js+App+Router#setup-a-copilot-runtime-endpoint) for other frameworks.
Create the following route file:
```typescript app/api/copilotkit/route.ts {13}
import {
CopilotRuntime,
ExperimentalEmptyAdapter,
copilotRuntimeNextJSAppRouterEndpoint,
} from "@copilotkit/runtime";;
import { NextRequest } from "next/server";
// You can use any service adapter here for multi-agent support.
const serviceAdapter = new ExperimentalEmptyAdapter();
const runtime = new CopilotRuntime({
remoteEndpoints: [
{ url: "http://localhost:1338/copilotkit" },
],
});
export const POST = async (req: NextRequest) => {
const { handleRequest } = copilotRuntimeNextJSAppRouterEndpoint({
runtime,
serviceAdapter,
endpoint: "/api/copilotkit",
});
return handleRequest(req);
};
```
Make sure to use the correct port when plugging to CopilotRuntime. By default, CopilotKit’s documentation binds to port 8000 but the default port in the Blaxel agent is **1338**.
You can now follow the rest of [CopilotKit’s documentation on how to setup a Copilot in your frontend application (step 8)](https://docs.copilotkit.ai/coagents/quickstart/langgraph?copilot-hosting=self-hosted\&lg-deployment-type=Self+hosted+\(FastAPI\)\&package-manager=bun\&component=CopilotSidebar\&endpoint-type=Next.js+App+Router#configure-the-copilotkit-provider). Make sure to adapt the name of the agent if you changed it.
### Hosting on Blaxel
**Deploy the agent**
Run the following command at the root of your agent folder to deploy the agent to Blaxel:
```bash
bl deploy
```
Retrieve the base invocation URL for the agent. It should look like this, **on top of which you will add the `/copilotkit` endpoint**.
```http Query agent
POST https://run.blaxel.ai/{YOUR-WORKSPACE}/agents/{YOUR-AGENT}
```
**Create API key**
Then, create an API key either for your profile or for a service account in your workspace. Store that API key for the next step.
**Integrate with CopilotKit**
Now let’s setup a Copilot Runtime endpoint in your application and point your frontend to it. The following tutorial will demonstrate integration with a NextJS application. Check out [CopilotKit’s documentation (step 6)](https://docs.copilotkit.ai/coagents/quickstart/langgraph?copilot-hosting=self-hosted\&lg-deployment-type=Local+\(LangGraph+Studio\)\&package-manager=bun\&component=CopilotSidebar\&endpoint-type=Next.js+App+Router#setup-a-copilot-runtime-endpoint) for other frameworks.
Create the following route file. Make sure to replace `https://run.blaxel.ai/{YOUR-WORKSPACE}/agents/{YOUR-AGENT}/copilotkit` and `` .
```typescript app/api/copilotkit/route.ts {14-19}
import {
CopilotRuntime,
ExperimentalEmptyAdapter,
copilotRuntimeNextJSAppRouterEndpoint,
} from "@copilotkit/runtime";;
import { NextRequest } from "next/server";
// You can use any service adapter here for multi-agent support.
const serviceAdapter = new ExperimentalEmptyAdapter();
const runtime = new CopilotRuntime({
remoteEndpoints: [
{
url: "https://run.blaxel.ai/{YOUR-WORKSPACE}/agents/{YOUR-AGENT}/copilotkit",
onBeforeRequest: ({ ctx }) => {
return {
headers: {
"X-Blaxel-Authorization":
"Bearer ",
},
};
},
},
],
});
export const POST = async (req: NextRequest) => {
const { handleRequest } = copilotRuntimeNextJSAppRouterEndpoint({
runtime,
serviceAdapter,
endpoint: "/api/copilotkit",
});
return handleRequest(req);
};
```
Make sure to call the `/copilotkit` endpoint on your agent (if left as default), or the actual endpoint name that you have used.
You can now follow the rest of [CopilotKit’s documentation on how to setup a Copilot in your frontend application (step 8)](https://docs.copilotkit.ai/coagents/quickstart/langgraph?copilot-hosting=self-hosted\&lg-deployment-type=Self+hosted+\(FastAPI\)\&package-manager=bun\&component=CopilotSidebar\&endpoint-type=Next.js+App+Router#configure-the-copilotkit-provider). Make sure to adapt the name of the agent if you changed it.
# n8n integration
Source: https://docs.blaxel.ai/Agents/Integrate-in-apps/n8n
Orchestrate Blaxel agents using n8n workflows.
This tutorial will walk you through how to integrate your AI agents —deployed on Blaxel— into automated workflows using [n8n](https://n8n.io/). Whether you’re new to Blaxel, n8n, or both, this guide will help you get started quickly with a minimalistic setup that you can build on.
## What You’ll Build

This is a simple n8n workflow that:
1. listens for chat messages,
2. then forwards those messages as inputs to your [AI agent on Blaxel](../Overview) via an HTTP request.
Here's a minimal JSON snippet that demonstrates the workflow:
```json
{
"name": "Demo: My first AI Agent in n8n",
"nodes": [
{
"parameters": {
"options": {}
},
"id": "5b410409-5b0b-47bd-b413-5b9b1000a063",
"name": "When chat message received",
"type": "@n8n/n8n-nodes-langchain.chatTrigger",
"typeVersion": 1.1,
"position": [660, -200],
"webhookId": "a889d2ae-2159-402f-b326-5f61e90f602e"
},
{
"parameters": {
"method": "POST",
"url": "https://run.blaxel.ai/{YOUR-WORKSPACE}/agents/{YOUR-AGENT}",
"authentication": "genericCredentialType",
"genericAuthType": "httpHeaderAuth",
"sendBody": true,
"bodyParameters": {
"parameters": [
{
"name": "inputs",
"value": "={{ $json.chatInput }}"
}
]
},
"options": {}
},
"type": "n8n-nodes-base.httpRequest",
"typeVersion": 4.2,
"position": [1040, -200],
"id": "d389abf6-09cd-4fad-88fa-4a8c098bddf5",
"name": "HTTP Request",
"credentials": {
"httpHeaderAuth": {
"id": "{YOUR_AUTH_ACCOUNT_ID}",
"name": "Header Auth account"
}
}
}
],
"pinData": {},
"connections": {
"When chat message received": {
"main": [
[
{
"node": "HTTP Request",
"type": "main",
"index": 0
}
]
]
},
"HTTP Request": {
"main": [
[]
]
}
},
"active": false,
"settings": {
"executionOrder": "v1"
},
"versionId": "f82cb549-fa06-4cbe-9268-76451dd8e7fc",
"meta": {
"templateId": "PT1i+zU92Ii5O2XCObkhfHJR5h9rNJTpiCIkYJk9jHU=",
"templateCredsSetupCompleted": true,
"instanceId": "b90a39a88ba2a73793446bbe14503ff3b070f8a0ec6fce01ee5b4761919441e1"
},
"id": "Xu7ugYZKH0Dzn9hQ",
"tags": []
}
```
## Step 1: Update the URL Field
Before running your workflow, **update the URL field** in the HTTP Request node to match your [agent’s URL](../Query-agents). Replace `https://run.blaxel.ai/{YOUR-WORKSPACE}/agents/{YOUR-AGENT}` with your actual workspace and agent identifiers.

## Step 2: Configure Header Authentication
To secure your API calls, you must set up header authentication. Follow these two key steps:
1. **Set up the header auth credentials:**
Ensure that your HTTP Request node is set in ***Header Auth*** type.

2. **Create Credentials:**
Fill out the form with the following details. For more details on obtaining your Blaxel API key, refer to this [Access Tokens documentation](https://docs.blaxel.ai/Security/Access-tokens#api-keys).
* **Name:** `Authorization`
* **Value:** `Bearer `

Your n8n workflow is ready to launch!
Hooking up your Blaxel AI agents with n8n is like giving your dev toolkit superpowers! This bare-bones setup we just walked through is just scratching the surface. Think of it as your "Hello World" moment before diving into the really cool stuff - like building a workflow of multiple AI agents that work together.
# Agents Hosting
Source: https://docs.blaxel.ai/Agents/Overview
Deploy your agents as serverless auto-scalable endpoints.
Blaxel Agents Hosting lets you bring your agent code **and deploys it as a serverless auto-scalable endpoint** — no matter your development framework.
An *AI agent* is any application that leverages generative AI models to take autonomous actions in the real world—whether by interacting with humans or using APIs to read and write data.
## Essentials
Agents Hosting is a **serverless computing service that allows you to host any application** without having to manage infrastructure. It gives you full observability and tracing out of the box.
It doesn't force you into any kind of workflow or shaped box — you can host any app on Blaxel as long as it exposes an HTTP API. This makes Blaxel completely agnostic of the framework used to develop your workflow or agent.
Blaxel optimizes the experience specifically for agentic AI use cases, delivering a fully serverless experience even for the longer-running tasks typical of AI agents. For example, telemetry focuses on crucial agent metrics like end-to-end latency and time-to-first-token.
### Main features
Some features of running workloads on Agents Hosting:
* a default invocation endpoint for synchronous requests
* an asynchronous invocation endpoint, for agent workloads lasting from dozens of seconds to 10 minutes
* full logging, telemetry and tracing — out-of-the-box
* revisions manage your agents’ lifecycle across iterations. You can ship as a new revision and rollback instantly
* an SDK to connect to other Blaxel resources (like [models](../Models/Overview) and [tools](../Functions/Overview)) with adapters to most popular [agent frameworks](../Frameworks/Overview)
### Requirements & limitations
Agents Hosting have few requirements or limitations:
* Agents Hosting only supports applications developed in **Python** and in **TypeScript**.
* The only requirement to deploy an app on Agents Hosting is that it exposes an HTTP API server which is bound on `BL_SERVER_HOST` (for the host) and `BL_SERVER_PORT` (for the port). **These two environment variables are required for the host+port combo.**
* You can use [express](https://expressjs.com/), [fastify](https://fastify.dev/), [FastAPI](https://fastapi.tiangolo.com/), etc. for this.
* Deployed agents have a runtime limit after which executions time out. This timeout duration is determined by your chosen [infrastructure generation](../Infrastructure/Gens). For Mk 2 generation, the **maximum timeout is 10 minutes**.
* The synchronous endpoint has a timeout of **100 seconds** for keeping the connection open when no data flows through the API. If your agent streams back responses, the 100-second timeout resets with each chunk streamed. For example, if your agent processes a request for 5 minutes while streaming data, the connection stays open. However, if it goes 100 seconds without sending any data — even while calling external APIs — the connection will timeout.
## Deploy your agent to Blaxel
[Blaxel SDK](../sdk-reference/introduction) provides methods to programmatically access and integrate various resources hosted on Blaxel into your agent's code, such as: [model APIs](../Models/Overview), [tool servers](../Functions/Overview), [sandboxes](../Sandboxes/Overview), [batch jobs](../Jobs/Overview), or [other agents](Overview). The SDK handles authentication, secure connection management and telemetry automatically.
This packaging makes Blaxel **fully agnostic of the framework** used to develop your agent and doesn’t prevent you from deploying your software on another platform.
Read our guide for developing AI agents leveraging Blaxel computing services.
Learn how to deploy and manage your agent on Blaxel.
## Use your agents in your apps
Once your agent is deployed on Blaxel, you can start using it in your applications.
Whether you need to process individual inference requests or integrate the agent into a larger application workflow, **Blaxel provides flexible options for interaction**. Learn how to authenticate requests, handle responses, and optimize your agent's performance in production environments.
Learn how to run consumers’ inference requests on your agent.
Learn how to integrate and use your Blaxel agents in your downstream applications .
# Query an agent
Source: https://docs.blaxel.ai/Agents/Query-agents
Make inference requests on your agents.
Agent [deployments](Overview) on Blaxel have a default **inference endpoint** which can be used by external consumers to request an inference execution. This inference endpoint is synchronous so the connection remains open until the end of your request is entirely processed by the agent. You can also query an asynchronous endpoint for agents, allowing to send requests that last for longer times without keeping connections open.
All inference requests are routed on the [Global Agentics Network](../Infrastructure/Global-Inference-Network) based on the [deployment policies](../Model-Governance/Policies) associated with your agent deployment.
## Inference endpoints
### Default synchronous endpoint
When you deploy an agent on Blaxel, an **inference endpoint** is automatically generated on Global Agentics Network. This endpoint operates synchronously—keeping the connection open until your agent sends its complete response. This endpoint supports both batch and streaming responses, which you can implement in your agent's code.
The inference URL looks like this:
```http Query agent
POST https://run.blaxel.ai/{YOUR-WORKSPACE}/agents/{YOUR-AGENT}
```
Timeout limit:
* The synchronous endpoint has a timeout of **100 seconds** for keeping the connection open when no data flows through the API. If your agent streams back responses, the 100-second timeout resets with each chunk streamed. For example, if your agent processes a request for 5 minutes while streaming data, the connection stays open. However, if it goes 100 seconds without sending any data — even while calling external APIs — the connection will timeout.
* If your request processing is expected to take longer than 100 second without streaming data, you should use the asynchronous endpoint or [batch jobs](../Jobs/Overview) instead.
### Async endpoint
In addition to the default synchronous endpoint, Blaxel provides the ability to create **asynchronous endpoints** for handling longer-running agent requests.

This endpoint allows you to initiate requests without maintaining an open connection throughout the entire processing duration, making it particularly useful for complex or time-intensive operations that might exceed typical connection timeouts. Blaxel handles queuing and execution behind the scene. **You are responsible for implementing your own method for retrieving the agent's results in your code**. You can send results to a webhook, a database, an S3 bucket, etc.
The timeout duration for this endpoint is **10 minutes**. If your request processing is expected to take longer than this, you should use [batch jobs](../Jobs/Overview) instead.
The async endpoint looks like this:
```http Query agent (async)
POST https://run.blaxel.ai/{YOUR-WORKSPACE}/agents/{YOUR-AGENT}/async
```
You can create async endpoints either from the Blaxel Console, or from your code in the `blaxel.toml` file.
This file is used to configure the deployment of the agent on Blaxel. The only mandatory parameter is the `type` so Blaxel knows which kind of entity to deploy. Others are not mandatory but allow you to customize the deployment.
```toml
name = "my-agent"
workspace = "my-workspace"
type = "agent"
agents = []
functions = ["blaxel-search"]
models = ["gpt-4o-mini"]
[env]
DEFAULT_CITY = "San Francisco"
[runtime]
timeout = 900
memory = 1024
[[triggers]]
id = "trigger-async-my-agent"
type = "http-async"
[triggers.configuration]
path = "agents/my-agent/async" # This will create this endpoint on the following base URL: https://run.blaxel.ai/{YOUR-WORKSPACE}
retry = 1
[[triggers]]
id = "trigger-my-agent"
type = "http"
[triggers.configuration]
path = "agents/my-agent/sync"
retry = 1
authenticationType = "public"
```
* `name`, `workspace`, and `type` fields are optional and serve as default values. Any bl command run in the folder will use these defaults rather than prompting you for input.
* `agents`, `functions`, and `models` fields are also optional. They specify which resources to deploy with the agent. These resources are preloaded during build, eliminating runtime dependencies on the Blaxel control plane and dramatically improving performance.
* `[env]` section defines environment variables that the agent can access via the SDK. Note that these are NOT [secrets](Variables-and-secrets).
* `[runtime]` section allows to override agent deployment parameters: timeout (in s) or memory (in MB) to allocate.
* `[[triggers]]` and `[triggers.configuration]` sections defines ways to send requests to the agent. You can create both [synchronous and asynchronous](Query-agents) trigger endpoints. You can also make them either private (default) or public.
A private synchronous HTTP endpoint is always created by default, even if you don’t define any trigger here.
### Endpoint authentication
By default, agents deployed on Blaxel **aren’t public**. It is necessary to authenticate all inference requests, via a [bearer token](../Security/Access-tokens).
The evaluation of authentication/authorization for inference requests is managed by the Global Agentics Network based on the [access given in your workspace](../Security/Workspace-access-control).
See how to remove authentication on a deployed agent down below.
### Manage sessions
To simulate multi-turn conversations, you can pass on request headers. You'll need your client to generate this ID and pass it using any header which you can retrieve via the code (e.g. `Thread-Id`). Without a thread ID, the agent won't maintain nor use any conversation memory when processing the request.
## Make an agent public
To make an agent publicly accessible, add the following to the `blaxel.toml` configuration file, as explained above:
```toml blaxel.toml
…
[[triggers]]
id = "http"
type = "http"
[triggers.configuration]
path = "/" # This will be translated to https://run.blaxel.ai//
authenticationType = "public"
```
## Make an inference request
### Blaxel API
Make a **POST** request to the default inference endpoint for the agent deployment you are requesting, making sure to fill in the authentication token:
```
curl 'https://run.blaxel.ai/YOUR-WORKSPACE/agents/YOUR-AGENT?environment=YOUR-ENVIRONMENT' \
-H 'accept: application/json, text/plain, */*' \
-H 'X-Blaxel-Authorization: Bearer YOUR-TOKEN' \
-H 'X-Blaxel-Workspace: YOUR-WORKSPACE' \
--data-raw $'{"inputs":"Enter your input here."}'
```
Read about [the API parameters in the reference](https://docs.blaxel.ai/api-reference/inference).
### Blaxel CLI
The following command will make a default POST request to the agent.
```bash
bl run agent your-agent --data '{"inputs":"Enter your input here."}'
```
Read about [the CLI parameters in the reference](https://docs.blaxel.ai/cli-reference/bl_run).
### Blaxel console
Inference requests can be made from the Blaxel console from the agent deployment’s **Playground** page.
# Variables and secrets
Source: https://docs.blaxel.ai/Agents/Variables-and-secrets
Manage variables and secrets in your agent or MCP server code.
Environment variables are retrieved first from your `.env` file, and if not found there, from the `[env]` section of `blaxel.toml`. This fallback mechanism allows for two kinds of variables:
* secrets
* simple environment variables
## Secrets
You can create a file named `.env` at the root level of your project to store your secrets. The `.env` file should be added to your `.gitignore` file to prevent committing these sensitive variables.
```
MY_SECRET=123456
```
You can then use secrets in your code as follows:
```typescript TypeScript
import { env } from "@blaxel/core";
console.info(env.MY_SECRET); // 123456
```
```python Python
import os
os.environ.get('MY_SECRET')
```
## Variables
You can define variables inside your agent or MCP server in the `blaxel.toml` file at root level of your project. These variables are NOT intended to be use as secrets, but as configuration variables.
```toml blaxel.toml {6}
name = "..."
workspace = "..."
type = "function"
[env]
DEFAULT_CITY = "San Francisco"
```
You can then use it in your code as follows:
```typescript TypeScript
import { env } from "@blaxel/core";
console.info(env.DEFAULT_CITY); // San Francisco
```
```python Python
import os
os.environ.get('DEFAULT_CITY')
```
## Reserved variables
The following variables are reserved by Blaxel:
`PORT`: Reserved by the system.
`BL_SERVER_PORT` : Port of the HTTP server, it need to be set to allow Blaxel platform to configure it
`BL_SERVER_HOST` : Host of the HTTP server, it need to be set to allow Blaxel platform to configure it
Internal URL for Blaxel platform, to avoid linking multiple instance through the Internet
`BL_AGENT_${envVar}_SERVICE_NAME`
`BL_FUNCTION_${envVar}_SERVICE_NAME`
`BL_RUN_INTERNAL_HOSTNAME`: internal run url
Override URL to link multiple agents and MCP servers together locally
`BL_AGENT_${envVar}_URL`
`BL_FUNCTION_${envVar}_URL`
Metadata automatically set by Blaxel platform in production
`BL_WORKSPACE` : workspace name
`BL_NAME` : name of the function or the agent
`BL_TYPE` : function or agent
Authentication environment variables
`BL_CLIENT_CREDENTIALS` : client credentials, used by Blaxel in production with a workspaced service account
`BL_API_KEY` : can be set in your code to connect with the platform (locally or from a server not on Blaxel platform)
`BL_LOG_LEVEL` : Log level, default to info, can be set to debug,warn,error
`BL_DEBUG_TELEMETRY`: Enable telemetry debug mode, will print each interaction with OpenTelemetry
`BL_ENABLE_OPENTELEMETRY`: Enable OpenTelemetry, it's set automatically by the platform in production
# Templates & Cookbooks
Source: https://docs.blaxel.ai/Examples/Templates-and-Cookbooks
Discover templates of agents in multiple frameworks that you can deploy on Blaxel in one click.
Blaxel offers several ways to quickly bootstrap your agents, allowing rapid deployment and iteration.
* Many [pre-built tools for agents](../Integrations) that seamlessly connect with third-party systems, APIs, and databases.
* [Integrations](../Integrations) with leading LLM providers through Blaxel's gateway.
* **Templates of agents** across multiple frameworks, pre-configured with Blaxel SDK commands for one-click deployment.
Discover our templates on Blaxel’s GitHub repository:
### **LangGraph templates**
An agent powered by OneGrep for semantic tool search & selection, enabling effective autonomous actions even with a high number of tools.
An implementation of a deep research agent using LangGraph and GPT-4.
An expert assistant with deep knowledge of your organization, providing contextually relevant responses to internal inquiries regarding resources, processes and IT services.
This agent dynamically enriches context with data stored in a Qdrant knowledge base.
A powerful agent for automated social media post generation.
The agent processes Zendesk support tickets and provides automated analysis.
This agent analyzes companies using Exa Search Engine and finds similar ones, storying memory in a Qdrant knowledge base.
# Google ADK
Source: https://docs.blaxel.ai/Frameworks/ADK
Learn how to leverage Blaxel with Google ADK agents.
Google ADK has a [known open issue](https://github.com/google/adk-python/issues/153) where tool calling will sometimes **not work** with models other than Gemini models.
You can deploy your [Google Agent Development Kit (ADK)](https://github.com/google/adk-python/tree/main) projects to Blaxel with minimal code editing (and zero configuration), enabling you to use [Serverless Deployments](../Infrastructure/Global-Inference-Network), [Agentic Observability](../Observability/Overview), [Policies](../Model-Governance/Policies), and more.
## Get started with ADK on Blaxel
To get started with ADK on Blaxel:
* if you already have a ADK agent, adapt your code with [Blaxel SDK commands](../Agents/Develop-an-agent) to connect to [MCP servers](../Functions/Overview), [LLMs](../Models/Overview) and [other agents](../Agents/Overview).
* else initialize an example project with ADK by using the following Blaxel CLI command and selecting the *Google ADK hello world:*
```bash
bl create-agent-app myagent
```
[Deploy](../Agents/Deploy-an-agent) it by running:
```bash
bl deploy
```
## Develop a ADK agent using Blaxel features
While building your agent in ADK, use Blaxel [SDK](../sdk-reference/introduction) to connect to resources already hosted on Blaxel:
* [MCP servers](../Functions/Overview)
* [LLMs](../Models/Overview)
* [other agents](../Agents/Overview)
### Connect to MCP servers
Connect to [MCP servers](../Functions/Overview) using the Blaxel SDK to access pre-built or custom tool servers hosted on Blaxel. This eliminates the need to manage server connections yourself, with credentials stored securely on the platform.
Run the following command to retrieve tools in ADK format:
```python Python
from blaxel.tools import bl_tools
await bl_tools(['mcp-server-name']).to_google_adk()
```
### Connect to LLMs
Connect to [LLMs](../Models/Overview) hosted on Blaxel using the SDK to avoid managing model API connections yourself. All credentials remain securely stored on the platform.
```python Python
from blaxel.models import bl_model
model = await bl_model("model-api-name").to_google_adk()
```
### Connect to other agents
Connect to other agents hosted on Blaxel from your code by using the [Blaxel SDK](../sdk-reference/introduction). This allows for multi-agent chaining without managing connections yourself. This command is independent of the framework used to build the agent.
```python Python
from blaxel.agents import bl_agent
response = await bl_agent("agent-name").run(input);
```
### Host your agent on Blaxel
You can [deploy](../Agents/Deploy-an-agent) your agent on Blaxel, enabling you to use [Serverless Deployments](../Infrastructure/Global-Inference-Network), [Agentic Observability](../Observability/Overview), [Policies](../Model-Governance/Policies), and more. This command is independent of the framework used to build the agent.
Either run the following CLI command from the root of your agent repository.
```bash
bl deploy
```
Or connect a GitHub repository to Blaxel for automatic deployments every time you push on *main*.
# CrewAI
Source: https://docs.blaxel.ai/Frameworks/CrewAI
Learn how to leverage Blaxel with CrewAI agents.
[CrewAI](https://www.crewai.com/) is a framework for orchestrating autonomous AI agents — enabling you to create AI teams where each agent has specific roles, tools, and goals, working together to accomplish complex tasks. You can deploy your CrewAI projects to Blaxel with minimal code editing (and zero configuration), enabling you to use [Serverless Deployments](../Infrastructure/Global-Inference-Network), [Agentic Observability](../Observability/Overview), [Policies](../Model-Governance/Policies), and more.
## Get started with CrewAI on Blaxel
To get started with CrewAI on Blaxel:
* if you already have a CrewAI agent, adapt your code with [Blaxel SDK commands](../Agents/Develop-an-agent) to connect to [MCP servers](../Functions/Overview), [LLMs](../Models/Overview) and [other agents](../Agents/Overview).
* else initialize an example project in CrewAI by using the following Blaxel CLI command and selecting the *CrewAI hello world:*
```bash
bl create-agent-app myagent
```
[Deploy](../Agents/Deploy-an-agent) it by running:
```bash
bl deploy
```
## Develop a CrewAI agent using Blaxel features
While building your agent in CrewAI, use Blaxel [SDK](../sdk-reference/introduction) to connect to resources already hosted on Blaxel:
* [MCP servers](../Functions/Overview)
* [LLMs](../Models/Overview)
* [other agents](../Agents/Overview)
### Connect to MCP servers
Connect to [MCP servers](../Functions/Overview) using the Blaxel SDK to access pre-built or custom tool servers hosted on Blaxel. This eliminates the need to manage server connections yourself, with credentials stored securely on the platform.
Run the following command to retrieve tools in CrewAI format:
```python Python
from blaxel.tools import bl_tools
await bl_tools(['mcp-server-name']).to_crewai()
```
### Connect to LLMs
Connect to [LLMs](../Models/Overview) hosted on Blaxel using the SDK to avoid managing model API connections yourself. All credentials remain securely stored on the platform.
```python Python
from blaxel.models import bl_model
model = await bl_model("model-api-name").to_crewai()
```
### Connect to other agents
Connect to other agents hosted on Blaxel from your code by using the [Blaxel SDK](../sdk-reference/introduction). This allows for multi-agent chaining without managing connections yourself. This command is independent of the framework used to build the agent.
```python Python
from blaxel.agents import bl_agent
response = await bl_agent("agent-name").run(input);
```
### Host your agent on Blaxel
You can [deploy](../Agents/Deploy-an-agent) your agent on Blaxel, enabling you to use [Serverless Deployments](../Infrastructure/Global-Inference-Network), [Agentic Observability](../Observability/Overview), [Policies](../Model-Governance/Policies), and more. This command is independent of the framework used to build the agent.
Either run the following CLI command from the root of your agent repository.
```bash
bl deploy
```
Or connect a GitHub repository to Blaxel for automatic deployments every time you push on *main*.
# LangChain
Source: https://docs.blaxel.ai/Frameworks/LangChain
Learn how to leverage Blaxel with LangChain and LangGraph.
[LangChain](https://www.langchain.com/) is a composable framework to build LLM applications. It can be combined with [LangGraph](https://www.langchain.com/langgraph) which is a stateful, orchestration framework that brings added control to agent workflows. You can deploy your LangChain or LangGraph projects to Blaxel with minimal code editing (and zero configuration), enabling you to use [Serverless Deployments](../Infrastructure/Global-Inference-Network), [Agentic Observability](../Observability/Overview), [Policies](../Model-Governance/Policies), and more.
## Get started with LangChain on Blaxel
To get started with LangChain/LangGraph on Blaxel:
* if you already have a LangChain or LangGraph agent, adapt your code with [Blaxel SDK commands](../Agents/Develop-an-agent) to connect to [MCP servers](../Functions/Overview), [LLMs](../Models/Overview) and [other agents](../Agents/Overview).
* clone one of our LangChain [example templates](https://github.com/blaxel-ai/templates/tree/main) and deploy it by connecting to your git provider via the Blaxel console.
* or initialize an example project in LangChain by using the following Blaxel CLI command and selecting the *LangChain hello world:*
```bash
bl create-agent-app myagent
```
[Deploy](../Agents/Deploy-an-agent) it by running:
```bash
bl deploy
```
Browse LangChain agents and deploy them with Blaxel.
## Develop a LangChain agent using Blaxel features
While building your agent in LangChain, use Blaxel [SDK](../sdk-reference/introduction) to connect to resources already hosted on Blaxel:
* [MCP servers](../Functions/Overview)
* [LLMs](../Models/Overview)
* [other agents](../Agents/Overview)
### Connect to MCP servers
Connect to [MCP servers](../Functions/Overview) using the Blaxel SDK to access pre-built or custom tool servers hosted on Blaxel. This eliminates the need to manage server connections yourself, with credentials stored securely on the platform.
Run the following command to retrieve tools in LangChain format:
```python Python
from blaxel.tools import bl_tools
await bl_tools(['mcp-server-name']).to_langchain()
```
```typescript TypeScript
import { blTools } from '@blaxel/langgraph';
const tools = await blTools(['mcp-server-name'])
```
### Connect to LLMs
Connect to [LLMs](../Models/Overview) hosted on Blaxel using the SDK to avoid managing model API connections yourself. All credentials remain securely stored on the platform.
```python Python
from blaxel.models import bl_model
model = await bl_model("model-api-name").to_langchain()
```
```typescript TypeScript
import { blModel } from "@blaxel/langgraph";
const model = await blModel("model-api-name");
```
### Connect to other agents
Connect to other agents hosted on Blaxel from your code by using the [Blaxel SDK](../sdk-reference/introduction). This allows for multi-agent chaining without managing connections yourself. This command is independent of the framework used to build the agent.
```python Python
from blaxel.agents import bl_agent
response = await bl_agent("agent-name").run(input);
```
```typescript TypeScript
import { blAgent } from "@blaxel/core";
const myAgentResponse = await blAgent("agent-name").run(input);
```
### Host your agent on Blaxel
You can [deploy](../Agents/Deploy-an-agent) your agent on Blaxel, enabling you to use [Serverless Deployments](../Infrastructure/Global-Inference-Network), [Agentic Observability](../Observability/Overview), [Policies](../Model-Governance/Policies), and more. This command is independent of the framework used to build the agent.
Either run the following CLI command from the root of your agent repository.
```bash
bl deploy
```
Or connect a GitHub repository to Blaxel for automatic deployments every time you push on *main*.
# LlamaIndex
Source: https://docs.blaxel.ai/Frameworks/LlamaIndex
Learn how to leverage Blaxel with LlamaIndex agents.
You can deploy your [LlamaIndex](https://www.llamaindex.ai/) projects to Blaxel with minimal code editing (and zero configuration), enabling you to use [Serverless Deployments](../Infrastructure/Global-Inference-Network), [Agentic Observability](../Observability/Overview), [Policies](../Model-Governance/Policies), and more.
## Get started with LlamaIndex on Blaxel
To get started with LlamaIndex on Blaxel:
* if you already have a LlamaIndex agent, adapt your code with [Blaxel SDK commands](../Agents/Develop-an-agent) to connect to [MCP servers](../Functions/Overview), [LLMs](../Models/Overview) and [other agents](../Agents/Overview).
* else initialize an example project in LlamaIndex by using the following Blaxel CLI command and selecting the *LlamaIndex hello world:*
```bash
bl create-agent-app myagent
```
[Deploy](../Agents/Deploy-an-agent) it by running:
```bash
bl deploy
```
## Develop a LlamaIndex agent using Blaxel features
While building your agent in LlamaIndex, use Blaxel [SDK](../sdk-reference/introduction) to connect to resources already hosted on Blaxel:
* [MCP servers](../Functions/Overview)
* [LLMs](../Models/Overview)
* [other agents](../Agents/Overview)
### Connect to MCP servers
Connect to [MCP servers](../Functions/Overview) using the Blaxel SDK to access pre-built or custom tool servers hosted on Blaxel. This eliminates the need to manage server connections yourself, with credentials stored securely on the platform.
Run the following command to retrieve tools in LlamaIndex format:
```python Python
from blaxel.tools import bl_tools
await bl_tools(['mcp-server-name']).to_llamaindex()
```
```typescript TypeScript
import { blTools } from '@blaxel/llamaindex';
const tools = await blTools(['mcp-server-name'])
```
### Connect to LLMs
Connect to [LLMs](../Models/Overview) hosted on Blaxel using the SDK to avoid managing model API connections yourself. All credentials remain securely stored on the platform.
```python Python
from blaxel.models import bl_model
model = await bl_model("model-api-name").to_llamaindex()
```
```typescript TypeScript
import { blModel } from "@blaxel/llamaindex";
const model = await blModel("model-api-name");
```
### Connect to other agents
Connect to other agents hosted on Blaxel from your code by using the [Blaxel SDK](../sdk-reference/introduction). This allows for multi-agent chaining without managing connections yourself. This command is independent of the framework used to build the agent.
```python Python
from blaxel.agents import bl_agent
response = await bl_agent("agent-name").run(input);
```
```typescript TypeScript
import { blAgent } from "@blaxel/core";
const myAgentResponse = await blAgent("agent-name").run(input);
```
### Host your agent on Blaxel
You can [deploy](../Agents/Deploy-an-agent) your agent on Blaxel, enabling you to use [Serverless Deployments](../Infrastructure/Global-Inference-Network), [Agentic Observability](../Observability/Overview), [Policies](../Model-Governance/Policies), and more. This command is independent of the framework used to build the agent.
Either run the following CLI command from the root of your agent repository.
```bash
bl deploy
```
Or connect a GitHub repository to Blaxel for automatic deployments every time you push on *main*.
# Mastra
Source: https://docs.blaxel.ai/Frameworks/Mastra
Learn how to leverage Blaxel with Mastra agents.
You can deploy your [Mastra](https://mastra.ai/) projects to Blaxel with minimal code editing (and zero configuration), enabling you to use [Serverless Deployments](../Infrastructure/Global-Inference-Network), [Agentic Observability](../Observability/Overview), [Policies](../Model-Governance/Policies), and more.
## Get started with Mastra on Blaxel
To get started with Mastra on Blaxel:
* if you already have a Mastra agent, adapt your code with [Blaxel SDK commands](../Agents/Develop-an-agent) to connect to [MCP servers](../Functions/Overview), [LLMs](../Models/Overview) and [other agents](../Agents/Overview).
* else initialize an example project in Mastra by using the following Blaxel CLI command and selecting the *Mastra hello world:*
```bash
bl create-agent-app myagent
```
[Deploy](../Agents/Deploy-an-agent) it by running:
```bash
bl deploy
```
## Develop a Mastra agent using Blaxel features
While building your agent in Mastra, use Blaxel [SDK](../sdk-reference/introduction) to connect to resources already hosted on Blaxel:
* [MCP servers](../Functions/Overview)
* [LLMs](../Models/Overview)
* [other agents](../Agents/Overview)
### Connect to MCP servers
Connect to [MCP servers](../Functions/Overview) using the Blaxel SDK to access pre-built or custom tool servers hosted on Blaxel. This eliminates the need to manage server connections yourself, with credentials stored securely on the platform.
Run the following command to retrieve tools in Mastra format:
```typescript TypeScript
import { blTools } from '@blaxel/mastra';
const tools = await blTools(['mcp-server-name'])
```
### Connect to LLMs
Connect to [LLMs](../Models/Overview) hosted on Blaxel using the SDK to avoid managing model API connections yourself. All credentials remain securely stored on the platform.
```typescript TypeScript
import { blModel } from "@blaxel/mastra";
const model = await blModel("model-api-name");
```
### Connect to other agents
Connect to other agents hosted on Blaxel from your code by using the [Blaxel SDK](../sdk-reference/introduction). This allows for multi-agent chaining without managing connections yourself. This command is independent of the framework used to build the agent.
```typescript TypeScript
import { blAgent } from "@blaxel/core";
const myAgentResponse = await blAgent("agent-name").run(input);
```
### Host your agent on Blaxel
You can [deploy](../Agents/Deploy-an-agent) your agent on Blaxel, enabling you to use [Serverless Deployments](../Infrastructure/Global-Inference-Network), [Agentic Observability](../Observability/Overview), [Policies](../Model-Governance/Policies), and more. This command is independent of the framework used to build the agent.
Either run the following CLI command from the root of your agent repository.
```bash
bl deploy
```
Or connect a GitHub repository to Blaxel for automatic deployments every time you push on *main*.
# OpenAI Agents
Source: https://docs.blaxel.ai/Frameworks/OpenAI-Agents
Learn how to leverage Blaxel with OpenAI Agents framework.
You can deploy your [OpenAI Agents](https://platform.openai.com/docs/guides/agents) projects to Blaxel with minimal code editing (and zero configuration), enabling you to use [Serverless Deployments](../Infrastructure/Global-Inference-Network), [Agentic Observability](../Observability/Overview), [Policies](../Model-Governance/Policies), and more.
## Get started with OpenAI Agents on Blaxel
To get started with OpenAI Agents SDK on Blaxel:
* if you already have an agent built with OpenAI Agents, adapt your code with [Blaxel SDK commands](../Agents/Develop-an-agent) to connect to [MCP servers](../Functions/Overview), [LLMs](../Models/Overview) and [other agents](../Agents/Overview).
* else initialize an example project with OpenAI Agents by using the following Blaxel CLI command and selecting the *OpenAI Agents hello world:*
```bash
bl create-agent-app myagent
```
[Deploy](../Agents/Deploy-an-agent) it by running:
```bash
bl deploy
```
## Develop with OpenAI Agents using Blaxel features
While building your agent with OpenAI Agents SDK, use Blaxel [SDK](../sdk-reference/introduction) to connect to resources already hosted on Blaxel:
* [MCP servers](../Functions/Overview)
* [LLMs](../Models/Overview)
* [other agents](../Agents/Overview)
### Connect to MCP servers
Connect to [MCP servers](../Functions/Overview) using the Blaxel SDK to access pre-built or custom tool servers hosted on Blaxel. This eliminates the need to manage server connections yourself, with credentials stored securely on the platform.
Run the following command to retrieve tools in OpenAI Agents format:
```python Python
from blaxel.tools import bl_tools
await bl_tools(['mcp-server-name']).to_openai()
```
### Connect to LLMs
Connect to [LLMs](../Models/Overview) hosted on Blaxel using the SDK to avoid managing model API connections yourself. All credentials remain securely stored on the platform.
```python Python
from blaxel.models import bl_model
model = await bl_model("model-api-name").to_openai()
```
### Connect to other agents
Connect to other agents hosted on Blaxel from your code by using the [Blaxel SDK](../sdk-reference/introduction). This allows for multi-agent chaining without managing connections yourself. This command is independent of the framework used to build the agent.
```python Python
from blaxel.agents import bl_agent
response = await bl_agent("agent-name").run(input);
```
### Host your agent on Blaxel
You can [deploy](../Agents/Deploy-an-agent) your agent on Blaxel, enabling you to use [Serverless Deployments](../Infrastructure/Global-Inference-Network), [Agentic Observability](../Observability/Overview), [Policies](../Model-Governance/Policies), and more. This command is independent of the framework used to build the agent.
Either run the following CLI command from the root of your agent repository.
```bash
bl deploy
```
Or connect a GitHub repository to Blaxel for automatic deployments every time you push on *main*.
# Frameworks on Blaxel
Source: https://docs.blaxel.ai/Frameworks/Overview
Ship agents in any Python/TypeScript framework on Blaxel.
Blaxel is a fully framework-agnostic infrastructure platform that helps you build and host your agents. It supports a **range of the most popular AI agent frameworks**, optimizing how your agent builds and runs no matter how you coded it.
Blaxel's platform-agnostic design lets you deploy your code either on Blaxel or through traditional methods like Docker containers. When deploying on Blaxel, your agent goes through a specialized build process that gives it access to Blaxel features through SDK commands in its code. This low-level SDK connects you to [MCP servers](../Functions/Overview), [LLM APIs](../Models/Overview) and [other agents](../Agents/Overview) that are hosted on Blaxel.
As such, you can build your agentic applications with anything from [LangChain](LangChain) or [Vercel AI SDK](Vercel-AI) to pure TypeScript or Python, and deploy them with minimal upfront setup. Learn how to [get started with Blaxel](../Get-started) or clone one of [our example repos](https://github.com/blaxel-ai/templates/tree/main) to your favorite git provider and deploy it on Blaxel.
Build and deploy LangChain agents on Blaxel.
Run multi-agent systems built with CrewAI on Blaxel.
Deploy LlamaIndex agentic systems on Blaxel.
Host agents built with Vercel’s AI SDK on Blaxel.
Use Mastra framework to develop agentic AI on Blaxel.
Leverage OpenAI Agents SDK to create Blaxel agents.
Create and deploy PydanticAI agents on Blaxel.
Run LLM agents or workflows of agents on Blaxel using Google’s Agent Development Kit (ADK).
Create and deploy custom Python agents.
Create and deploy custom TypeScript agents.
Blaxel can **integrate with your git provider** to build and deploy new revisions for each pull request you make to your project.
Deploying on Blaxel with one of our supported frameworks gives you access to many features, such as:
* **Global Agentics Network:** Deploy your agents and tools across multiple locations for lowest latency and highest availability, with smart global placement of workflows.
* **Model API Gateway:** Access multiple LLM providers (OpenAI, Anthropic, MistralAI, etc.) through a unified gateway with centralized credentials and observability.
* **Agentics Observability:** Track agent traces, request latencies, and comprehensive metrics through our observability suite.
* **Governance Policies:** Define and enforce rules for deployment locations or token usage limits across your infrastructure.
* **Git Integration:** Automatically build and deploy new revisions for each pull request in your project.
* **Rich Integrations:** Connect your agents to 70+ various services and APIs including Slack, GitHub, or databases while keeping credentials secure.
## To go further
Learn more about deploying your preferred framework on Blaxel with the following resources:
See how Blaxel can help you bootstrap and deploy your AI agents.
Or explore our template marketplace on GitHub:
An agent powered by OneGrep for semantic tool search & selection, enabling effective autonomous actions even with a high number of tools.
An implementation of a deep research agent using LangGraph and GPT-4.
An expert assistant with deep knowledge of your organization, providing contextually relevant responses to internal inquiries regarding resources, processes and IT services.
This agent dynamically enriches context with data stored in a Qdrant knowledge base.
A powerful agent for automated social media post generation.
The agent processes Zendesk support tickets and provides automated analysis.
This agent analyzes companies using Exa Search Engine and finds similar ones, storying memory in a Qdrant knowledge base.
# PydanticAI
Source: https://docs.blaxel.ai/Frameworks/PydanticAI
Learn how to leverage Blaxel with PydanticAI agents.
You can deploy your [PydanticAI](https://ai.pydantic.dev/) projects to Blaxel with minimal code editing (and zero configuration), enabling you to use [Serverless Deployments](../Infrastructure/Global-Inference-Network), [Agentic Observability](../Observability/Overview), [Policies](../Model-Governance/Policies), and more.
## Get started with PydanticAI on Blaxel
To get started with PydanticAI on Blaxel:
* if you already have a PydanticAI agent, adapt your code with [Blaxel SDK commands](../Agents/Develop-an-agent) to connect to [MCP servers](../Functions/Overview), [LLMs](../Models/Overview) and [other agents](../Agents/Overview).
* else initialize an example project in PydanticAI by using the following Blaxel CLI command and selecting the *PydanticAI hello world:*
```bash
bl create-agent-app myagent
```
[Deploy](../Agents/Deploy-an-agent) it by running:
```bash
bl deploy
```
## Develop a PydanticAI agent using Blaxel features
While building your agent in PydanticAI, use Blaxel [SDK](../sdk-reference/introduction) to connect to resources already hosted on Blaxel:
* [MCP servers](../Functions/Overview)
* [LLMs](../Models/Overview)
* [other agents](../Agents/Overview)
### Connect to MCP servers
Connect to [MCP servers](../Functions/Overview) using the Blaxel SDK to access pre-built or custom tool servers hosted on Blaxel. This eliminates the need to manage server connections yourself, with credentials stored securely on the platform.
Run the following command to retrieve tools in PydanticAI format:
```python Python
from blaxel.tools import bl_tools
await bl_tools(['mcp-server-name']).to_pydantic()
```
### Connect to LLMs
Connect to [LLMs](../Models/Overview) hosted on Blaxel using the SDK to avoid managing model API connections yourself. All credentials remain securely stored on the platform.
```python Python
from blaxel.models import bl_model
model = await bl_model("model-api-name").to_pydantic()
```
### Connect to other agents
Connect to other agents hosted on Blaxel from your code by using the [Blaxel SDK](../sdk-reference/introduction). This allows for multi-agent chaining without managing connections yourself. This command is independent of the framework used to build the agent.
```python Python
from blaxel.agents import bl_agent
response = await bl_agent("agent-name").run(input);
```
### Host your agent on Blaxel
You can [deploy](../Agents/Deploy-an-agent) your agent on Blaxel, enabling you to use [Serverless Deployments](../Infrastructure/Global-Inference-Network), [Agentic Observability](../Observability/Overview), [Policies](../Model-Governance/Policies), and more. This command is independent of the framework used to build the agent.
Either run the following CLI command from the root of your agent repository.
```bash
bl deploy
```
Or connect a GitHub repository to Blaxel for automatic deployments every time you push on *main*.
# Vercel AI SDK
Source: https://docs.blaxel.ai/Frameworks/Vercel-AI
Learn how to leverage Blaxel with Vercel AI SDK agents.
You can deploy your [Vercel AI SDK](https://sdk.vercel.ai/docs/introduction) projects to Blaxel with minimal code editing (and zero configuration), enabling you to use [Serverless Deployments](../Infrastructure/Global-Inference-Network), [Agentic Observability](../Observability/Overview), [Policies](../Model-Governance/Policies), and more.
## Get started with Vercel AI SDK on Blaxel
To get started with Vercel AI SDK on Blaxel:
* if you already have a Vercel AI agent, adapt your code with [Blaxel SDK commands](../Agents/Develop-an-agent) to connect to [MCP servers](../Functions/Overview), [LLMs](../Models/Overview) and [other agents](../Agents/Overview).
* else initialize an example project with Vercel AI SDK by using the following Blaxel CLI command and selecting the *Vercel AI hello world:*
```bash
bl create-agent-app myagent
```
[Deploy](../Agents/Deploy-an-agent) it by running:
```bash
bl deploy
```
## Develop a Vercel AI agent using Blaxel features
While building your agent with Vercel AI SDK, use Blaxel [SDK](../sdk-reference/introduction) to connect to resources already hosted on Blaxel:
* [MCP servers](../Functions/Overview)
* [LLMs](../Models/Overview)
* [other agents](../Agents/Overview)
### Connect to MCP servers
Connect to [MCP servers](../Functions/Overview) using the Blaxel SDK to access pre-built or custom tool servers hosted on Blaxel. This eliminates the need to manage server connections yourself, with credentials stored securely on the platform.
Run the following command to retrieve tools in Vercel AI format:
```typescript TypeScript
import { blTools } from '@blaxel/vercel';
const tools = await blTools(['mcp-server-name'])
```
### Connect to LLMs
Connect to [LLMs](../Models/Overview) hosted on Blaxel using the SDK to avoid managing model API connections yourself. All credentials remain securely stored on the platform.
```typescript TypeScript
import { blModel } from "@blaxel/vercel";
const model = await blModel("model-api-name");
```
### Connect to other agents
Connect to other agents hosted on Blaxel from your code by using the [Blaxel SDK](../sdk-reference/introduction). This allows for multi-agent chaining without managing connections yourself. This command is independent of the framework used to build the agent.
```typescript TypeScript
import { blAgent } from "@blaxel/core";
const myAgentResponse = await blAgent("agent-name").run(input);
```
### Host your agent on Blaxel
You can [deploy](../Agents/Deploy-an-agent) your agent on Blaxel, enabling you to use [Serverless Deployments](../Infrastructure/Global-Inference-Network), [Agentic Observability](../Observability/Overview), [Policies](../Model-Governance/Policies), and more. This command is independent of the framework used to build the agent.
Either run the following CLI command from the root of your agent repository.
```bash
bl deploy
```
Or connect a GitHub repository to Blaxel for automatic deployments every time you push on *main*.
# Develop a custom MCP server
Source: https://docs.blaxel.ai/Functions/Create-MCP-server
Create your own custom MCP Servers.
**MCP servers** ([Model Context Protocol](https://github.com/modelcontextprotocol)) provide a toolkit of multiple tools—individual capabilities for accessing specific APIs or databases. These servers can be interacted with using WebSocket protocol on the server’s global endpoint.
You can **develop custom [MCP servers](https://modelcontextprotocol.io/introduction) in TypeScript** **or Python** and deploy them on Blaxel by integrating a few lines of the Blaxel SDK and leveraging our other developer tools ([Blaxel CLI](../cli-reference/introduction), GitHub action, etc.).
## Quickstart
It is required to have *npm* (TypeScript) or *uv* (Python) installed to use the following command.
You can quickly **initialize a new MCP server from scratch** by using CLI command `bl create-mcp-server`. This will create a pre-scaffolded local repo where your entire code can be added.
```bash
bl create-mcp-server my-mcp
```
You can test it by running the following command which launches both the server and a web application ([MCP Inspector](https://github.com/modelcontextprotocol/inspector), managed by MCP) locally for testing the server’s capabilities during development.
```shell TypeScript
pnpm inspect
```
```shell Python
BL_DEBUG=true uv run mcp dev src/server.py
```
The web application is accessible at: [http://127.0.0.1:6274](http://127.0.0.1:6274/). Alternatively, you can just simply [serve the server](Deploy-a-function) locally by running `bl serve --hotreload`.
## Develop the MCP server logic
If you open the `src/server.ts` file, you'll see the complete server implementation. It follows the MCP server standard, with the only difference being **our use of Blaxel transport** that leverages WebSockets for efficient platform serving.
The main component you'll need to modify is the tool definition:
```typescript server.ts {12-24}
import { BlaxelMcpServerTransport } from "@blaxel/core";
import { McpServer } from "@modelcontextprotocol/sdk/server/mcp.js";
import { StdioServerTransport } from "@modelcontextprotocol/sdk/server/stdio.js";
import { z } from "zod";
const server = new McpServer({
name: "mymcp",
version: "1.0.0",
description: ""
});
server.tool(
"hello_world",
"Say hello to a person",
{
firstname: z.string()
},
async ({firstname}) => {
console.info(`Hello world called`);
return {
content: [{ type: "text", text: `Hello ${firstname}` }]
}
}
);
function main() {
let transport;
if (process.env.BL_SERVER_PORT) {
transport = new BlaxelMcpServerTransport();
} else {
transport = new StdioServerTransport();
}
server.connect(transport);
console.info("Server started");
}
main();
```
Remember that the `name`, `description`, and *parameters* are crucial—they help your agent understand how your tool functions.
If you open the `src/server.py` file, you'll see the complete server implementation. It follows the MCP server standard, with the only difference being **our use of Blaxel transport** that leverages WebSockets for efficient platform serving.
The main component you'll need to modify is the tool definition:
```python server.py {10-18}
from blaxel import env
from blaxel.mcp.server import FastMCP
from typing import Annotated
from logging import getLogger
mcp = FastMCP("mcp-helloworld-python")
logger = getLogger(__name__)
@mcp.tool()
def hello_world(
first_name: Annotated[
str,
"First name of the user",
],
) -> str:
"""Say hello to the user"""
return f"Hello {first_name}!"
if not env["BL_DEBUG"]:
mcp.run(transport="ws")
```
## Deploy your MCP server
Just run `bl deploy` in the folder of your project, as explained [in this guide](Deploy-a-function).
```bash
bl deploy
```
You can **configure the server deployment** (e.g. specify the MCP server name, etc.) in the `blaxel.toml` file at the root of your directory. Read the file structure section down below for more details.
Read our complete guide for deploying your custom MCP server on Blaxel.
### Deploy with a Dockerfile
While Blaxel uses predefined, optimized container images to build and deploy your code, you can also deploy your agent using your own [Dockerfile](https://docs.docker.com/reference/dockerfile/).
Deploy resources using a custom Dockerfile.
## Template directory reference
### blaxel.toml
This file is used to configure the deployment of the MCP server on Blaxel. The only mandatory parameter is the `type` so Blaxel knows which kind of entity to deploy. Others are not mandatory but allow you to customize the deployment.
```toml
name = "my-mcp-server"
workspace = "my-workspace"
type = "function"
[env]
DEFAULT_CITY = "San Francisco"
```
* `name`, `workspace`, and `type` fields are optional and serve as default values. Any bl command run in the folder will use these defaults rather than prompting you for input.
* `[env]` section defines environment variables that the MCP server can access via the SDK. Note that these are NOT [secrets](../Agents/Variables-and-secrets).
Additionally, when developing in Python, you can define an `[entrypoint]` section to specify how Blaxel is going to start your server.
```toml
...
[entrypoint]
prod = ".venv/bin/python3 src/server.py"
dev = "npx nodemon --exec uv run python src/server.py"
...
```
* `prod`: this is the command that will be used to serve your MCP server
```bash
.venv/bin/python3 src/server.py
```
* `dev`: same as prod in dev mode, it will be used with the command `--hotreload`. Example:
```bash
npx nodemon --exec uv run python src/server.py
```
This `entrypoint` section is optional. If not specified, Blaxel will automatically detect in the MCP server’s content and configure your server’s startup settings.
In TypeScript, entrypoints are managed in the `scripts` in the `package.json` file at the root of the directory.
* `scripts.start` : start the server locally through the TypeScript command, to avoid having to build the project when developing.
* `scripts.build` : build the project. It is done automatically when deploying.
* `scripts.prod` : start the server remotely on Blaxel from the dist folder, the project needs to be have been built before.
* `scripts.dev` : same as start, but with hotreload. It's useful when developing locally, each file change is reflected immediately.
The remaining fields in *package.json* follow standard JavaScript/TypeScript project conventions. Feel free to add any dependencies you need, but keep in mind that devDependencies are only used during the build process and are removed afterwards.
Read our complete guide for connecting to and invoking an MCP server.
# Deploy custom MCP servers
Source: https://docs.blaxel.ai/Functions/Deploy-a-function
Host your custom MCP Servers on Blaxel in a few clicks.
Blaxel provides a serverless infrastructure to instantly deploy MCP servers. You receive a global inference endpoint for each deployment, and your workloads are served optimally to dramatically accelerate cold-start and latency. The main way to deploy an MCP server on Blaxel is by **using Blaxel CLI.**
## Deploy an MCP server with Blaxel CLI
This section assumes you have developed the MCP server locally, as explained [in this documentation](Create-MCP-server), and are ready to deploy it.
### Serve locally
You can serve the MCP server locally in order to make the entrypoint function (by default: `server.ts` / `server.py`) available on a local endpoint.
Run the following command to serve the MCP server:
```bash
bl serve
```
You can then create an MCP Client to communicate with your server. When testing locally, communication happens over stdio, but when deployed on Blaxel, your server will use WebSockets instead.
Add the flag `--hotreload` to get live changes.
```bash
bl serve --hotreload
```
### Deploy on production
You can deploy the MCP server in order to make the entrypoint function (by default: `server.ts` / `server.py`) **available on a global hosted endpoint**. When deploying to Blaxel, you get a dedicated endpoint that enforces your [deployment policies](../Model-Governance/Policies).
Run the following command to build and deploy the MCP server on Blaxel:
```bash
bl deploy
```
You can now [connect to the MCP server](Invoke-functions) either from an agent on Blaxel (using the Blaxel SDK), or from an external client that supports WebSockets transport.
```typescript In TypeScript
// Import tool adapter (in whichever framework format):
import { blTools } from "@blaxel/langchain";
// or
import { blTools } from "@blaxel/llamaindex";
// or
import { blTools } from "@blaxel/mastra";
// or
import { blTools } from "@blaxel/vercel";
const tools = blTools(['blaxel-search'])
```
```python In Python
from blaxel.tools import bl_tools
# Retrieve tools (in whichever framework format):
await bl_tools(['blaxel-search']).to_pydantic();
# or
await bl_tools(['blaxel-search']).to_langchain();
# or
await bl_tools(['blaxel-search']).to_llamaindex();
#or
# …
```
Learn how to run invocation requests on your MCP server.
### Customize an MCP server deployment
You can set custom parameters for an MCP server deployment (e.g. specify the server name, etc.) in the `blaxel.toml` file at the root of your directory.
This file is used to configure the deployment of the MCP server on Blaxel. The only mandatory parameter is the `type` so Blaxel knows which kind of entity to deploy. Others are not mandatory but allow you to customize the deployment.
```toml
name = "my-mcp-server"
workspace = "my-workspace"
type = "function"
[env]
DEFAULT_CITY = "San Francisco"
```
* `name`, `workspace`, and `type` fields are optional and serve as default values. Any bl command run in the folder will use these defaults rather than prompting you for input.
* `[env]` section defines environment variables that the MCP server can access via the SDK. Note that these are NOT [secrets](../Agents/Variables-and-secrets).
Additionally, when developing in Python, you can define an `[entrypoint]` section to specify how Blaxel is going to start your server.
```toml
...
[entrypoint]
prod = ".venv/bin/python3 src/server.py"
dev = "npx nodemon --exec uv run python src/server.py"
...
```
* `prod`: this is the command that will be used to serve your MCP server
```bash
.venv/bin/python3 src/server.py
```
* `dev`: same as prod in dev mode, it will be used with the command `--hotreload`. Example:
```bash
npx nodemon --exec uv run python src/server.py
```
This `entrypoint` section is optional. If not specified, Blaxel will automatically detect in the MCP server’s content and configure your server’s startup settings.
In TypeScript, entrypoints are managed in the `scripts` in the `package.json` file at the root of the directory.
* `scripts.start` : start the server locally through the TypeScript command, to avoid having to build the project when developing.
* `scripts.build` : build the project. It is done automatically when deploying.
* `scripts.prod` : start the server remotely on Blaxel from the dist folder, the project needs to be have been built before.
* `scripts.dev` : same as start, but with hotreload. It's useful when developing locally, each file change is reflected immediately.
The remaining fields in *package.json* follow standard JavaScript/TypeScript project conventions. Feel free to add any dependencies you need, but keep in mind that devDependencies are only used during the build process and are removed afterwards.
## Overview of deployment life-cycle
### Choosing the infrastructure generation
Blaxel offers two [infrastructure generations](../Infrastructure/Gens). When deploying a workload, you can select between *Mk 2 infrastructure*—which provides stable, globally distributed container-based workloads—and *Mk 3* (in Alpha), which delivers ultra-fast cold starts. Choose the generation that best fits your specific requirements.
### Maximum runtime
* Deployed MCP servers have a runtime limit after which executions time out. This timeout duration is determined by your chosen [infrastructure generation](../Infrastructure/Gens). For Mk 2 generation, the **maximum timeout is 10 minutes**.
### Manage revisions
As you iterate on your software development, you will need to update the version of a function that is currently deployed and used by your consumers. Every time you build a new version of your function, this creates a **revision**. Blaxel stores the 10 latest revisions for each object.

Revisions are atomic builds of your deployment that can be either deployed (accessible via the inference endpoint) or not. This system enables you to:
* **rollback a deployment** to its exact state from an earlier date
* create a revision without immediate deployment to **prepare for a future release**
* implement progressive rollout strategies, such as **canary deployments**
Important: Revisions are not the same as versions. You cannot use revisions to return to a previous configuration and branch off from it. For version control, use your preferred system (such as GitHub) alongside Blaxel.
Deployment revisions are updated following a **blue-green** paradigm. The Global Inference Network will wait for the new revision to be completely up and ready before routing requests to the new deployment. You can also set up a **canary deployment** to split traffic between two revisions (maximum of two).

When making a deployment using Blaxel CLI (`bl deploy`), the new traffic routing depends on the `--traffic` option. Without this option specified, Blaxel will automatically deploy the new revision with full traffic (100%) if the previous deployment was the latest revision. Otherwise, it will create the revision without deploying it (0% traffic).
Learn how to run invocation requests on your function.
# OneGrep integration
Source: https://docs.blaxel.ai/Functions/Integrate-in-apps/OneGrep
Implement semantic tool search and selection on Blaxel-hosted MCP servers using OneGrep.
This tutorial will walk you through how to use [OneGrep](https://www.onegrep.dev/) to power your agents with semantic tool search, trainable contexts, and feedback-driven selection that gets smarter over time. Access your MCP servers hosted on Blaxel with configurable security policies and guardrails.
This tutorial is based on a TypeScript LangGraph agent.
## **Prerequisites**
* **Node.js:** v18 or later.
* **OneGrep**: Install [OneGrep](https://github.com/OneGrep/typescript-sdk) CLI and login to your account:
```bash
npx -y @onegrep/cli account
```
* **Blaxel CLI:** Ensure you have [Blaxel CLI](../../cli-reference/introduction) installed.
* **Login to Blaxel:**
```bash
bl login YOUR-WORKSPACE
```
## **Installation**
* **Clone the repository and install dependencies:**
```bash
git clone https://github.com/blaxel-ai/template-onegrep.git
cd template-onegrep
pnpm i
```
* **Environment Variables:** Create a `.env` file with your configuration. You can begin by copying the sample file:
```bash
cp .env-sample .env
```
Then, update the following values with your own credentials:
* [OneGrep API key](https://onegrep.dev): `ONEGREP_API_KEY`
* [OneGrep URL](https://onegrep.dev): `ONEGREP_URL`
## **Running the server locally**
Start the development server with hot reloading:
```bash
bl serve --hotreload
```
This command starts the server and enables hot reload so that changes to the source code are automatically reflected.
## **Testing your agent**
You can test your agent using the chat interface:
```bash
bl chat --local blaxel-agent
```
Or run it directly with specific input:
```bash
bl run agent blaxel-agent --local --data '{"input": "What is the weather in Paris?"}'
```
## **Deploying to Blaxel**
When you are ready to deploy your agent:
```bash
bl deploy
```
This command uses your code and the configuration files under the `.blaxel` directory to deploy your application.
# Query MCP servers
Source: https://docs.blaxel.ai/Functions/Invoke-functions
Make invocation requests on your MCP servers.
Blaxel has a **purpose-built implementation for MCP transport** **that uses WebSockets** protocol instead of Server-Sent Events (SSE) or stdio to feature cloud deployment capabilities.
At this time, MCP servers deployed on Blaxel are only hosted server-side and cannot be installed locally. Only WebSockets protocol is supported.
## MCP server endpoint
When you deploy an MCP server on Blaxel, a **WebSocket endpoint** is generated on Global Agentics Network to connect to the server.
The server endpoint looks like this:
```http Connect to an MCP server
wss://run.blaxel.ai/{YOUR-WORKSPACE}/functions/{YOUR-SERVER-NAME}
```
### Endpoint authentication
By default, MCP servers deployed on Blaxel aren’t public. It is necessary to authenticate all connections, via a [bearer token](../Security/Access-tokens).
The evaluation of authentication/authorization for messages is managed by the Global Agentics Network based on the [access given in your workspace](../Security/Workspace-access-control).
Making an MCP server publicly available is not yet available. Please contact us at [support@blaxel.ai](mailto:support@blaxel.ai) if this is something that you need today.
### Timeout limit
MCP server runtime has a hard limit of 15 minutes.
## Call the MCP server
You can connect to your MCP server and send requests in several ways (code samples below):
* **use the Blaxel SDK to retrieve tools**: best when developing an agent, particularly when running on Blaxel
* **connect from your code directly**: suitable for custom implementations requiring server connection to list and call tools
* **connect from the Blaxel Console's Playground**: best for testing and validating server functionality
### Use Blaxel SDK to retrieve tools
The following code example demonstrates how to use the Blaxel SDK to retrieve and pass an MCP server’s tools when building an agent.
```typescript In TypeScript
// Import tool adapter (in whichever framework format):
import { blTools } from "@blaxel/langchain";
// or
import { blTools } from "@blaxel/llamaindex";
// or
import { blTools } from "@blaxel/mastra";
// or
import { blTools } from "@blaxel/vercel";
const tools = blTools(['blaxel-search'])
```
```python In Python
from blaxel.tools import bl_tools
# Retrieve tools (in whichever framework format):
await bl_tools(['blaxel-search']).to_pydantic();
# or
await bl_tools(['blaxel-search']).to_langchain();
# or
await bl_tools(['blaxel-search']).to_llamaindex();
#or
# …
```
### Directly connect from your code
Below are snippets of code to connect to an MCP server that is deployed on Blaxel. You will need the following information:
* `BL_API_KEY`: an [API key](../Security/Access-tokens) to connect to your Blaxel workspace
* `BL_WORKSPACE`: the slug ID for your workspace
* `MCP_SERVER_NAME`: the slug name for your MCP server
```typescript In TypeScript
import { Client as ModelContextProtocolClient } from "@modelcontextprotocol/sdk/client/index.js";
import dotenv from 'dotenv';
import { BlaxelMcpClientTransport, env } from “@blaxel/core”
// Load environment variables from .env file
dotenv.config();
async function sampleMcpBlaxel(name: string): Promise {
const apiKey = env.BL_API_KEY;
const workspace = env.BL_WORKSPACE;
if (!apiKey || !workspace) {
throw new Error("BL_API_KEY and BL_WORKSPACE environment variables must be set");
}
const headers = {
"X-Blaxel-Authorization": `Bearer ${apiKey}`
};
const transport = new BlaxelMcpClientTransport(
`
wss://run.blaxel.ai/${workspace}/functions/${name}
`,
headers
);
const client = new ModelContextProtocolClient(
{
name: name,
version: "1.0.0",
},
{
capabilities: {
tools: {},
},
}
);
try {
await client.connect(transport);
const response = await client.listTools();
console.log(`Tools retrieved, number of tools: ${response.tools.length}`);
// Call the tool, specify the correct tool name and arguments
const result = await client.callTool({
name: "search_issues",
arguments: { query: "test" }
});
console.log(`Tool call result: ${JSON.stringify(result)}`);
} finally {
await client.close();
await transport.close();
}
}
// Example usage
if (require.main === module) {
sampleMcpBlaxel("MCP_SERVER_NAME").catch(console.error);
}
```
```python In Python
import asyncio
import os
from blaxel.mcp.client import websocket_client
from dotenv import load_dotenv
from mcp import ClientSession
load_dotenv()
BL_API_KEY = os.getenv("BL_API_KEY")
BL_WORKSPACE = os.getenv("BL_WORKSPACE")
async def list_mcp_tools(name: str):
headers = {
"X-Blaxel-Authorization": f"Bearer {BL_API_KEY}"
}
async with websocket_client(
f"
wss://run.blaxel.ai/{BL_WORKSPACE}/functions/{name}
",
headers=headers,
timeout=30,
) as (read, write):
async with ClientSession(read, write) as session:
await session.initialize()
response = await session.list_tools()
print(f"Tools retrieved, number of tools: {len(response.tools)}")
# Call the tool, specify the correct tool name and arguments
result = await session.call_tool("search_issues", { "query": "test" })
print(f"Tool call result: {result}")
if __name__ == "__main__":
asyncio.run(list_mcp_tools("MCP_SERVER_NAME"))
```
Requirements are as follows:
```json package.json (In TypeScript)
"dependencies": {"@blaxel/core": …}
```
```txt requirements.txt (In Python)
python-dotenv
blaxel
```
### Connect to pre-built servers
Blaxel’s pre-built MCP servers offer two methods:
* `tools/list` : method that **lists the available tools** and their schemas, allowing consumers (you or agents) to discover the function’s capabilities.
* `tools/call` : method that lets consumers **execute individual tools**. It requires params with two keys:
* `name`: the name of the tool to run, obtained from the listing endpoint above
* `arguments`: an object with the key and values of input parameters for the execution, obtained from the listing endpoint above
Example of `tools/list` outbound message on a Brave Search toolkit (make sure to fill in the authentication token).
```json
{
"method":"tools/list",
"jsonrpc":"2.0",
"id":1
}
```
This one returns two tools in the function: ***brave\_web\_search*** and ***brave\_local\_search***.
```json
{
"result": {
"tools": [
{
"name": "blaxel_web_search",
"description": "Performs a web search using the Brave Search API, ideal for general queries, news, articles, and online content. Use this for broad information gathering, recent events, or when you need diverse web sources. Supports pagination, content filtering, and freshness controls. Maximum 20 results per request, with offset for pagination. ",
"inputSchema": {
"type": "object",
"properties": {
"query": {
"type": "string"
},
"count": {
"type": "number"
},
"offset": {
"type": "number"
}
},
"additionalProperties": false,
"$schema": "http://json-schema.org/draft-07/schema#"
}
},
{
"name": "blaxel_local_search",
"description": "Searches for local businesses and places using Brave's Local Search API. Best for queries related to physical locations, businesses, restaurants, services, etc. Returns detailed information including:\n- Business names and addresses\n- Ratings and review counts\n- Phone numbers and opening hours\nUse this when the query implies 'near me' or mentions specific locations. Automatically falls back to web search if no local results are found.",
"inputSchema": {
"type": "object",
"properties": {
"query": {
"type": "string"
},
"count": {
"type": "number"
}
},
"additionalProperties": false,
"$schema": "http://json-schema.org/draft-07/schema#"
}
}
]
},
"jsonrpc": "2.0",
"id": "1"
}
```
Example of `tools/call` outbound message on the ***brave\_web\_search*** tool.
```json
{
"jsonrpc":"2.0",
"id":2,
"method":"tools/call",
"params":{
"name":"blaxel_web_search",
"arguments":{
"query":"What is the current weather in NYC?",
"count":1,
"offset":1
}
}
}
```
### Blaxel console
Requests to an MCP server can be made from the Blaxel console from the server deployment’s **Playground** page.

# MCP servers
Source: https://docs.blaxel.ai/Functions/Overview
Deploy MCP servers as serverless APIs to equip your agents with tools.
MCP servers (called `functions` in Blaxel API) are lightweight programs that expose specific capabilities (accessing databases, APIs, local files, etc.) through the standardized [Model Context Protocol](https://modelcontextprotocol.io/introduction) (MCP).
MCP servers are designed to **equip agents with tools** to interact with the world.
## Essentials
MCP Server Hosting is a **serverless computing service that allows you to host remote MCP servers** without having to manage infrastructure. It gives you full observability and tracing out of the box.
You only provide the MCP server code, and Blaxel automates its hosting, execution and scaling - providing you with one single global endpoint to access the MCP server. The deployed server implements Blaxel’s customized WebSockets transport layer.
Blaxel SDK allows to r**etrieve the tools from an MCP server in your code**. When both an agent and MCP server run on Blaxel, the tool call in the MCP server is execute separately from the agent logic. This ensures not only optimal resource utilization, but also better design practice for your agentic system.
### Requirements & limitations
* Your MCP server must implement Blaxel’s customized WebSockets transport layer.
* Deployed MCP servers have a runtime limit after which executions time out. This timeout duration is determined by your chosen [infrastructure generation](../Infrastructure/Gens). For Mk 2 generation, the **maximum timeout is 10 minutes**.
## MCP hosting on Blaxel
Blaxel has a **purpose-built implementation for MCP transport** **that uses WebSockets** protocol instead of Server-Sent Events (SSE) or stdio to feature cloud deployment capabilities.
At this time, MCP servers deployed on Blaxel are only hosted server-side and cannot be installed locally. Only WebSockets protocol is supported.
For developers interested in the technical details, our implementation is available open-source through [Blaxel's Supergateway](https://github.com/blaxel-ai/supergateway) and [Blaxel's SDK](https://github.com/blaxel-ai/toolkit/blob/main/sdk-ts/src/functions/mcp.ts).
There are two routes you can take when hosting MCPs on Blaxel:
* Use one of the pre-built MCP servers from the Blaxel Store
* Deploy a custom MCP server from your code
Read our guide for developing a custom MCP server with Blaxel.
Read our guide for deploying your custom MCP server to Blaxel.
Learn how to run invocation requests on your MCP server.
## Examples
This example highlights how to use OneGrep for semantic tool search & selection to enable effective function calling even with a high number of tools.
# Variables and secrets
Source: https://docs.blaxel.ai/Functions/Variables-and-secrets
Manage variables and secrets in your agent or MCP server code.
Environment variables are retrieved first from your `.env` file, and if not found there, from the `[env]` section of `blaxel.toml`. This fallback mechanism allows for two kinds of variables:
* secrets
* simple environment variables
## Secrets
You can create a file named `.env` at the root level of your project to store your secrets. The `.env` file should be added to your `.gitignore` file to prevent committing these sensitive variables.
```
MY_SECRET=123456
```
You can then use secrets in your code as follows:
```typescript TypeScript
import { env } from "@blaxel/core";
console.info(env.MY_SECRET); // 123456
```
```python Python
import os
os.environ.get('MY_SECRET')
```
## Variables
You can define variables inside your agent or MCP server in the `blaxel.toml` file at root level of your project. These variables are NOT intended to be use as secrets, but as configuration variables.
```toml blaxel.toml {6}
name = "..."
workspace = "..."
type = "function"
[env]
DEFAULT_CITY = "San Francisco"
```
You can then use it in your code as follows:
```typescript TypeScript
import { env } from "@blaxel/core";
console.info(env.DEFAULT_CITY); // San Francisco
```
```python Python
import os
os.environ.get('DEFAULT_CITY')
```
## Reserved variables
The following variables are reserved by Blaxel:
`PORT`: Reserved by the system.
`BL_SERVER_PORT` : Port of the HTTP server, it need to be set to allow Blaxel platform to configure it
`BL_SERVER_HOST` : Host of the HTTP server, it need to be set to allow Blaxel platform to configure it
Internal URL for Blaxel platform, to avoid linking multiple instance through the Internet
`BL_AGENT_${envVar}_SERVICE_NAME`
`BL_FUNCTION_${envVar}_SERVICE_NAME`
`BL_RUN_INTERNAL_HOSTNAME`: internal run url
Override URL to link multiple agents and MCP servers together locally
`BL_AGENT_${envVar}_URL`
`BL_FUNCTION_${envVar}_URL`
Metadata automatically set by Blaxel platform in production
`BL_WORKSPACE` : workspace name
`BL_NAME` : name of the function or the agent
`BL_TYPE` : function or agent
Authentication environment variables
`BL_CLIENT_CREDENTIALS` : client credentials, used by Blaxel in production with a workspaced service account
`BL_API_KEY` : can be set in your code to connect with the platform (locally or from a server not on Blaxel platform)
`BL_LOG_LEVEL` : Log level, default to info, can be set to debug,warn,error
`BL_DEBUG_TELEMETRY`: Enable telemetry debug mode, will print each interaction with OpenTelemetry
`BL_ENABLE_OPENTELEMETRY`: Enable OpenTelemetry, it's set automatically by the platform in production
# Get started
Source: https://docs.blaxel.ai/Get-started
Deploy your first workload on Blaxel.
[Blaxel](https://app.blaxel.ai/) is a computing platform where AI builders can **deploy AI agents easily**. This tutorial demonstrates how to deploy your first workload on Blaxel.
## Quickstart
Welcome there! 👋 Make sure you have created an account on Blaxel (here → [https://app.blaxel.ai](https://app.blaxel.ai)), and created a first [workspace](Security/Workspace-access-control). Retrieve the workspace ID.
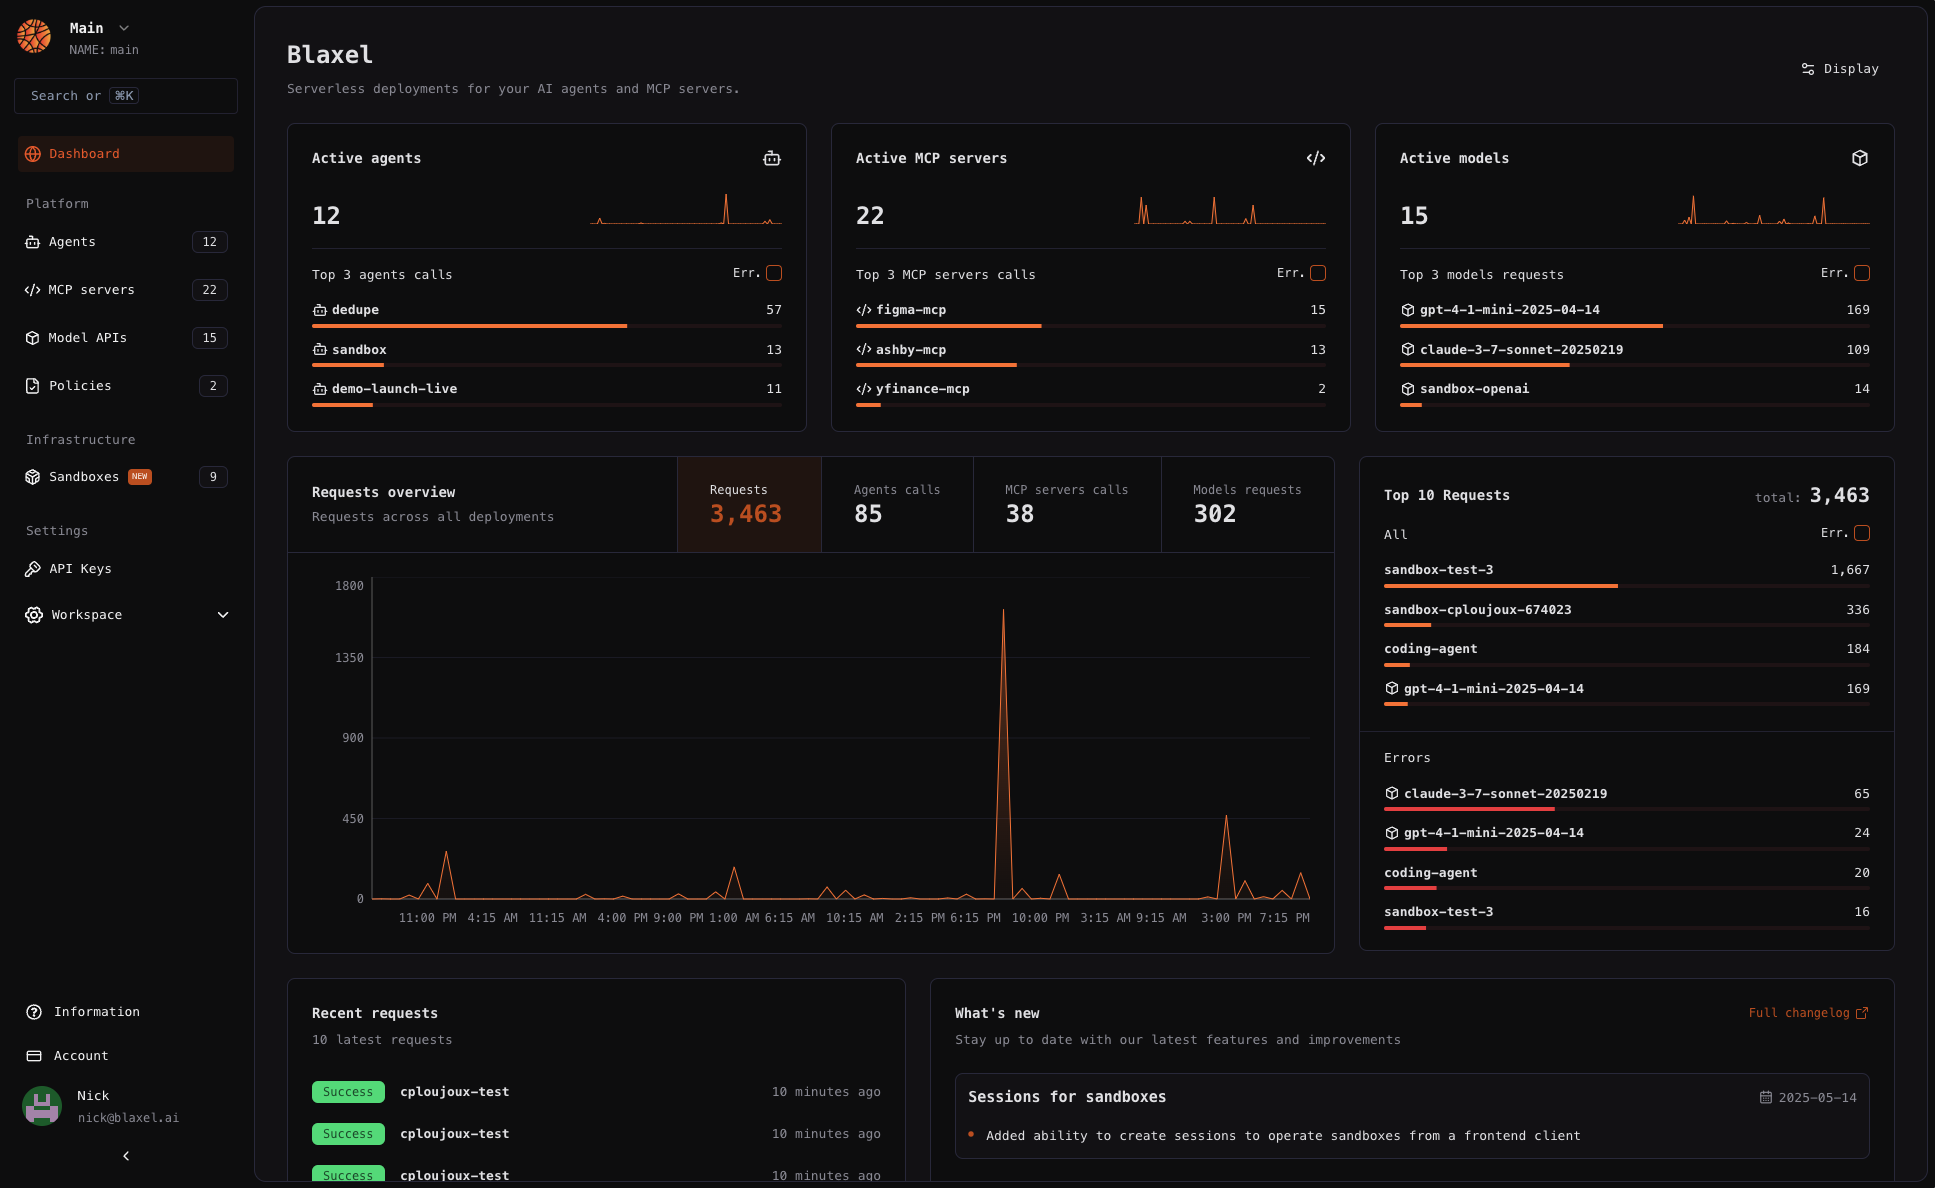
Upon creating a workspace, Blaxel automatically adds a starter connection to a rate-limited model API to get you started. You can bring your own credentials to model providers to connect to more [model APIs](Models/Overview).To install Blaxel CLI, you must use [Homebrew](https://brew.sh/): make sure it is installed on your machine. We are currently in the process of supporting additional installers. Check out the cURL method down below for general installation.
Install Blaxel CLI by running the two following commands successively in a terminal:
```shell
brew tap blaxel-ai/blaxel
```
```shell
brew install blaxel
```
Install Blaxel CLI by running the following command in a terminal (alternatives below):
```shell
curl -fsSL \
https://raw.githubusercontent.com/blaxel-ai/toolkit/main/install.sh \
| BINDIR=/usr/local/bin sudo -E sh
```
If you need to specify a version (e.g. v0.1.21):
```shell
curl -fsSL \
https://raw.githubusercontent.com/blaxel-ai/toolkit/main/install.sh \
| VERSION=v0.1.21 BINDIR=/usr/local/bin sudo -E sh
```
For the most reliable solution, we recommend adapting the aforementioned Linux commands by using Windows Subsystem for Linux.
First install WSL (Windows Subsystem for Linux) if not already installed. This can be done by:
* Opening PowerShell as Administrator
* Running: `wsl --install -d Ubuntu-20.04`
* Restarting the computer
* From the Microsoft Store, install the Ubuntu app
* Run the command line using the aforementioned Linux installation process. Make sure to install using **sudo**.
Open a terminal and login to Blaxel using this command. Find your **workspace ID in the top left sidebar corner** of Blaxel Console:
```bash
bl login <>
```
Follow the [uv documentation](https://docs.astral.sh/uv/getting-started/installation/) for guidance on how to install **uv,** if not already installed.
Follow the [npm documentation](https://docs.npmjs.com/downloading-and-installing-node-js-and-npm) for guidance on how to install **npm,** if not already installed.
Blaxel is the ultimate toolkit for AI agent builders, letting you create and deploy resources on a purpose-built infrastructure for agentics.
In Python, you will need to [have *uv* installed](https://docs.astral.sh/uv/getting-started/installation/); in TypeScript, you will need to [have npm installed](https://docs.npmjs.com/downloading-and-installing-node-js-and-npm) for this.
Let’s initialize a first app. The following command creates a **pre-scaffolded local repository** ready for developing and deploying your agent on Blaxel.
```bash
bl create-agent-app my-agent
```
You can now develop your agent application using any framework you want (or none), and use the [Blaxel](sdk-reference/introduction) [SDK](sdk-reference) to [leverage other Blaxel deployments](Agents/Develop-an-agent) in `/src/agent.py` or `/src/agent.ts`. A placeholder HTTP API server is already preconfigured in `/src/main.py` or `/src/main.ts`.
In Python, you will need to [have *uv* installed](https://docs.astral.sh/uv/getting-started/installation/); in TypeScript, you will need to [have npm installed](https://docs.npmjs.com/downloading-and-installing-node-js-and-npm) for this.
Let’s initialize a first batch job definition. The following command creates a **pre-scaffolded local repository** ready for developing and deploying your job on Blaxel.
```bash
bl create-job myjob
```
You can now develop your job and use the [Blaxel](sdk-reference/introduction) [SDK](sdk-reference) to leverage other Blaxel deployments in `/src/index.py` or `/src/index.ts`.
Sandboxes can be created programmatically using Blaxel SDK. Install the SDK:
```shell Python (pip)
pip install blaxel
```
```shell Python (uv)
uv pip install blaxel
```
```shell TypeScript (pnpm)
pnpm install @blaxel/core
```
```shell TypeScript (npm)
npm install @blaxel/core
```
```shell TypeScript (yarn)
yarn add @blaxel/core
```
```shell TypeScript (bun)
bun add @blaxel/core
```
Read the guide for creating and connecting to sandboxes using Blaxel SDK.
In Python, you will need to [have *uv* installed](https://docs.astral.sh/uv/getting-started/installation/); in TypeScript, you will need to [have npm installed](https://docs.npmjs.com/downloading-and-installing-node-js-and-npm) for this.
You can quickly **initialize a new MCP server from scratch** by using CLI command `bl create-mcp-server`. This will create a pre-scaffolded local repo where your entire code can be added.
```bash
bl create-mcp-server my-mcp
```
You can now [develop your MCP server](Functions/Create-MCP-server) using the [Blaxel](sdk-reference/introduction) [SDK](sdk-reference) in `/src/server.py` or `/src/server.ts`.
Run the following command to serve your workload locally, replacing `<>` with the name of the workload's root directory:
```bash
cd <>;
bl serve;
```
Query your agent locally by making a **POST** request to this endpoint: [`http://localhost:1338`](http://localhost:1338) with the following payload format: `{"inputs": "Hello world!"}`:
```bash
curl -X POST -H "Content-Type: application/json" -d '{"inputs": "Hello world!"}' http://localhost:1338
```
Execute your job locally by making a **POST** request to this endpoint: [`http://localhost:1338`](http://localhost:1338) with the following payload format: `{"tasks": [{"param1": "value1"}]}`
```bash
curl -X POST -H "Content-Type: application/json" -d '{"tasks": [{"name": "John"}, {"name": "Jane"}]}' http://localhost:1338
```
You can test it by running the following command which launches both the server and a web application ([MCP Inspector](https://github.com/modelcontextprotocol/inspector), managed by MCP) locally for testing the server’s capabilities during development.
```shell TypeScript
pnpm inspect
```
```shell Python
BL_DEBUG=true uv run mcp dev src/server.py
```
The web application is accessible at: [http://127.0.0.1:6274](http://127.0.0.1:6274/). Alternatively, you can just simply [serve the server](Functions/Deploy-a-function) locally by running `bl serve --hotreload`.
To **push to Blaxel**, run the following command. Blaxel will handle the build and deployment:
```bash
bl deploy
```
Your workload is made available as a **serverless auto scalable** **global endpoint** 🌎 .
Run a first inference on your Blaxel agent with the following command:
```bash
bl chat my-agent
```
This gives you a chat-like interface where you can interact with your agent! To use this when serving locally, just add option `--local` .
Alternatively, you can send requests to your production agent by running:
```bash
bl run agent my-agent --data '{"inputs":"Hello world!"}'
```
Or by directly calling the [global endpoint](Agents/Query-agents).
Trigger an execution of your batch job by running:
```bash
# Run a job using Blaxel CLI with --data argument
bl run job jobs-ts --data '{"tasks": [{"name": "John"}, {"name": "Jane"}]}'
```
When you deploy an MCP server on Blaxel, a **WebSocket endpoint** is generated on Global Agentics Network to connect to the server.
The server endpoint looks like this:
```http Connect to an MCP server
wss://run.blaxel.ai/{YOUR-WORKSPACE}/functions/{YOUR-SERVER-NAME}
```
Read more about [how to connect to the server here](Functions/Invoke-functions).
## Next steps
You are ready to run AI with Blaxel! Here’s a curated list of guides which may be helpful for you to make the most of Blaxel, but feel free to explore the product on your own!
Complete guide for deploying AI agents on Blaxel.
Complete guide for spawning sandboxed VMs for your agents to access.
Complete guide for creating and running batch jobs from your agents.
Complete guide for managing deployment and routing policies on the Global Agentics Network.
## Any question?
Although we designed this documentation to be as comprehensive as possible, you are welcome to contact [support@blaxel.ai](mailto:support@blaxel.ai) or the community on [Discord](https://discord.gg/9fu69KEg) with any questions or feedback you have.
# Generations
Source: https://docs.blaxel.ai/Infrastructure/Gens
Empower your agents with AI models from anywhere.
All workloads deployed on Blaxel run on one of the available infrastructure generations. Depending on the workload type, not all generations may be available. You can set a default generation value in your [workspace](../Security/Workspace-access-control), which applies when creating new resources unless overridden. Choose the generation based on which features best suit your specific use case.
**Mk 2 infrastructure** features extensive global distribution, with more than 15 points of presence worldwide.
**Mk 3 infrastructure (coming soon!)** delivers dramatically lower cold starts, with sub-20-ms boot times for workloads. It is currently available in private Alpha release. [Contact us](http://blaxel.ai/contact?purpose=mk3) to get access.
## How to choose an infrastructure generation
### Mark 2 infrastructure
Mk 2 infrastructure uses containers to run workloads, providing emulation of most Linux system calls. Cold starts typically take between 2 and 10 seconds. After a deployment is queried, it stays warm for a period that varies based on overall infrastructure usage, allowing it to serve subsequent requests instantly.
You should choose Mk 2 infrastructure if:
* your workload requires system calls not yet supported by Mk 3 infrastructure
* boot times of around 5 seconds are suitable for your needs
* your deployment receives consistent traffic that keeps it running warm
* you need to run workloads in specific regions for sovereignty or regulatory compliance using [deployment policies](../Model-Governance/Policies)
* you require revision control for rollbacks or canary deployments
Mark 2 infrastructure is currently available to run the following workloads:
* [agents](../Agents/Overview)
* [MCP servers](../Functions/Overview)
### Mark 3 infrastructure
Mk 3 infrastructure leverages Firecracker-based micro VMs to run code with mission-critical low cold-starts. Mk 3 is currently available in private Alpha.
You should choose Mk 3 infrastructure if:
* low latency is important to your use case (sub-20ms boot times)
Mark 3 infrastructure is currently available to run the following workloads:
* [sandboxes](../Sandboxes/Overview)
* *coming soon: [agents](../Agents/Overview) and [MCP servers](../Functions/Overview)*
Mark 3 infrastructure is currently in Alpha release.
## What about Mk 1
Mk 1 infrastructure was originally designed for serverless ML model inference but proved inadequate for running agentic workloads. Built on Knative Custom Resource Definitions (CRDs) running atop managed Kubernetes clusters, it leveraged KNative Serving’s scale-to-zero capabilities and Kubernetes’ container orchestration features. The infrastructure utilized pod autoscaling through the Knative Autoscaler (KNA). It also allowed to federate multiple clusters via a Blaxel agent that would offload inference requests from one Knative cluster to another based on a usage metric.
While it demonstrated reasonable stability even at 20+ requests per second and achieved somewhat acceptable cold starts through runtime optimization, its architecture wasn’t suited for the more lightweight workloads that make up most of autonomous agents: tool calls, agent orchestration, and external model routing.
Mark 1 infrastructure was decommissioned in January 2025.
# Global Agentics Network
Source: https://docs.blaxel.ai/Infrastructure/Global-Inference-Network
The Blaxel powerhouse to securely run AI at scale.
The *Global Agentics Network* makes up the entire backbone of Blaxel. It is a globally distributed infrastructure, on which AI teams can push serverless agentic workloads across multiple clusters and locations.
The purpose of the Global Agentics Network is to serve inferences at scale, in a highly available and low-latency manner, to end-users from anywhere. The smart network securely routes requests to the best compute infrastructure based on the deployment policies you enforce, and optimizes for configurable strategies for routing, load-balancing and failover.
On the technical level, the Global Agentics Network is made of two planes: execution clusters (the ‘*execution plane*’), and a smart global networking system (the ‘*data plane*’).
### Overview of how Global Agentics Network works
The Global Agentics Network is a **very flexible and configurable infrastructure** built for AI builders. Both the execution plane and data plane can be configured and managed through other services of the Blaxel platform.
The data plane routes all requests between end-users (consumers of your AI applications) and execution locations, as well as between workloads themselves—for example, in agentic workflows. Designed and optimized by Blaxel for tomorrow’s AI, the Network is laser-focused on minimizing latency for AI deployments.
The execution plane encompasses all physical locations where AI workloads run in response to consumers' requests. These can be managed by Blaxel or provided by you.
From a high-level perspective, the Global Agentics Network can operate in several modes, each tailored to your specific deployment strategy.

* **Mode 1: Managed Blaxel infrastructure.** Directly deploy workloads on Blaxel to make them available on the Global Agentics Network. Read [our guide on how to deploy agents on Blaxel](../Agents).
* **Mode 2: Global hybrid deployment.** Attach your private clusters to the Global Agentics Network through the Blaxel controller, and federate multi-region deployments behind our global networking system. This mode is part of our Enterprise offering, contact us at [support@blaxel.ai](mailto:support@blaxel.ai) for more information.
* **Mode 3: Offload on Blaxel**. This mode allows for **minimal footprint** on your stack and is fully transparent for your consumers. Through a Blaxel controller, you can reference Kubernetes deployments from your own private cluster and offload them to Blaxel Global Agentics Network based on conditions, for e.g. in case of sudden traffic burst. This mode is part of our Enterprise offering, contact us at [support@blaxel.ai](mailto:support@blaxel.ai) for more information.
* **Mode 4: On-prem Replication**. Through a Blaxel controller, you can reference Kubernetes deployments from your own private cluster and offload them to another of your private cluster in case of traffic burst. This mode entirely relies on open-source software. Read more on the [Github page for the open-source Blaxel controller](https://github.com/blaxel-ai/bl-controller).
# Integrations
Source: https://docs.blaxel.ai/Integrations
Create agents that connect to private systems, LLMs, SaaS, databases, and APIs.
**Blaxel Integrations** enable you to let Blaxel resources access various external APIs, private networks and AI services, and to connect to downstream interfaces such as your applications. With integrations, you can **manage access control, credentials, and observability** across different providers and systems from a single platform.
Blaxel supports integration with:
* LLM providers like OpenAI or Anthropic
* APIs and SaaS for agents’ tools like Slack or GitHub
* gateways for tools/agents like OneGrep
* agent marketplaces like Pactory
* downstream applications like CopilotKit
All integrations must be configured by a [workspace admin](Security/Workspace-access-control) in the Integrations section of the workspace settings before they can be used by team members.
## All integrations
### LLM APIs
These integrations allow to connect your agents to LLMs from top providers, while controlling access and cost.
[OpenAI](Integrations/OpenAI)
[Anthropic](Integrations/Anthropic)
[MistralAI](Integrations/MistralAI)
[Cohere](Integrations/Cohere)
[xAI](Integrations/xAI)
[DeepSeek](Integrations/DeepSeek)
[Azure-AI-Foundry](Integrations/Azure-AI-Foundry)
[HuggingFace](Integrations/HuggingFace)
**AWS Bedrock**
**Gemini**
**Google Vertex AI**
### Tools and APIs
These integrations allow to equip your agents with tools to access APIs, SaaS and databases.
[**Airweave**](https://airweave.ai/)
**AWS S3**
**AWS SES**
**Brave Search**
**Cloudflare**
**Dall-E**
**Discord**
**Exa**
**GitHub**
[Google-Maps](Integrations/Google-Maps)
[Gmail](Integrations/Gmail)
**HubSpot**
**Linear**
**Notion**
**PostgreSQL**
**Qdrant**
**Sendgrid**
**Shopify**
**Slack**
**Smartlead**
**Snowflake**
**Supabase**
**Tavily**
**Telegram**
**Trello**
**Twilio**
### Frameworks
Blaxel lets you bring agents developed in many of the most popular AI agent frameworks, optimizing how your agent builds and runs no matter how you coded it.
[LangChain](Frameworks/LangChain)
[CrewAI](Frameworks/CrewAI)
[LlamaIndex](Frameworks/LlamaIndex)
[Vercel AI SDK](Frameworks/Vercel-AI)
[Mastra](Frameworks/Mastra)
[OpenAI Agents SDK](Frameworks/OpenAI-Agents)
[PydanticAI](Frameworks/PydanticAI)
[Google ADK](Frameworks/ADK)
[Python](Agents/Develop-an-agent-py)
[TypeScript](Agents/Develop-an-agent-ts)
### Integrate in your applications
These integrations allow to **expose or use Blaxel resources** in downstream applications, gateways and marketplaces.
[Pactory](Integrations/Pactory)
[**n8n**](Agents/Integrate-in-apps/n8n)
[CopilotKit](Agents/Integrate-in-apps/CopilotKit)
[OneGrep](Functions/Integrate-in-apps/OneGrep)
# Anthropic integration
Source: https://docs.blaxel.ai/Integrations/Anthropic
Connect your agents to LLMs from Anthropic.
The Anthropic integration allows Blaxel users to **call Anthropic models using a Blaxel endpoint** in order to unify access control, credentials and observability management.
The integration must be set up by an [admin](../Security/Workspace-access-control) in the Integrations section in the [workspace settings](../Security/Workspace-access-control).
## Set up the integration
In order to use this integration, you must register an Anthropic access token into your Blaxel workspace settings. The scope of this access token (i.e. the Anthropic workspace it is allowed to access) will be the scope that Blaxel has access to.
First, generate an [Anthropic API key](https://docs.anthropic.com/en/api/getting-started) from [your Anthropic organization settings](https://console.anthropic.com/settings/keys). Select the workspace to use for this key.
On Blaxel, in Workspace Settings > Anthropic integration, create a new connection and paste this token into the “API key” section.

## Connect to an Anthropic model
Once you’ve set up the integration in the workspace, any workspace member can use it to reference an Anthropic model as an [external model API](../Models/External-model-apis).
When creating a model API, select Anthropic. You can search for any model from the Anthropic catalog.

After the model API is created, you will receive a dedicated global Blaxel endpoint to call the model. Blaxel will forward inference requests to Anthropic, using your Anthropic credentials for authentication and authorization.
Because your own credentials are used, any inference request on this endpoint will incur potential costs on your Anthropic account, as if you queried the model directly on Anthropic.
# Azure AI Foundry integration
Source: https://docs.blaxel.ai/Integrations/Azure-AI-Foundry
Connect your agents to LLMs deployed in Azure AI Inference, Azure OpenAI Service, and Azure AI Services.
The Azure AI Foundry integration allows Blaxel users to **call models deployments from [Azure AI Foundry](https://learn.microsoft.com/en-us/azure/ai-studio/what-is-ai-studio) services** (Azure AI Inference, Azure OpenAI Service, and Azure AI Services) through a Blaxel endpoint that unifies access control, credentials and observability management.
There are 2 types of integrations related to this service:
* **Azure AI Inference**: connect to a model endpoint deployed as an “Azure AI Services” model on Azure. This typically includes OpenAI models.
* **Azure AI Marketplace**: connect to a model deployed from the Azure Marketplace. This typically includes Llama models.
The integration must be set up by an [admin](../Security/Workspace-access-control) in the Integrations section in the [workspace settings](../Security/Workspace-access-control).
## Azure AI Inference
### Set up the integration
In order to use this integration, you must register an Azure AI Inference endpoint and access key into your Blaxel workspace settings.
First, go to the [Azure AI Foundry console](https://ai.azure.com/build/overview), and open your project. Select the “Azure AI Inference” capability, and retrieve both:
* the **API key**
* the **Azure AI model inference endpoint**

On Blaxel, in Workspace Settings > Azure AI Inference integration, create a new connection and paste the endpoint and the Access token there.

### Connect to a model
Once you’ve set up the integration in the workspace, any workspace member can use it to reference an “Azure AI Services” model as an [external model API](../Models/External-model-apis).
When creating a model API, select “Azure AI Inference”. Then, input the **name** of your model just as it is deployed on Azure.


After the model API is created, you will receive a dedicated global Blaxel endpoint to call the model. Blaxel will forward inference requests to Azure, using your Azure credentials for authentication and authorization.
Because your own credentials are used, any inference request on this endpoint will incur potential costs on your Azure account, as if you queried the model directly on Azure.
## Azure AI Marketplace
### Set up the integration & connect to a model
In order to use this integration, you must register an Azure endpoint and access token into your Blaxel workspace settings.
The difference with most other model API integrations is that the integration will be tied to your model.
First, go to the [Azure AI Foundry console](https://ai.azure.com/build/overview), and open your project. Go to your models, and open the model you want to connect to. Retrieve:
* the **API key**
* the **Azure AI model inference endpoint**

On Blaxel, in Workspace Settings > Azure Marketplace integration, create a new connection and paste this token into the “Access token” section.

Once you’ve set up the integration in the workspace, any workspace member can use it to connect to the model as an [external model API](../Models/External-model-apis).
When creating a model API, select Azure Marketplace, input the name of the endpoint as you want it on Blaxel, and finish creating the model.

After the model API is created, you will receive a dedicated global Blaxel endpoint to call the model. Blaxel will forward inference requests to Azure, using your Azure credentials for authentication and authorization.
Because your own credentials are used, any inference request on this endpoint will incur potential costs on your Azure account, as if you queried the model directly on Azure.
# Cohere integration
Source: https://docs.blaxel.ai/Integrations/Cohere
Connect your agents to LLMs from Cohere.
The Cohere integration allows Blaxel users to **call Cohere models using a Blaxel endpoint** in order to unify access control, credentials and observability management.
The integration must be set up by an [admin](../Security/Workspace-access-control) in the Integrations section in the [workspace settings](../Security/Workspace-access-control).
## Set up the integration
In order to use this integration, you must register a Cohere access token into your Blaxel workspace settings. First, generate a [Cohere API key](https://docs.cohere.com/v2/docs/rate-limits) from [the Cohere platform](https://dashboard.cohere.com/api-keys).
On Blaxel, in Workspace Settings > Cohere integration, create a new connection and paste this token into the “API key” section.

## Connect to an Cohere model
Once you’ve set up the integration in the workspace, any workspace member can use it to reference a Cohere model as an [external model API](../Models/External-model-apis).
When creating a model API, select Cohere. You can search for any model from the Cohere catalog.

After the model API is created, you will receive a dedicated global Blaxel endpoint to call the model. Blaxel will forward inference requests to Cohere, using your Cohere credentials for authentication and authorization.
Because your own credentials are used, any inference request on this endpoint will incur potential costs on your Cohere account, as if you queried the model directly on Cohere.
# DeepSeek integration
Source: https://docs.blaxel.ai/Integrations/DeepSeek
Connect your agents to LLMs from DeepSeek.
The DeepSeek integration allows Blaxel users to **call DeepSeek models using a Blaxel endpoint** in order to unify access control, credentials and observability management.
The integration must be set up by an [admin](../Security/Workspace-access-control) in the Integrations section in the [workspace settings](../Security/Workspace-access-control).
## Set up the integration
In order to use this integration, you must register an DeepSeek access token into your Blaxel workspace settings. First, generate an DeepSeek API key from [your DeepSeek console](https://platform.deepseek.com/api_keys).
On Blaxel, in Workspace Settings > DeepSeek integration, create a new connection and paste this token into the “API key” section.

## Connect to an DeepSeek model
Once you’ve set up the integration in the workspace, any workspace member can use it to reference an DeepSeek model as an [external model API](../Models/External-model-apis).
When creating a model API, select DeepSeek. You can search for any model from the DeepSeek catalog.

After the model API is created, you will receive a dedicated global Blaxel endpoint to call the model. Blaxel will forward inference requests to DeepSeek, using your DeepSeek credentials for authentication and authorization.
Because your own credentials are used, any inference request on this endpoint will incur potential costs on your DeepSeek account, as if you queried the model directly on DeepSeek.
# Gmail
Source: https://docs.blaxel.ai/Integrations/Gmail
Integrate Gmail services into your agents for email communication capabilities.
The *Gmail integration* allows you to equip your agents with tools to interact with Gmail services, enabling email communication and message processing within your applications.
## Set up the integration
In order to use this integration, you must sign-in to your Google account. This will create an integration to Gmail in your workspace settings.

## Create a Gmail function
Once you’ve set up the integration in the workspace, any workspace member can use it to create a Gmail [function](../Functions/Overview).
When creating a function, select Gmail. After the function is created, you will receive a dedicated global Blaxel endpoint to call it.
### Available tools
This integration provides the following tools:
* `send_email`: Send an email using Gmail. No sender will be needed, it use a default configuration. You just have to set the recipient as an email string address inside the parameter "to", a subject and a body in string format
# Google Maps
Source: https://docs.blaxel.ai/Integrations/Google-Maps
Integrate Google Maps services into your agents for location-based capabilities.
The *Google Maps integration* allows to equip your agents with tools to interact with Google Maps services, enabling location-based functionalities and geographic data processing within your applications.
## Set up the integration
In order to use this integration, you must register a Google Cloud Platform (GCP) API access token. The scope of this access token will be the scope that Blaxel has access to.
First, generate a GCP API key from [your GCP 'API & Services' section](https://console.cloud.google.com/apis/credentials). Then on Blaxel, in the workspace settings, in the *Google Maps* integration, paste this token into the “API key” section.

## Create a Google Maps function
Once you’ve set up the integration in the workspace, any workspace member can use it to create a Google Maps [function](../Functions/Overview).
When creating a function, select Google Maps. After the function is created, you will receive a dedicated global Blaxel endpoint to call it.
### Available tools
This integration provides the following tools:
* `maps_geocode`: Convert an address into geographic coordinates
* `maps_reverse_geocode`: Convert coordinates into an address
* `maps_search_places`: Search for places using Google Places API
* `maps_place_details`: Get detailed information about a specific place
* `maps_distance_matrix`: Calculate travel distance and time for multiple origins and destinations
* `maps_elevation`: Get elevation data for locations on the earth
* `maps_directions`: Get directions between two points
# HuggingFace integration
Source: https://docs.blaxel.ai/Integrations/HuggingFace
Deploy public or private AI models from HuggingFace.
The [HuggingFace](https://huggingface.co/) integration enables Blaxel users to **connect to [serverless endpoints](https://huggingface.co/docs/api-inference/en/index) from HuggingFace**—whether public, gated, or private—directly through their agents on Blaxel. The integration is bidirectional, letting you create new [deployments](https://huggingface.co/docs/inference-endpoints/index) on HuggingFace from the Blaxel console to use as [model APIs](../Models/External-model-apis).
The integration must be set up by an [admin](../Security/Workspace-access-control) in the Integrations section in the [workspace settings](../Security/Workspace-access-control).
## Set up the integration
In order to use this integration, you must register a HuggingFace access token into your Blaxel workspace settings. The scope of this access token (i.e. the HuggingFace resources it is allowed to access) will be the scope that Blaxel has access to.
First, generate a [HuggingFace access token](https://huggingface.co/docs/hub/security-tokens) from [your HuggingFace settings](https://huggingface.co/settings/tokens). Give this access token the scope that you want Blaxel to access on HuggingFace (e.g. repositories, etc.).
On Blaxel, in the workspace settings, in the *HuggingFace* integration, paste this token into the “API key” section.

## Connect to a HuggingFace model
Once you’ve set up the integration in the workspace, any workspace member can use it to reference a HuggingFace model as an [external model API](../Models/External-model-apis).
### Public and private models
When [creating a model API](../Models/Overview) on Blaxel, select “HuggingFace”. You can search for:
* any **public model** from [Inference API (serverless)](https://huggingface.co/docs/api-inference/index)
* any **private model** from [Inference Endpoints (dedicated)](https://huggingface.co/docs/inference-endpoints/index) in the organizations & repositories allowed by the integration’s token.

After the model API is created, you will receive a dedicated global Blaxel endpoint to call the model. Blaxel will forward inference requests to HuggingFace, using your HuggingFace credentials for authentication and authorization.
### Gated models
If the model you're trying to connected to is [gated](https://huggingface.co/docs/hub/models-gated), you'll **first need to request access on HuggingFace,** and accept their terms and conditions of usage (if applicable). Access to some HuggingFace models is granted immediately after request, while others require manual approval.
When the model gets deployed, Blaxel will check if the **integration token is allowed access to the model** on HuggingFace. If you have not been allowed access, the model deployment will fail in error.
## Create a HuggingFace Inference Endpoint
You can deploy a model in HuggingFace’s [Inference Endpoints](https://huggingface.co/docs/inference-endpoints/index) directly from the Blaxel console when creating a new [external model API](../Models/External-model-apis).

* **Organization**: select the HuggingFace namespace in which the endpoint will be deployed
* **Model**: select the model to deploy
* **Instance**: choose the type (GPU) and size of the instance to use for the deployment. Blaxel will trigger a deployment on Google Cloud Platform with default auto-scaling parameters.
* **Endpoint**: enter the name for your endpoint on HuggingFace
This action will incur costs on your HuggingFace subscription, depending on the choice of instance selected.
Once you launch a deployment, it will be available in your HuggingFace console, as well as your Blaxel console. You will receive a dedicated global Blaxel endpoint to call the model which proxies the requests to the HuggingFace endpoint and enforces token usage control and observability.
# Mistral AI integration
Source: https://docs.blaxel.ai/Integrations/MistralAI
Connect your agents to LLMs from Mistral AI.
The Mistral AI integration allows Blaxel users to **call Mistral AI models using a Blaxel endpoint** in order to unify access control, credentials and observability management.
The integration must be set up by an [admin](../Security/Workspace-access-control) in the Integrations section in the [workspace settings](../Security/Workspace-access-control).
## Set up the integration
In order to use this integration, you must register a Mistral AI access token into your Blaxel workspace settings. First, generate a Mistral AI API key from [your Mistral AI La Plateforme settings](https://console.mistral.ai/api-keys/).
On Blaxel, in Mistral AI integration, create a new connection and paste this token into the “API key” section.

## Connect to an Mistral AI model
Once you’ve set up the integration in the workspace, any workspace member can use it to reference a Mistral AI model as an [external model API](../Models/External-model-apis).
When creating a model API, select Mistral AI. You can search for any model from the Mistral AI catalog.
After the model API is created, you will receive a dedicated global Blaxel endpoint to call the model. Blaxel will forward inference requests to Mistral AI, using your Mistral AI credentials for authentication and authorization.
Because your own credentials are used, any inference request on this endpoint will incur potential costs on your Mistral AI account, as if you queried the model directly on Mistral AI.
# OpenAI integration
Source: https://docs.blaxel.ai/Integrations/OpenAI
Connect your agents to LLMs from OpenAI.
The OpenAI integration allows Blaxel users to **call OpenAI models using a Blaxel endpoint** in order to unify access control, credentials and observability management.
The integration must be set up by an [admin](../Security/Workspace-access-control) in the Integrations section in the [workspace settings](../Security/Workspace-access-control).
## Set up the integration
In order to use this integration, you must register an OpenAI access token into your Blaxel workspace settings. The scope of this access token (i.e. the OpenAI resources it is allowed to access) will be the scope that Blaxel has access to.
First, generate an [OpenAI API key](https://platform.openai.com/docs/api-reference/authentication) from [your OpenAI Platform settings](https://platform.openai.com/api-keys). Set this API key in `Read-only` mode.
On Blaxel, in Workspace Settings > OpenAI integration, create a new connection and paste this token into the “API key” section.

## Connect to an OpenAI model
Once you’ve set up the integration in the workspace, any workspace member can use it to reference an OpenAI model as an [external model API](../Models/External-model-apis).
When creating a model API, select OpenAI. You can search for any model from the OpenAI catalog.

After the model API is created, you will receive a dedicated global Blaxel endpoint to call the model. Blaxel will forward inference requests to OpenAI, using your OpenAI credentials for authentication and authorization.
Because your own credentials are used, any inference request on this endpoint will incur potential costs on your OpenAI account, as if you queried the model directly on OpenAI.
# Pactory
Source: https://docs.blaxel.ai/Integrations/Pactory
Monetize your agents with Pactory.
The *Pactory integration* allows you to integrate your agents with [Pactory](https://pactory.ai/connect-your-agent), a platform for distributing and monetizing agents. This integration is managed by Pactory.
## Retrieve agent information
To use this integration, you'll need:
* the inference endpoint for the agent you want to connect
* an API key that has access to this agent
First, [deploy an agent](../Agents/Deploy-an-agent) on Blaxel (formerly Beamlit). Once the agent is deployed, retrieve its [inference endpoint](../Agents/Query-agents).

You will need an API key to query the agent externally. Follow [this guide to create a service account in your workspace and generate an API key](../Security/Service-accounts).
## Connect your agent on Pactory
To connect your agent to your Pactory account, open your Pactory dashboard, then go to “**Add New Agent**” and select “**Beamlit**”

Fill in the standard agent configuration fields (name, description, etc.). Then, enter your Blaxel-specific configuration:
* LLM Completions Endpoint: inference endpoint of your Blaxel agent
* LLM Completion API key: service account’s API key
Publish and turn on your agent using the button in the actions section of the agent. Send a test message to verify the integration is working properly. Share your agent and get paid based on usage.
Complete documentation for using Pactory.
# xAI integration
Source: https://docs.blaxel.ai/Integrations/xAI
Connect your agents to LLMs from xAI.
The xAI integration allows Blaxel users to **call xAI models using a Blaxel endpoint** in order to unify access control, credentials and observability management.
The integration must be set up by an [admin](../Security/Workspace-access-control) in the Integrations section in the [workspace settings](../Security/Workspace-access-control).
## Set up the integration
In order to use this integration, you must register an xAI access token into your Blaxel workspace settings. First, generate an [xAI API key](https://docs.x.ai/docs/tutorial#step-2-generate-an-api-key) from [your xAI team console](https://console.x.ai/team/default/api-keys). This key must have access to at least the *Chat* and *Models* endpoints.
On Blaxel, in Workspace Settings > xAI integration, create a new connection and paste this token into the “API key” section.

## Connect to an xAI model
Once you’ve set up the integration in the workspace, any workspace member can use it to reference an xAI model as an [external model API](../Models/External-model-apis).
When creating a model API, select xAI. You can search for any model from the xAI catalog.

After the model API is created, you will receive a dedicated global Blaxel endpoint to call the model. Blaxel will forward inference requests to xAI, using your xAI credentials for authentication and authorization.
Because your own credentials are used, any inference request on this endpoint will incur potential costs on your xAI account, as if you queried the model directly on xAI.
# Jobs
Source: https://docs.blaxel.ai/Jobs/Overview
Scheduled jobs of batch processing tasks for your AI workflows.
Jobs allow you to run many AI tasks in parallel using batch processing.

## Concepts
* **Job**: A code definition that specifies a batch processing task. Jobs can run multiple times within a single execution and accept optional input parameters.
* **Execution**: A specific instance of running a batch job at a given timestamp. Each execution consists of multiple tasks running in parallel.
* **Task**: A single instance of a job definition running as part of an execution.

## Quickstart
It is required to have *npm* (TypeScript) *or uv* (Python) installed to use the following command.
You can quickly **initialize a new job from scratch** by using CLI command `bl create-job`.
```bash
bl create-job myjob
```
This will create a pre-scaffolded local directory where your entire code can be added. In the generated folder, you'll find a boilerplate job with multiple steps in the entrypoint file `index.ts`.
```typescript index.ts
import { blStartJob, withSpan } from '@blaxel/core'; // You can load any Blaxel SDK function
import '@blaxel/telemetry'; // This import is required to connect all the metrics and tracing with blaxel platform
import step1 from './steps/step1';
import step2 from './steps/step2';
import step3 from './steps/step3';
type JobArguments = {
name: string;
}
async function myJob({name}: JobArguments) {
console.log(`Hello, world ${name}!`);
// You can call standard Javascript functions
await step1();
await step2();
...
}
// You need to use a Blaxel SDK function to wrap your job, this is the only requirement to make it work with Blaxel
blStartJob(myJob);
```
Start the job locally:
```bash
# Run the job with a sample batch file
bl run job jobs-ts --local --file batches/sample-batch.json
# Or directly with --data argument
bl run job jobs-ts --local --data '{"tasks": [{"name": "John"}]}'
# Or without blaxel CLI
pnpm start --name John
```
## Deploy a job with Blaxel CLI
This section assumes you have developed a job locally.
The [Blaxel SDK](../sdk-reference/introduction) allows you to connect to and orchestrate other resources (such as model APIs, tool servers, multi-agents) during development, and ensures telemetry, secure connections to third-party systems or private networks, smart global placement of workflows, and much more when jobs are deployed.
The Blaxel SDK authenticates with your workspace using credentials from these sources, in priority order:
1. when running on Blaxel, authentication is handled automatically
2. variables in your `.env` file (`BL_WORKSPACE` and `BL_API_KEY`, or see [this page](../Agents/Variables-and-secrets) for other authentication options).
3. environment variables from your machine
4. configuration file created locally when you log in through [Blaxel CLI](../cli-reference/introduction) (or deploy on Blaxel)
When developing locally, the recommended method is to just **log in to your workspace with Blaxel CLI.** This allows you to run Blaxel SDK functions that will automatically connect to your workspace without additional setup. When you deploy on Blaxel, this connection persists automatically.
When running Blaxel SDK from a remote server that is not Blaxel-hosted, we recommend using environment variables as described in the third option above.
### Serve locally
You can serve the job locally in order to make the entrypoint function (by default: `index.py` / `index.ts`) available on a local endpoint.
Run the following command to serve the job:
```bash
bl serve
```
Calling the provided endpoint will execute the job locally. Add the flag `--hotreload` to get live changes.
```bash
bl serve --hotreload
```
### Deploy on production
You can deploy the job in order to make the entrypoint function (by default: `index.ts` / `server.py`) **callable on a global endpoint**. When deploying to Blaxel, you get a dedicated endpoint that enforces your [deployment policies](../Model-Governance/Policies).
Run the following command to build and deploy a local job on Blaxel:
```bash
bl deploy
```
### Run a job
Start a batch job execution by running:
```bash
# Run a job using Blaxel CLI with --data argument
bl run job jobs-ts --data '{"tasks": [{"name": "John"}, {"name": "Jane"}]}'
```
You can cancel a job execution from the Blaxel Console or via API.
### Retries
You can set a maximum number of **retries per task** in the job definition. Check out the reference for `blaxel.toml` configuration file down below.
### Deploy with a Dockerfile
While Blaxel uses predefined, optimized container images to build and deploy your code, you can also deploy your agent using your own [Dockerfile](https://docs.docker.com/reference/dockerfile/).
Deploy resources using a custom Dockerfile.
## Template directory reference
### Overview
```
package.json # Mandatory. This file is the standard package.json file, it defines the entrypoint of the project and dependencies.
blaxel.toml # This file lists configurations dedicated to Blaxel to customize the deployment.
tsconfig.json # This file is the standard tsconfig.json file, only needed if you use TypeScript.
src/
└── index.ts # This file is the standard entrypoint of the project. It is where the core logic of the job is implemented.
└── steps # This is an example of organization for your sub steps, feel free to change it.
```
### package.json
Here the most notable imports are the scripts. They are used for the `bl serve` and `bl deploy` commands.
```json
{
"name": "job-ts",
"version": "1.0.0",
"description": "Job using Blaxel Platform",
"main": "src/index.ts",
"keywords": [],
"license": "MIT",
"author": "Blaxel",
"scripts": {
"start": "tsx src/index.ts",
"prod": "node dist/index.js",
"build": "tsc"
},
"dependencies": {
"@blaxel/core": "0.2.5",
"@blaxel/telemetry": "0.2.5"
},
"devDependencies": {
"@types/express": "^5.0.1",
"@types/node": "^22.13.11",
"tsx": "^4.19.3",
"typescript": "^5.8.2"
}
}
```
Depending of what you do, all of the `scripts` are not required. With TypeScript, all 4 of them are used.
* `start` : start the job locally through the TypeScript command, to avoid having to build the project when developing.
* `prod` : start the job remotely from the dist folder, the project needs to be have been built before.
* `build` : build the project. It is done automatically when deploying.
The remaining fields in package.json follow standard JavaScript/TypeScript project conventions. Feel free to add any dependencies you need, but keep in mind that devDependencies are only used during the build process and are removed afterwards.
### blaxel.toml
This file is used to configure the deployment of the job on Blaxel. The only mandatory parameter is the `type` so Blaxel knows which kind of entity to deploy. Others are not mandatory but allow you to customize the deployment.
```toml
type = "job"
name = "my-job"
workspace = "my-workspace"
policies = ["na"]
[env]
DEFAULT_CITY = "San Francisco"
[runtime]
memory = 1024
maxConcurrentTasks = 10
timeout = 900
maxRetries=0
```
* `name`, `workspace`, and `type` fields are optional and serve as default values. Any bl command run in the folder will use these defaults rather than prompting you for input.
* `policies` fields is also optional. It allow you to specify a Blaxel [policy](../Model-Governance/Policies) to customize the deployment. For example, deploy it only in a specific region of the world.
* `[env]` section defines environment variables that the job can access via the SDK. Note that these are NOT secrets.
* `[runtime]` section allows to override job execution parameters: maximum number of concurrent tasks, maximum number of retries for each task, timeout (in s), or memory (in MB) to allocate.
# Connect your AI assistant
Source: https://docs.blaxel.ai/MCP-docs
Make your coding assistant access this documentation.
Blaxel provides LLM-accessible tools that you can plug locally in your coding assistant (Cursor, Windsurf, Claude Desktop, etc.). There are two options:
* **An MCP server** that can directly query this documentation, ensuring your coding assistant receives real-time information about available commands and features.
* **An llms-full.txt** text file with the entire documentation compiled and formatted for LLMs
Alternatively you can also use the native AI assistant built into this documentation portal.
## Option 1: Install the MCP server
Open a terminal and run the following command to install the MCP server locally:
```bash
npx mint-mcp add blaxel
```
Everything will be set up automatically.
## Option 2: Copy-paste llms-full.txt
You'll find a `llms-full.txt` file at the root level of this documentation. It is a compiled text document designed to provide context for LLMs.
Copy the following content and paste it in the prompt for your coding assistant:
[https://docs.blaxel.ai/llms-full.txt](https://docs.blaxel.ai/llms-full.txt)
## Option 3: Use the documentation's built-in assistant
This documentation portal has a built-in AI assistant. Simply click "✨**Ask AI**" at the top of any page to use it.

# Policies
Source: https://docs.blaxel.ai/Model-Governance/Policies
Create and enforce fine-grained deployment rules.
Policies are used to program how and where your workloads are deployed on Blaxel. Policies can be defined as code, allowing for easy programming and customization of your [Global Agentics Network](../Infrastructure/Global-Inference-Network).
Policies apply to the entities they are attached to: [model APIs](../Models/Overview), [functions](../Functions/Overview) and [agent](../Agents/Overview) deployments.
## Policies overview
Policies essentially describe rules as to how deployments and executions are made on Blaxel.
A policy states all the **allowed options for a specific aspect** (called the *policy type)* of the deployment or execution (for example: the execution location).
Example:
* Policy `Country: US` means that attached workloads will only be able to run in locations that are in the United States.
When no policies are enforced on a type, all options for this type are considered allowed. Workloads are executed using [Global Agentics Network](../Infrastructure/Global-Inference-Network)’s default optimizations.
### Policy types
Policies have a **type**, allowing multiple policies to drive various deployment strategies without colliding. Typically, you can easily enforce a policy on the execution location and a policy on the underlying hardware at the same time.
There are currently three types of policies: **location,** **flavor,** and **token usage**
### Location policies
Location policies give control over which clusters will execute your workloads.
They come in two different formats:
* policies on **countries** allow to define all [physical locations](Policies) inside of one or several countries at once
* for example, execute only in the following country: *USA*
* policies on **continents** allow to define all [physical locations](Policies) inside of one or several continents at once
* for example, execute only in *North America*
### Flavor policies
Flavor policies give control over which underlying accelerator (GPU) your workloads will be executed on.
They come in two different formats:
* policies on **cpu** allow to pass a specific list of CPU types
* for example, execute only on x86
* policies on **gpu** allow to pass a specific list of GPU types
* execute only on NVIDIA A100
* execute only on NVIDIA L4 or NVIDIA T4
### Token usage policies
Token usage policies control the maximum number of tokens your [**model APIs**](../Models/Overview) can handle within a specific time period. You can control the maximum number of input tokens, output tokens, **and/or** total tokens. When a model reaches its maximum token limit, subsequent requests are rejected with a 429 error.
The policy only drops complete requests AFTER the maximum limit is reached. The first request that exceeds the threshold will still be processed. However, all subsequent requests within the enforced time period will be dropped.
## Create a policy
Policies can be created from the Blaxel console, or from the Blaxel APIs and CLI.
Read [our complete reference on policies](https://docs.blaxel.ai/api-reference/policies/create-or-update-policy).
## Attach a policy
Attaching a policy to a workload enforces it on the workload.
When no policies are enforced on a type, all options for this type are considered allowed. Workloads are executed using [Global Agentics Network](../Infrastructure/Global-Inference-Network)’s default optimizations.
### Attaching multiple policies
When attaching **multiple policies** to a resource, it's crucial to understand their combined effect.
**If you are attaching multiple policies to the same resource:**
Their combined effect is the **UNION** of all of their effects for the same [type](Policies) of policy (a.k.a *OR* clause), and **INTERSECTION** across all [types](Policies) of policies (a.k.a *AND* clause).
For example:
* Let’s assume the following policies:
* Policy A: Country is: USA
* Policy B: Continent is: North America, or Europe
* Policy C: GPU is: NVIDIA T4
* if a workload has the following combined policies:
* A and B: then the workload will only execute in any location in either North America (including USA) or Europe — on any kind of hardware available there.
* B and C: then the workload will only execute in any location in either North America or Europe, only on T4 GPUs.
* A and C: then the workload will only execute in any location in the USA, only on T4 GPUs.
* A and B and C: then the workload will only execute in any location in either North America (including USA) or Europe — only on T4 GPUs.
## Policy reference
Below is the list of official names to build policies.
### Flavors
**type**: `flavor`
| **Code** | **Type** | **Flavor Name** |
| -------- | -------- | --------------- |
| CPU x86 | cpu | x86 |
| t4 | gpu | NVIDIA T4 |
### Locations
**type**: `location`
| **Code** | **Type** | **Name** |
| -------- | --------- | ------------- |
| eu | continent | Europe |
| na | continent | North America |
| us | country | United States |
### Flavors
**type**: `maxToken`
* `granularity`: the unit period of time over which the number of tokens is evaluated. One of: `month`, `day`, `hour`, `minute`
* `step`: the number of time period units over which the number of tokens is evaluated. It is a number greater than 1.
* `input`: threshold for the maximum number of **input** tokens. If 0, this metric is not evaluated.
* `output`: threshold for the maximum number of **output** tokens. If 0, this metric is not evaluated.
* `total`: threshold for the maximum number of **input and output** tokens. If 0, this metric is not evaluated.
# External model APIs
Source: https://docs.blaxel.ai/Models/External-model-apis
Control & secure access to AI models from top providers behind Blaxel Global Inference Network.
You can query any LLM or other generative AI model from top API providers via Blaxel, in order to benefit from a **unified layer of access control and telemetry,** especially when running whole AI agents.
## Creating a model endpoint on Blaxel
Adding model endpoints from external providers on Blaxel gives you single endpoints to call the model on the same base URL, rather than calling each provider separately. Blaxel handles the authentication, authorization and monitoring automatically for you.
This is done in a two step process:
1. First, you need to create a workspace integration that will contain the credentials to connect to your model API provider. Check out the dedicated documentation for each available integration.
2. Second, you can create a dedicated endpoint for a specific model from this provider. You will need to choose the model from the list of available models for the provider.

You can then query the model using its [dedicated global inference endpoint](Query-a-model). Any call to this endpoint will be passed to the underlying provider.
## Provider reference
The following providers are available:
* [OpenAI](../Integrations/OpenAI)
* [Anthropic](../Integrations/Anthropic)
* [Mistral AI](../Integrations/MistralAI)
* [Cohere](../Integrations/Cohere)
* [xAI](../Integrations/xAI)
* [DeepSeek](../Integrations/DeepSeek)
# Model APIs
Source: https://docs.blaxel.ai/Models/Overview
Empower your agents with AI models from anywhere.
AI models are the brain of AI agents, as they are able to reason, talk, and generate payloads for the tools that the agent can use.
There are two ways to approach models on Blaxel:
* **Using an external model API provider** (e.g. OpenAI, Together, etc.): Blaxel acts as a unified gateway for model APIs, centralizing access credentials, tracing and telemetry. You can achieve this by defining workspace integrations to any major model API provider, and creating gateway endpoints on Blaxel for any of their models.
* **Bringing your own model**: Deploy a custom model on Blaxel, allowing you to use fine-tuned SLMs/LLMs or any other kind of AI model. When a model is deployed on Blaxel, you get global API endpoint to call it. This option is part of our Enterprise offering, contact us at [support@blaxel.ai](mailto:support@blaxel.ai) for more information.
Complete guide for connecting to an external model provider like Anthropic or OpenAI.
# Query a model API
Source: https://docs.blaxel.ai/Models/Query-a-model
Make inference requests on your model APIs.
Model APIs on Blaxel have a unique **inference endpoint** which can be used by external consumers and agents to request an inference execution. Inference requests are then routed on the [Global Agentics Network](../Infrastructure/Global-Inference-Network) based on the [deployment policies](../Model-Governance/Policies) associated with your model API.
## Inference endpoints
Whenever you deploy a model API on Blaxel, an **inference endpoint** is generated on Global Agentics Network.
The inference URL looks like this:
```http Query model API
POST https://run.blaxel.ai/{YOUR-WORKSPACE}/models/{YOUR-MODEL}
```
### Specific API endpoints in your model
The URL above calls your model and can be called directly. However your model may **implement additional endpoints.** These sub-endpoints will be hosted on this URL.
For example, if you are calling a text generation model that also implements the ChatCompletions API:
* calling `run.blaxel.ai/your-workspace/models/your-model` (the base endpoint) will generate text based on a prompt
* calling `run.blaxel.ai/your-workspace/models/your-model/v1/chat/completions` (the ChatCompletions API implementation) will generate response based on a list of messages
### Endpoint authentication
It is necessary to authenticate all inference requests, via a [bearer token](../Security/Access-tokens). The evaluation of authentication/authorization for inference requests is managed by the Global Agentics Network based on the [access given in your workspace](../Security/Workspace-access-control).
Making a workload publicly available is not yet available. Please contact us at [support@blaxel.ai](mailto:support@blaxel.ai) if this is something that you need today.
## Make an inference request
### Blaxel API
Make a **POST** request to the [inference endpoint](Query-a-model) for the model API you are requesting, making sure to fill in the [authentication token](Query-a-model):
```
curl 'https://run.blaxel.ai/YOUR-WORKSPACE/models/YOUR-MODEL' \
-H 'accept: application/json, text/plain, */*' \
-H 'x-Blaxel-authorization: Bearer YOUR-TOKEN' \
-H 'x-Blaxel-workspace: YOUR-WORKSPACE' \
--data-raw $'{"inputs":"Enter your input here."}'
```
Read about [the API parameters in the reference](https://docs.blaxel.ai/api-reference/inference).
### Blaxel CLI
The following command will make a default POST request to the model API.
```bash
bl run model your-model --data '{"inputs":"Enter your input here."}'
```
You can call [specific API endpoints](Query-a-model) that your model implements with the option `--path` :
```bash
bl run model your-model --path /v1/chat/completions --data '{"inputs":"Hello there!"}'
```
Read about [the CLI parameters in the reference](https://docs.blaxel.ai/cli-reference/bl_run).
### Blaxel console
Inference requests can be made from the Blaxel console from the model API’s **Playground** page.

# Logs & traces
Source: https://docs.blaxel.ai/Observability/Overview
Monitor your agents executions.
Deploying and running agents on Blaxel gives you **total observability by design**, without needing to install any additional library. When you either deploy from the console’s low-code builder or by using the Blaxel SDK to wrap your code for deployment, Blaxel will automatically implement logging & tracing on your requests.
## Monitor from the Blaxel console
There are three ways you can observe and monitor your running agents:
* Metrics
* Logs
* Traces
### Metrics
Metrics are aggregated data about your agents’ executions. They include:
* Number and rate of requests
* End-to-end latency: average, p50, p90, p99
* Number of tokens generated by model APIs: input, output and total
* City and country of origin of all requests


### Logs
Logs are timestamped data about what happens with your agents, functions and model APIs. Such data includes:
* Status of all requests on agents, functions and model APIs
* Logs generated when building your deployments
* Custom logs generated by your agents and functions

### Traces
Tracing helps you understand how your agent works by showing you all its parts in action. When you make a request, it creates a trace that contains multiple *spans*.
Think of a span as a building block - it shows when something starts and ends, what went in, what came out, and other useful details. Spans can contain other spans, like when one function calls another. You'll often see spans for things like LLM calls, tool calls, or steps in an agent's process. You can click on any trace to see all its spans laid out clearly. This makes it much easier to follow how your agent works and fix any problems you find.
Blaxel collects and saves the traces of a **sampled 10%** of all your executions. In order to force saving the trace on an execution, call the run API and add query parameter `debug:true`.

### Connect to third-party tools
Blaxel uses the OpenTelemetry standard for all the logging and tracing. We can export metrics easily to any compatible third-party platform, such as Datadog, Langfuse or others. Exporting metrics outside of Blaxel requires being in the Enterprise plan.
# Blaxel Documentation
Source: https://docs.blaxel.ai/Overview
Welcome to Blaxel!
Blaxel is a **cloud infrastructure built for AI agents**. Our computing platform gives AI Builders the services, infra, and developer experience optimized to build and deploy agentic AI — with a twist: your agents can also take the wheel.
An *AI agent* is any application that leverages generative AI models to take autonomous actions in the real world—whether by interacting with humans or using APIs to read and write data.
* **Conversational agents** that are able to take action in the world while keeping a human in the loop for activation or validation: for example an AI agent for an e-commerce website, assisting consumers with purchases and refunds with a natural language interface.
* **Retrieval Augmented Generation** **(RAG) agents**: for example, a chatbot assistant for a SaaS that can better answer consumers’ queries by autonomously accessing the software documentation and reference
* **AI-powered data pipelines**: for example a data transformation pipeline that retrieves unstructured data from sources, uses an LLM to turn this raw data into structured data, and insert it back into a database
* **Automated agents** that automate machine-to-machine workflows with AI: for example a system that retrieves traffic video feeds in real-time, detects the presence of accidents, and if so contacts emergency services automatically by generating and sending a detailed report.
Blaxel provides developer tools for running such production-grade multi-agents that can use tools, LLMs and code sandboxes ; and offers infrastructure to run these agents on a global network that makes them run fast and reliably.
This portal provides comprehensive documentation and API, SDK and CLI reference to help you operate Blaxel Platform.
## Essential concepts
Blaxel is a cloud designed for agentic AI. It **doesn't force you into any kind of workflow** or shaped box. While we encourage you to exploit architecture designs that we consider are more reliable, our toolkit gives you all the pieces you need to build agentic systems exactly the way you want.
Blaxel consists of modular services that are engineered to work seamlessly together — but you can also just use any one of them independently. Think of it as a purpose-built set of building blocks that you can use to power and ship agents.
### The building blocks
At the heart of Blaxel is our flagship **Agents Hosting** service. Agents Hosting lets you deploy your AI agents as serverless auto scalable endpoints.
* Completely framework agnostic. Just bring your code, Blaxel builds it and runs it for you.
* Asynchronous endpoints with automatic queuing and retries
* Full observability — out-of-the-box
The rest of Blaxel’s cloud services include:
* **MCP Servers Hosting** - Deploy custom tool servers on a fast-starting infrastructure to extend your agents' capabilities.
* **Model Gateway** - Intelligent routing layer to LLM providers with built-in telemetry, token cost control, and fallbacks capabilities
* **Sandboxes** - Near instant-starting micro VMs that provide agents with their own compute runtime to execute code or run commands.
* **Batch Jobs** - Scalable compute engine designed for agents to schedule and execute many AI processing tasks in parallel in the background
### The Blaxel method
As the ultimate AI builder's playground, Blaxel doesn’t require you to learn and adopt a framework or architecture. However, we do recommend best-practices from our experience working with top AI teams and aim to provide guardrails and framing when you build your agents.
* Break down and distribute your agents whenever possible. A single monolithic agent handling all tool calls, LLM calls, and task workflows can be deployed to Blaxel—but it will be harder to maintain, monitor, and will use resources inefficiently. Blaxel SDK allows builders to split services and connect them from your code.
* You can call LLM providers directly from your code, but we recommend you go through Blaxel’s Model Gateway for telemetry.
* Similarly, while direct tool calls are possible, deploying separate MCP servers improves reusability, optimizes resources, and simplifies monitoring. Blaxel also optimizes placement globally when your serverless tool server needs to make multiple backend calls.
* Break large agents into smaller, specialized sub-agents when possible—they're easier to debug and observe.
* Agentic systems naturally connect with many services both inside and outside your network, mixing North-South and East-West traffic in cloud terms. Strong observability is essential for reliability.
* Reliability is the biggest challenge in agentic AI. Focus on fine-tuning your prompts, tool calls, data access, and orchestration logic—Blaxel will handle the execution.
### A cloud built for agents
Agents will transform how we work in the coming years. Traditional cloud providers weren't designed to handle them and their one-size-fits-all architecture holds them back. We built Blaxel to fix that.
Blaxel is a cloud where **AI agents themselves are the primary users**. All products are accessible through MCP servers, allowing agents to create and manage resources via tool calls. Blaxel provides agents with all the compute they need to scale and perform optimally: products like Sandboxes give them their own dedicated personal computer(s) / computing environments, while Batch Jobs enable them to schedule background tasks at scale.
### Which component should I use?
When building your agentic system, you'll need to make architecture design choices. Blaxel offers several compute options, summarized below in order of latency performance:
* [**Sandboxes**](Sandboxes/Overview): Perfect for maximum workload flexibility. These micro VMs provide full access to filesystem, network, and processes, booting from hibernation in under 25ms.
* [**Agents Hosting (sync mode)**](https://docs.blaxel.ai/Agents/Query-agents#default-synchronous-endpoint): Ideal for running HTTP API services that process requests within a few seconds.
* [**Agents Hosting (async mode)**](https://docs.blaxel.ai/Agents/Query-agents#async-endpoint): Best for running HTTP API services handling longer requests without maintaining an open connection.
* [**Batch Jobs**](Jobs/Overview): Designed for asynchronous tasks that may run for extended periods where boot latency is less critical. These jobs are triggered by providing specific input parameters, unlike Agents that are a fully hosted API.
| **Product** | **Typical use** | **Typical workload duration** | **Boot time** | **Input type** |
| --------------------------- | ------------------------------------------ | ---------------------------------------- | ------------- | ------------------------- |
| Agents Hosting (sync mode) | Agent API that answers fast | a few seconds (**maximum 100 s**) | \~2-4s | Custom API endpoints |
| Agents Hosting (async mode) | Agent API that processes data for a while | a few minutes (**maximum 10 mins**) | \~5s | Custom API endpoints |
| Batch Jobs | Sub-tasks scheduled in an agentic workflow | minutes to hours (**maximum 24 h**) | \~30s | Specific input parameters |
| Sandboxes | Giving an agent its own compute runtime | seconds to hours | \~25ms | Fully custom |
| MCP Servers Hosting | Running an MCP server API | seconds to minutes (**maximum 15 mins**) | \~2-4s | API following MCP |
## The Blaxel powerhouse
When you deploy workloads to Blaxel, they run on a technical backbone called the **Global Agentics Network**. Its natively serverless architecture automatically scales computing resources without any server management on your part.
Global Agentics Network serves as the powerhouse for the entire Blaxel platform, from Agents Hosting to Sandboxes. It is natively **distributed** in order to optimize for low-latency or other strategies. It allows for multi-region deployment, enabling AI workloads (such as an AI agent processing inference requests) to run across multiple geographic areas or cloud providers. This is accomplished by decoupling this execution layer from a data layer made of a smart distributed network that federates all those execution locations.
Finally, the platform implements advanced security measures, including fine-grained authentication and authorization through Blaxel IAM, ensuring that your AI infrastructure remains protected. It can be interacted with through various methods, including APIs, CLI, web console, and MCP servers.
## Documentation structure
You might want to start with any of the following articles:
* [**Get started**](Get-started): Deploy your first workload on Blaxel in just 3 minutes.
* **Product Documentation**
* [Agents Hosting](Agents/Overview): Build and run AI agents that can scale.
* [MCP Servers Hosting](Functions/Overview): Expose capabilities and execute tool calls for your AI agents.
* [**Model APIs:**](Models/Overview) Learn about supported model types.
* [**Sandboxes**](Sandboxes/Overview): Equip your agents with blazing-fast virtual machines to run commands and code.
* [**Batch jobs**](Jobs/Overview): Scheduled jobs of batch processing tasks for your AI workflows.
* [**Integrations:**](Integrations/HuggingFace) Discover how Blaxel works with other tools, frameworks, and platforms.
* [**Observability**](Observability/Overview): Monitor logs, traces and metrics for your agent runs.
* [**Policies Governance**](Model-Governance/Policies)[:](Model-Governance/Environments) Manage your AI deployment strategies.
* [**Security:**](Security/Workspace-access-control) Implement robust security measures for your AI infrastructure.
* [**API reference:**](https://docs.blaxel.ai/api-reference/introduction) Comprehensive guide to Blaxel's APIs.
* [**CLI reference:**](https://docs.blaxel.ai/cli-reference/introduction) Learn how to use Blaxel's command-line interface.
# File management for codegen
Source: https://docs.blaxel.ai/Sandboxes/Codegen-tools
Tools and functions that are optimized for AI codegen use cases.
Blaxel Sandboxes provide tools for managing files and their contents, specialized for code generation ("*codegen*") use cases. These tools are accessible exclusively through the [sandboxes' MCP server](https://docs.blaxel.ai/Sandboxes/Overview#mcp-server-for-a-sandbox).
## Fast apply of file edits
With this tool, you can **apply code changes** suggested by an LLM to your existing code files fast (2000+ tokens/second).
Traditional code generation requires generating the entire files every time, which can be slower for large files. With this approach your LLM only generates the specific changes needed, and this tool applies them to the original file.
### Get started
Fast apply of file edits is powered by [MorphLLM](https://morphllm.com/), and requires you to bring your own Morph account.
Make sure to pass your [Morph API key](https://docs.morphllm.com/api-reference/introduction#authentication) and Morph model (default = *morph-v2*) set as environment variables when creating the sandbox.
```typescript TypeScript
import { SandboxInstance } from "@blaxel/core"
export async function createOrGetSandbox({sandboxName, wait = true}: {sandboxName: string, wait?: boolean}) {
const envs = []
if (process.env.MORPH_API_KEY) {
envs.push({
name: "MORPH_API_KEY",
value: process.env.MORPH_API_KEY
})
}
if (process.env.MORPH_MODEL) {
envs.push({
name: "MORPH_MODEL",
value: process.env.MORPH_MODEL
})
}
const sandboxModel = {
metadata: {
name: sandboxName
},
spec: {
runtime: {
image: "blaxel/prod-nextjs:latest",
memory: 4096,
ports: [
{
name: "sandbox-api",
target: 8080,
protocol: "HTTP",
},
{
name: "preview",
target: 3000,
protocol: "HTTP",
}
]
},
envs
}
}
const sandbox = await SandboxInstance.createIfNotExists(sandboxModel)
if (wait) {
await sandbox.wait({ maxWait: 120000, interval: 1000 })
}
return sandbox
}
```
If you do not pass the MORPH\_API\_KEY, this specific tool will not be available.
### Use the tool
Call the `codegenEditFile` tool on the **[MCP server of a sandbox](https://docs.blaxel.ai/Sandboxes/Overview#mcp-server-for-a-sandbox)** to fast-apply a targeted edit to a specified file, with instructions and partial contents.
Use Blaxel SDK to retrieve the tool in any [compatible agent framework](../Frameworks/Overview) (here in AI SDK format):
```tsx
import { blTools } from '@blaxel/vercel'; // or any compatible agent framework
// Get all tools in the sandbox MCP
const allTools = await blTools([`sandboxes/YOUR-SANDBOX-ID`], maxDuration * 1000)
// Filter on just codegenEditFile
const tools = Object.fromEntries(Object.entries(allTools).filter(([key]) => key.startsWith('codegenEditFile')))
// You can then pass 'tools' in your agent, so it can autonomously use it
...
```
Check out the [following file on GitHub](https://github.com/blaxel-ai/sdk-typescript/blob/main/tests/sandbox/nextjs-sandbox-test/src/app/api/sandboxes/%5Bid%5D/chat/route.ts) to see a full example of using the fast apply tool in an agent.
## Other tools built for codegen
Use the following codegen-optimized functions by making tool calls through the MCP server of a sandbox. See example above on how to retrieve and execute the tools.
1. `codegenCodebaseSearch` - Find semantic code snippets from the codebase based on a natural language query.
2. `codegenFileSearch` - Fast fuzzy filename search in the project.
3. `codegenGrepSearch` - Run fast, exact regex/text searches on files for locating patterns or strings.
4. `codegenListDir` - List contents of a directory in the project.
5. `codegenParallelApply` - Plan and apply similar changes to multiple locations/files simultaneously.
6. `codegenReadFileRange` - Read a specific range of lines in a file (max 250 lines at once).
7. `codegenReapply` - Retry the application of the last edit, in case it previously failed.
# File system
Source: https://docs.blaxel.ai/Sandboxes/Filesystem
A simple file system interface for managing files in sandboxes.
Manage files and directories within sandboxes through the `fs` module of Blaxel SDK. This module provides essential operations for creating, reading, writing, copying, and deleting files and directories.
Complete code examples demonstrating all operations are available on Blaxel's GitHub: [in TypeScript](https://github.com/blaxel-ai/sdk-typescript/tree/main/tests/sandbox) and [in Python](https://github.com/blaxel-ai/sdk-python/blob/main/integrationtest/sandbox.py).
## Basic file system operations
The Blaxel SDK authenticates with your workspace using credentials from these sources, in priority order:
1. when running on Blaxel, authentication is handled automatically
2. variables in your `.env` file (`BL_WORKSPACE` and `BL_API_KEY`, or see [this page](../Agents/Variables-and-secrets) for other authentication options).
3. environment variables from your machine
4. configuration file created locally when you log in through [Blaxel CLI](../cli-reference/introduction) (or deploy on Blaxel)
When developing locally, the recommended method is to just **log in to your workspace with Blaxel CLI.** This allows you to run Blaxel SDK functions that will automatically connect to your workspace without additional setup. When you deploy on Blaxel, this connection persists automatically.
When running Blaxel SDK from a remote server that is not Blaxel-hosted, we recommend using environment variables as described in the third option above.
### Create directory
Create a new directory at a specific path in the sandbox:
```typescript TypeScript {5}
import { SandboxInstance } from "@blaxel/core";
const sandbox = await SandboxInstance.get("my-sandbox")
await sandbox.fs.mkdir(`/Users/user/Downloads/test`)
```
```python Python {14}
import asyncio
import logging
import os
from blaxel.client.models import Metadata, Port, Runtime, Sandbox, SandboxSpec
from blaxel.sandbox.base import ResponseError
from blaxel.sandbox.client.models import ProcessRequest
from blaxel.sandbox.sandbox import SandboxInstance
logger = logging.getLogger(__name__)
sandbox = await SandboxInstance.get(sandbox_name)
await sandbox.fs.mkdir(f"/Users/user/Downloads/test")
```
### List files
List files in a specific path:
```typescript TypeScript {1}
const dir = await sandbox.fs.ls(`/Users/user/Downloads`);
if (dir.files?.length && dir.files?.length < 1) {
throw new Error("Directory is empty");
}
```
```python Python {1}
dir = await sandbox.fs.ls(f"/Users/{user}/Downloads")
assert dir.files and len(dir.files) >= 1, "Directory is empty"
```
### Read file
Read a file from a specific filepath:
```typescript TypeScript
const content = await sandbox.fs.read(`/Users/user/Downloads/test.txt`)
```
```python Python
content = await sandbox.fs.read(f"/Users/user/Downloads/test.txt")
```
### Write file
Create a file in a specific path:
```typescript TypeScript
await sandbox.fs.write(`/Users/user/Downloads/test.txt`, "Hello world");
```
```python Python
await sandbox.fs.write(f"/Users/user/Downloads/test.txt", "Hello world")
```
See down below for how to upload/write a binary, or multiple files at once.
### Write multiple files
You can write multiple files or directories simultaneously. The second path parameter in `writeTree` specifies the base directory for writing the file tree, eliminating the need to repeat the full path for each file.
```typescript TypeScript {9}
const files = [
{ path: "file1.txt", content: "Content of file 1" },
{ path: "file2.txt", content: "Content of file 2" },
{ path: "subfolder/subfile1.txt", content: "Content of subfile 1" },
{ path: "subfolder/subfile2.txt", content: "Content of subfile 2" },
]
await sandbox.fs.writeTree(files, "/blaxel/tmp")
```
### Write binary
Write binary content to a file in the sandbox filesystem:
```typescript TypeScript {5}
// Read archive.zip as binary
const archiveBuffer = await fs.readFile("tests/sandbox/archive.zip")
await sandbox.fs.writeBinary("/blaxel/archive.zip", archiveBuffer)
```
The binary content to write can be provided as:
* *Buffer*: Node.js Buffer object
* *Blob*: Web API Blob object
* *File*: Web API File object
* *Uint8Array*: Typed array containing binary data
### Copy file
Copy a file from a path to another path:
```typescript TypeScript
await sandbox.fs.cp(`/Users/user/Downloads/test.txt`, `/Users/user/Documents/private/test.txt`);
```
```python Python
await sandbox.fs.cp(f"/Users/user/Downloads/test.txt", f"/Users/user/Documents/private/test.txt")
```
### Delete file or directory
Delete a file or directory by specifying its path:
```typescript TypeScript
await sandbox.fs.rm(`/Users/user/Downloads/test.txt`);
```
```python Python
await sandbox.fs.rm(f"/Users/user/Downloads/test.txt")
```
## Watch filesystem for events
The `watch` function monitors all file system changes **in the specified directory.** You can also watch subdirectories by passing a `/my/directory/**` pattern.
By default (when *withContent: false*), the events will only include metadata about the changes, not the actual file contents. Here's what you'll get in the callback events:
1. For ALL operations (CREATE, WRITE, DELETE, etc.), you'll receive:
1. op: The operation type (e.g., "CREATE", "WRITE", "DELETE")
2. path: The directory path where the change occurred
3. name: The name of the file/directory that changed
2. You will NOT receive:
1. The actual content of the files
2. File contents for CREATE or WRITE operations
```typescript TypeScript
import { SandboxInstance } from "@blaxel/core";
// Test the default watch functionality:
async function testWatch(sandbox: SandboxInstance) {
try {
const user = process.env.USER;
const testDir = `/Users/${user}/Downloads/watchtest`;
const testFile = `/file.txt`;
// Ensure correct type for fs
const fs = sandbox.fs;
// Clean up before test
try { await fs.rm(testDir, true); } catch {}
await fs.mkdir(testDir);
// Watch without content
const events: string[] = []
const contents: string[] = []
const handle = fs.watch("/", (fileEvent) => {
events.push(fileEvent.op)
if (fileEvent.op === "WRITE") {
contents.push(fileEvent.content ?? "")
}
}, {
withContent: true
});
await new Promise((resolve) => setTimeout(resolve, 100));
await fs.write(testFile, "content");
await new Promise((resolve) => setTimeout(resolve, 100));
await fs.write(testFile, "new content");
await new Promise((resolve) => setTimeout(resolve, 100));
await fs.rm(testFile)
await new Promise((resolve) => setTimeout(resolve, 100));
handle.close();
// Clean up after test
await fs.rm(testDir, true);
if (!events.includes("CREATE") || !events.includes("WRITE") || !events.includes("REMOVE")) {
throw new Error("Watch callback not consistent with expected events: " + events.join(", "));
}
if (!contents.includes("content") || !contents.includes("new content")) {
throw new Error("Watch callback not consistent with expected contents: " + contents.join(", "));
}
console.log("testWatch passed");
} catch (e) {
console.error("There was an error => ", e);
}
}
async function main() {
try {
const sandbox = await SandboxInstance.get("my-sandbox")
await testWatch(sandbox)
} catch (e) {
console.error("There was an error => ", e);
}
}
main()
.catch((err) => {
console.error("There was an error => ", err);
process.exit(1);
})
.then(() => {
process.exit(0);
})
```
### Watch sub-directories
Watch all sub-directories recursively with `/**`:
```typescript TypeScript {4}
async function testWatchWithSubfolder(sandbox: SandboxInstance) {
const fs = sandbox.fs;
const handle = fs.watch("/folder/**", (fileEvent) => {
console.log(fileEvent)
}, {
ignore: ["folder/test2.txt"]
});
await fs.write("folder/folder2/test.txt", "content");
await fs.write("folder/test2.txt", "content");
await new Promise((resolve) => setTimeout(resolve, 100));
handle.close();
}
```
### Ignore files or directories
You can ignore changes in certain files or directories by providing an array of filepaths to ignore:
```typescript TypeScript {9}
// Test the watch functionality, ignoring of some files:
async function testWatchWithIgnore(sandbox: SandboxInstance) {
const fs = sandbox.fs;
const handle = fs.watch("/", (fileEvent) => {
console.log(fileEvent)
}, {
withContent: true,
ignore: ["app/node_modules", "folder/test2.txt"]
});
await fs.write("folder/folder2/test.txt", "content");
await fs.write("folder/test2.txt", "content")
await fs.write("test2.txt", "content");
await fs.write("test3.txt", "content");
await new Promise((resolve) => setTimeout(resolve, 100));
handle.close();
}
async function main() {
try {
const sandbox = await SandboxInstance.get("my-sandbox")
await testWatchWithIgnore(sandbox)
} catch (e) {
console.error("There was an error => ", e);
}
}
main()
.catch((err) => {
console.error("There was an error => ", err);
process.exit(1);
})
.then(() => {
process.exit(0);
})
```
Specify `withContent: true` so the events include the actual file contents.
# Log streaming
Source: https://docs.blaxel.ai/Sandboxes/Log-streaming
Access logs generated by a sandbox in real time.
Logging provides developers with visibility into process outputs within sandboxes. You can retrieve logs either in batch or streaming.
Complete code examples demonstrating all operations are available on Blaxel's GitHub: [in TypeScript](https://github.com/blaxel-ai/sdk-typescript/tree/main/tests/sandbox) and [in Python](https://github.com/blaxel-ai/sdk-python/blob/main/integrationtest/sandbox.py).
## Retrieve logs
The Blaxel SDK authenticates with your workspace using credentials from these sources, in priority order:
1. when running on Blaxel, authentication is handled automatically
2. variables in your `.env` file (`BL_WORKSPACE` and `BL_API_KEY`, or see [this page](../Agents/Variables-and-secrets) for other authentication options).
3. environment variables from your machine
4. configuration file created locally when you log in through [Blaxel CLI](../cli-reference/introduction) (or deploy on Blaxel)
When developing locally, the recommended method is to just **log in to your workspace with Blaxel CLI.** This allows you to run Blaxel SDK functions that will automatically connect to your workspace without additional setup. When you deploy on Blaxel, this connection persists automatically.
When running Blaxel SDK from a remote server that is not Blaxel-hosted, we recommend using environment variables as described in the third option above.
### In batch
Retrieve logs for a specific [process](Processes) (using either its name or process ID) after it has completed execution. By default, this retrieves standard output (**stdout**):
```typescript TypeScript {6}
import { SandboxInstance } from "@blaxel/core";
const sandbox = await SandboxInstance.get("my-sandbox")
const process = await sandbox.process.exec({name: "test", command: "echo 'Hello world'"})
const logs = await sandbox.process.logs("test");
```
```python Python {15}
import asyncio
import logging
import os
from blaxel.client.models import Metadata, Port, Runtime, Sandbox, SandboxSpec
from blaxel.sandbox.base import ResponseError
from blaxel.sandbox.client.models import ProcessRequest
from blaxel.sandbox.sandbox import SandboxInstance
logger = logging.getLogger(__name__)
sandbox = await SandboxInstance.get(sandbox_name)
process = await sandbox.process.exec(ProcessRequest(name="test", command="echo 'Hello world'"))
logs = await sandbox.process.logs("test")
```
To retrieve standard error (**stderr**):
```typescript TypeScript
const logs = await sandbox.process.logs("test", "stderr");
```
```python Python
logs = await sandbox.process.logs("test", "stderr")
```
To retrieve both *stderr* and *stdout*:
```typescript TypeScript
const logs = await sandbox.process.logs("test", "all");
```
### Streaming
Stream logs for a specific [process](Processes) (using either its name or process ID):
```typescript TypeScript
// This command will output to both stdout and stderr 5 times with a 1 second sleep between each
const command = `sh -c 'for i in $(seq 1 5); do echo "Hello from stdout $i"; echo "Hello from stderr $i" 1>&2; sleep 1; done'`;
await sandbox.process.exec(
{
command: command,
name: "test",
},
);
const stream = sandbox.process.streamLogs("test", {
onLog: (log) => {
logCalled = true;
console.log("onLog", log);
logOutput += log + '\n';
},
onStdout: (stdout) => {
stdoutCalled = true;
console.log("onStdout", stdout);
stdoutOutput += stdout + '\n';
},
onStderr: (stderr) => {
stderrCalled = true;
console.log("onStderr", stderr);
stderrOutput += stderr + '\n';
},
})
await sandbox.process.wait("test")
stream.close();
```
# Sandboxes
Source: https://docs.blaxel.ai/Sandboxes/Overview
Lightweight virtual machines where both you and your agents can run code with sub-20ms cold starts.
Sandboxes are fast-launching virtual machines that both humans and AI agents can operate. They provide a basic [REST API interface](https://docs.blaxel.ai/api-reference/filesystem) for accessing the file system and processes, along with an [MCP server](../Functions/Overview) that makes these capabilities available to agents.
They natively serve as **sandboxed environments for agents**. You can securely run untrusted code inside these VMs — particularly AI-generated code. This makes sandboxes ideal for codegen agents that need access to an operating system to run commands or code, without compromising security and for other users. Beyond code generation, they can just be used as general-purpose VMs for any kind of workload.
## Create a sandbox
Create a new sandbox using the Blaxel SDK by specifying a name, the image to use and the ports to expose. Note that port 8080 is the sandbox API, it is automatically exposed by Blaxel sandboxes.
The list of public images [can be found here](https://github.com/blaxel-ai/sandbox/tree/main/hub). To create a sandbox with one of those images, enter `blaxel/prod-{NAME}:latest` (e.g. *blaxel/prod-base:latest*).
The Blaxel SDK authenticates with your workspace using credentials from these sources, in priority order:
1. when running on Blaxel, authentication is handled automatically
2. variables in your `.env` file (`BL_WORKSPACE` and `BL_API_KEY`, or see [this page](../Agents/Variables-and-secrets) for other authentication options).
3. environment variables from your machine
4. configuration file created locally when you log in through [Blaxel CLI](../cli-reference/introduction) (or deploy on Blaxel)
When developing locally, the recommended method is to just **log in to your workspace with Blaxel CLI.** This allows you to run Blaxel SDK functions that will automatically connect to your workspace without additional setup. When you deploy on Blaxel, this connection persists automatically.
When running Blaxel SDK from a remote server that is not Blaxel-hosted, we recommend using environment variables as described in the third option above.
```typescript TypeScript
import { SandboxInstance } from "@blaxel/core";
/// Start sandbox creation
const sandbox = await SandboxInstance.create({
metadata: {
name: "my-sandbox"
},
spec: {
runtime: {
memory: 4096,
image: "blaxel/prod-base:latest"
}
}
})
/// Wait for the sandbox to be deployed (for max 120 seconds, checking every 1 second)
await sandbox.wait({ maxWait: 120000, interval: 1000 })
```
```python Python
import asyncio
import logging
import os
from blaxel.client.models import Metadata, Port, Runtime, Sandbox, SandboxSpec
from blaxel.sandbox.base import ResponseError
from blaxel.sandbox.client.models import ProcessRequest
from blaxel.sandbox.sandbox import SandboxInstance
logger = logging.getLogger(__name__)
async def create_sandbox(sandbox_name: str):
image = "blaxel/prod-base:latest"
### Start sandbox creation
sandbox = await SandboxInstance.create(Sandbox(
metadata=Metadata(name=sandbox_name),
spec=SandboxSpec(
runtime=Runtime(
image=image,
memory=4096
)
)
))
### Wait for the sandbox to be deployed (for max 120 seconds, checking every 1 second)
await sandbox.wait(max_wait=120000, interval=1000)
logger.info("Sandbox deployed")
return sandbox
```
While `SandboxInstance.create()` waits for the creation to be acknowledged, the function `sandbox.wait` allows to wait for the sandbox to be fully deployed and ready on Blaxel.
### Images
Custom images are currently not supported. [Contact us](https://blaxel.ai/contact?purpose=custom_sandboxes\&origin=docs) to host your own image.
## Retrieve an existing sandbox
To reconnect to an existing sandbox, simply provide its name:
```typescript TypeScript
const sandbox = await SandboxInstance.get("my-sandbox")
```
```python Python
sandbox = await SandboxInstance.get("my-sandbox")
```
Complete code examples demonstrating all operations are available on Blaxel's GitHub: [in TypeScript](https://github.com/blaxel-ai/sdk-typescript/tree/main/tests/sandbox) and [in Python](https://github.com/blaxel-ai/sdk-python/blob/main/integrationtest/sandbox.py).
### Create if not exists
This helper function either retrieves an existing sandbox or creates a new one if it doesn't exist. Blaxel first checks for an existing sandbox with the provided `name` and either retrieves it or creates a new one using your specified configuration.
```typescript TypeScript
const sandbox = await SandboxInstance.createIfNotExists({
metadata: {
name: "my-sandbox"
},
spec: {
runtime: {
memory: 4096,
image: "blaxel/prod-base:latest"
}
}
})
```
## MCP server for a sandbox
Every sandbox is also exposed via an MCP server that allows agents to **operate a sandbox using tool calls.**
The MCP server operates through WebSockets at the sandbox's base URL:
```
wss://run.blaxel.ai/{{WORKSPACE_ID}}/sandboxes/{{SANDBOX_ID}}
```
1. Process management:
1. `processExecute` - Execute a command.
2. `processGet` - Get process information by identifier (PID or name).
3. `processGetLogs` - Get logs for a specific process.
4. `processKill` - Kill a specific process.
5. `processStop` - Stop a specific process.
6. `processesList` - List all running processes.
2. Filesystem operations
1. `fsDeleteFileOrDirectory` - Delete a file or directory.
2. `fsGetWorkingDirectory` - Get the current working directory.
3. `fsListDirectory` - List contents of a directory.
4. `fsReadFile` - Read contents of a file.
5. `fsWriteFile` - Create or update a file.
3. Tools specialized for code generation AI:
1. `codegenEditFile` - Propose and apply a targeted edit to a specified file, with instructions and partial contents. This tool uses [MorphLLM](https://morphllm.com/) for fast edits, and requires a Morph API key set as an environment variable when creating the sandbox.
2. `codegenCodebaseSearch` - Find semantic code snippets from the codebase based on a natural language query.
3. `codegenFileSearch` - Fast fuzzy filename search in the project.
4. `codegenGrepSearch` - Run fast, exact regex/text searches on files for locating patterns or strings.
5. `codegenListDir` - List contents of a directory in the project.
6. `codegenParallelApply` - Plan and apply similar changes to multiple locations/files simultaneously.
7. `codegenReadFileRange` - Read a specific range of lines in a file (max 250 lines at once).
8. `codegenReapply` - Retry the application of the last edit, in case it previously failed.
Connect to this MCP server [like any other MCP server](../Functions/Invoke-functions) though the endpoint shown above.
Using Blaxel SDK, you can retrieve the tools for a sandbox in any supported framework format by passing the sandbox’s name. For example, in LangGraph:
```typescript TypeScript
import { blTools } from "@blaxel/langgraph";
const tools = await blTools([`sandbox/${sandboxName}`])
```
```python Python
from blaxel.tools import bl_tools
tools = await bl_tools([f"sandbox/{sandbox_name}"])
```
[Read more documentation](../Functions/Invoke-functions) on connecting to the MCP server directly from your code.
## Overview of sandbox lifecycle
Blaxel sandboxes start from `standby` to `active` in **under 20 milliseconds**, and scale back down top `standby` **after one second of inactivity**, maintaining their previous state after scaling down.
Here is the summary on the possible statuses for a sandbox:
* **`standby`**: The sandbox is created but is hibernating. You are not charged while a sandbox is in standby mode. Sandboxes transition from *standby* to *active* mode in approximately 20 ms.
* **`active`**: The sandbox is running and processing tasks. You **are** charged for active runtime. Sandboxes automatically return to standby mode after 1 second of inactivity.
* **`stopped`**: The sandbox is shut down and **requires manual restart** to access its API.
Execute and manage processes in sandboxes.
Manage directories and files in sandboxes.
Access logs generated in a sandbox.
Render code in real-time via a direct preview URL.
Manage temporary sessions to connect to sandboxes from a frontend client.
Or explore the Sandbox API reference:
Access the your sandbox with an HTTP REST API.
# Preview code in real-time
Source: https://docs.blaxel.ai/Sandboxes/Preview-url
Render an application in real-time via a direct preview URL for its running sandbox.
Sometimes you may need to access a running sandbox application and preview the content in real time in a front-end client. This is useful for example to instantly preview React code generated by a codegen AI agent.
You can do this via a **preview URL** that routes to a specific port on your sandbox (e.g. *port 3000* for `npm run dev`). This preview URL can be either **public** (does not require you to be authenticated to access it) or **private** (see down below).
They will look something like this:
```
https://tkmu0oj2bf6iuoag6mmlt8.preview.bl.run
```
Setting a **custom domain** on the preview URL is a feature coming soon!
## Current limitations of real-time previews
JavaScript module bundlers handle real-time previewing. Here are the key compatibility requirements and limitations:
* Module bundler **must implement** [ping-pong](https://datatracker.ietf.org/doc/html/rfc6455#section-5.5.2)
* [Webpack](https://webpack.js.org/) has been tested and works
* [Turbopack](https://nextjs.org/docs/app/api-reference/turbopack) currently doesn't work as it doesn't support ping-pong (see [issue raised to Vercel](https://github.com/vercel/next.js/discussions/78947))
* Blaxel has a **15-minute connection timeout**. To maintain previews beyond this limit, ensure your bundler implements automatic reconnection
## Private preview URLs
When you create a private preview URL a token is required to access the URL. You must include the token as:
* a `bl_preview_token` query parameter when accessing the preview URL (e.g. *[https://tkmu0oj2bf6iuoag6mmlt8.preview.bl.run/health?bl\_preview\_token=\{token.value}](https://tkmu0oj2bf6iuoag6mmlt8.preview.bl.run/health?bl_preview_token=\{token.value})*)
* a `X-Blaxel-Preview-Token` header
## Manage preview URLs
### Blaxel console
You can create a preview URL for a sandbox from the Blaxel Console, on the overview of a sandbox:

### Blaxel SDK
The Blaxel SDK authenticates with your workspace using credentials from these sources, in priority order:
1. when running on Blaxel, authentication is handled automatically
2. variables in your `.env` file (`BL_WORKSPACE` and `BL_API_KEY`, or see [this page](../Agents/Variables-and-secrets) for other authentication options).
3. environment variables from your machine
4. configuration file created locally when you log in through [Blaxel CLI](../cli-reference/introduction) (or deploy on Blaxel)
When developing locally, the recommended method is to just **log in to your workspace with Blaxel CLI.** This allows you to run Blaxel SDK functions that will automatically connect to your workspace without additional setup. When you deploy on Blaxel, this connection persists automatically.
When running Blaxel SDK from a remote server that is not Blaxel-hosted, we recommend using environment variables as described in the third option above.
Create and manage a sandbox’s public preview URL:
```typescript TypeScript {8-16}
import { SandboxInstance } from "@blaxel/core";
const sandbox = await SandboxInstance.get("my-sandbox")
/// Create a public preview
try {
await sandbox.previews.create({
metadata: {
name: "preview-test-1"
},
spec: {
port: 443,
public: true
}
})
const previews = await sandbox.previews.list()
if (previews.length < 1) {
throw new Error("No previews found");
}
const preview = await sandbox.previews.get("preview-test-1")
if (preview.name !== "preview-test-1") {
throw new Error("Preview name is not correct");
}
const url = preview.spec?.url
if (!url) {
throw new Error("Preview URL is not correct");
}
const response = await fetch(`${url}/health`)
if (response.status !== 200) {
throw new Error("Preview is not working");
}
console.log("Preview is healthy :)")
} catch (e) {
console.log("ERROR IN PREVIEWS NOT EXPECTED => ", e.error);
}
```
```python Python {18-25}
import asyncio
import logging
from datetime import datetime, timedelta, timezone
import aiohttp
from blaxel.client.models import (Metadata, Port, Preview, PreviewSpec,
Runtime, Sandbox, SandboxSpec)
from blaxel.common.settings import settings
from blaxel.sandbox.sandbox import SandboxInstance
logger = logging.getLogger(__name__)
async def test_public_preview(sandbox: SandboxInstance):
try:
# Create a public preview
await sandbox.previews.create(Preview(
metadata=Metadata(name="preview-test-public"),
spec=PreviewSpec(
port=443,
prefix_url="small-prefix",
public=True
)
))
# List previews
previews = await sandbox.previews.list()
assert len(previews) >= 1, "No previews found"
# Get the preview
retrieved_preview = await sandbox.previews.get("preview-test-public")
assert retrieved_preview.name == "preview-test-public", "Preview name is not correct"
# Check the URL
url = retrieved_preview.spec.url if retrieved_preview.spec else None
assert url is not None, "Preview URL is not correct"
workspace = settings.workspace
expected_url = f"https://small-prefix-{workspace}.preview.bl.run"
assert url == expected_url, f"Preview URL is not correct => {url}"
# Test the preview endpoint
async with aiohttp.ClientSession() as session:
async with session.get(f"{url}/health") as response:
assert response.status == 200, f"Preview is not working => {response.status}:{await response.text()}"
logger.info("Public preview is healthy :)")
except Exception as e:
logger.error("ERROR IN PUBLIC PREVIEW TEST => ", exc_info=e)
raise
async def main():
sandbox = await SandboxInstance.get("sandbox-test")
await test_public_preview(sandbox)
if __name__ == "__main__":
asyncio.run(main())
```
Or create a private preview:
```typescript TypeScript {8-16, 23}
import { SandboxInstance } from "@blaxel/core";
const sandbox = await SandboxInstance.get("my-sandbox")
/// Create a private preview
try {
const preview = await sandbox.previews.create({
metadata: {
name: "preview-test-private"
},
spec: {
port: 443,
public: false
}
})
const url = preview.spec?.url
if (!url) {
throw new Error("Preview URL is not correct");
}
const retrievedPreview = await sandbox.previews.get("preview-test-private")
console.log(`Retrieved preview => url = ${retrievedPreview.spec?.url}`)
const token = await preview.tokens.create(new Date(Date.now() + 1000 * 60 * 10)) // 10 minutes expiration
console.log("Token created => ", token.value)
const tokens = await preview.tokens.list()
if (tokens.length < 1) {
throw new Error("No tokens found");
}
if (!tokens.find((t) => t.value === token.value)) {
throw new Error("Token not found in list");
}
console.log("Token created => ", token.value)
const response = await fetch(`${url}/health`)
if (response.status !== 401) {
throw new Error(`Preview is not protected by token, response => ${response.status}`);
}
const responseWithToken = await fetch(`${url}/health?bl_preview_token=${token.value}`)
if (responseWithToken.status !== 200) {
throw new Error(`Preview is not working with token, response => ${responseWithToken.status}`);
}
console.log("Preview is healthy with token :)")
await preview.tokens.delete(token.value)
} catch (e) {
console.log("ERROR IN PREVIEWS NOT EXPECTED => ", e);
}
```
```python Python {18-24, 31}
import asyncio
import logging
from datetime import datetime, timedelta, timezone
import aiohttp
from blaxel.client.models import (Metadata, Port, Preview, PreviewSpec,
Runtime, Sandbox, SandboxSpec)
from blaxel.common.settings import settings
from blaxel.sandbox.sandbox import SandboxInstance
logger = logging.getLogger(__name__)
async def test_private_preview(sandbox: SandboxInstance):
try:
# Create a private preview
preview = await sandbox.previews.create(Preview(
metadata=Metadata(name="preview-test-private"),
spec=PreviewSpec(
port=443,
public=False
)
))
# Get the preview URL
url = preview.spec.url if preview.spec else None
assert url is not None, "Preview URL is not correct"
# Create a token
token = await preview.tokens.create(datetime.now(timezone.utc) + timedelta(minutes=10))
logger.info(f"Token created => {token.value}")
# List tokens
tokens = await preview.tokens.list()
assert len(tokens) >= 1, "No tokens found"
assert any(t.value == token.value for t in tokens), "Token not found in list"
# Test the preview endpoint without token
async with aiohttp.ClientSession() as session:
async with session.get(f"{url}/health") as response:
assert response.status == 401, f"Preview is not protected by token, response => {response.status}"
# Test the preview endpoint with token
async with aiohttp.ClientSession() as session:
async with session.get(f"{url}/health?bl_preview_token={token.value}") as response:
assert response.status == 200, f"Preview is not working with token, response => {response.status}"
logger.info("Private preview is healthy with token :)")
# Delete the token
await preview.tokens.delete(token.value)
except Exception as e:
logger.error("ERROR IN PRIVATE PREVIEW TEST => ", exc_info=e)
raise
async def main():
sandbox = await SandboxInstance.get("sandbox-test")
await test_private_preview(sandbox)
if __name__ == "__main__":
asyncio.run(main())
```
### Create if not exists
Just like for sandboxes, this helper function either retrieves an existing preview or creates a new one if it doesn't exist. Blaxel first checks for an existing preview with the provided `name` and either retrieves it or creates a new one using your specified configuration.
```typescript TypeScript
const sandbox = await SandboxInstance.get("my-sandbox")
const preview = await sandbox.previews.createIfNotExists({
metadata: {
name: "preview-name"
},
spec: {
port: 443,
public: false
}
})
```
# Process execution
Source: https://docs.blaxel.ai/Sandboxes/Processes
Execute and manage processes in sandboxes.
Execute and manage processes in your sandboxes with Blaxel SDK. Run shell commands, retrieve process information, and control process execution.
Complete code examples demonstrating all operations are available on Blaxel's GitHub: [in TypeScript](https://github.com/blaxel-ai/sdk-typescript/tree/main/tests/sandbox) and [in Python](https://github.com/blaxel-ai/sdk-python/blob/main/integrationtest/sandbox.py).
## Execute processes and commands
The Blaxel SDK authenticates with your workspace using credentials from these sources, in priority order:
1. when running on Blaxel, authentication is handled automatically
2. variables in your `.env` file (`BL_WORKSPACE` and `BL_API_KEY`, or see [this page](../Agents/Variables-and-secrets) for other authentication options).
3. environment variables from your machine
4. configuration file created locally when you log in through [Blaxel CLI](../cli-reference/introduction) (or deploy on Blaxel)
When developing locally, the recommended method is to just **log in to your workspace with Blaxel CLI.** This allows you to run Blaxel SDK functions that will automatically connect to your workspace without additional setup. When you deploy on Blaxel, this connection persists automatically.
When running Blaxel SDK from a remote server that is not Blaxel-hosted, we recommend using environment variables as described in the third option above.
### Execute command
Execute shell commands using the TypeScript SDK:
```typescript TypeScript {6}
import { SandboxInstance } from "@blaxel/core";
const sandbox = await SandboxInstance.get("my-sandbox")
const process = await sandbox.process.exec({command: "echo 'Hello world'"})
if (process.status === "completed") {
throw new Error("Process did complete without waiting");
}
```
```python Python {13}
import asyncio
import logging
import os
from blaxel.client.models import Metadata, Port, Runtime, Sandbox, SandboxSpec
from blaxel.sandbox.base import ResponseError
from blaxel.sandbox.client.models import ProcessRequest
from blaxel.sandbox.sandbox import SandboxInstance
sandbox = await SandboxInstance.get("my-sandbox")
process = await sandbox.process.exec(ProcessRequest(command="echo 'Hello world'"))
assert getattr(process, "status", None) != "completed", "Process did complete without waiting"
```
### Use process names
When starting a process (running a command), you can specify a **process name**. This lets you interact with the process—such as retrieving logs or process information—without needing to store the process ID on your end.
```typescript TypeScript
const process = await sandbox.process.exec({
name: "test",
command: "echo 'Hello world'",
})
```
```python Python
process = await sandbox.process.exec(ProcessRequest(name="test", command="echo 'Hello world'"))
```
You can use either the process name or the process ID to get information about the process:
```typescript TypeScript {4}
await new Promise((resolve) => setTimeout(resolve, 10));
const completedProcess = await sandbox.process.get("test");
if (completedProcess.status !== "completed") {
throw new Error("Process did not complete");
```
```python Python {4}
await asyncio.sleep(0.01)
completed_process = await sandbox.process.get("test")
assert getattr(completed_process, "status", None) == "completed", "Process did not complete"
```
You can also use the process ID or name to [retrieve logs of your processes](Log-streaming).
### Wait for process completion
You can wait for process completion when executing it:
```typescript TypeScript {5}
const process = await sandbox.process.exec({
name: "test",
command: "echo 'Hello world'",
waitForCompletion: true,
timeout: 100
})
```
```python Python
process = await sandbox.process.exec(ProcessRequest(name="test", command="echo 'Hello world'", wait_for_completion=True, timeout=100))
```
Notice the `timeout` parameter which allows to set a timeout duration on the process.
When using `waitForCompletion`, Blaxel enforces a **timeout limit of 100 seconds**. Don't set your timeout longer than this. For longer waiting periods, use the process-watching option described below.
You can also wait for a process after it has started:
```typescript TypeScript
/// Wait for the process to finish (for max 120 seconds, checking every 1 second)
await sandbox.process.wait(”test”, { maxWait: 120000, interval: 1000 })
```
Set a long completion duration if your process is expected to take longer.
### Wait for ports
In some cases, you may want to wait for a port to be opened while running — for example if you are running `npm run dev` and want to wait for port 3000 to be open.
```typescript TypeScript {5}
const process = await sandbox.process.exec({
name: "test",
command: "echo 'Hello world'",
waitForPorts: [3000]
})
```
```python Python
process = await sandbox.process.exec(ProcessRequest(name="test", command="echo 'Hello world'", wait_for_ports=[3000]))
```
### Kill process
Kill a process immediately by running:
```typescript TypeScript
await sandbox.process.kill("test")
```
```python Python
await sandbox.process.kill("test")
```
### Process statuses
A process can have either of the following status:
* `running`
* `completed`
* `failed`
* `killed`
* `stopped`
## Call a sandbox on a specific port
You can call your sandbox on a specific port by using a URL that follows this format. This is useful when you need to expose specific services or applications running in your sandbox:
```
https://run.blaxel.ai/{workspace_id}/sandboxes/{sandbox_id}/port/{port_number}
```
# Client-side sessions
Source: https://docs.blaxel.ai/Sandboxes/Sessions
Operate sandboxes from a frontend client using sessions.
In many situations, you’ll need to operate a sandbox from a frontend client. When doing so, you cannot share the Blaxel credentials needed to access the sandbox. The solution is to use **sessions.**
Sessions are created for a sandbox from a backend server (using Blaxel credentials) and then shared with the frontend client, allowing the browser to connect to the sandbox.
## Basic example
Create a temporary backend session to access a sandbox instance from your client application. Main parameter for this is `expiresAt`, a `Date()` corresponding to the expiration date.
```tsx
/// From your backend:
import { SandboxInstance } from "@blaxel/core";
const sandbox = await SandboxInstance.get("my-sandbox")
const session = await sandbox.sessions.create({ expiresAt })
console.log(`created session name=${session.name} url=${session.url} token=${session.token} expiresAt=${session.expiresAt}`)
/// From your frontend:
import { SandboxInstance } from "@blaxel/core";
const sandboxWithSession = await SandboxInstance.fromSession(session)
```
### Create if expired
This helper function either retrieves an existing session or creates a new one if it expired. You can optionally pass `delta` (default: 1 hour), the time window in milliseconds before actual expiration when a session should still be recreated.
```tsx
const session = await sandbox.sessions.createIfExpired({ expiresAt }, delta: 60000)
```
## Complete example (NextJS)
The following example (see [full app on GitHub](https://github.com/blaxel-ai/sdk-typescript/tree/main/tests/sandbox/nextjs-sandbox-test)) demonstrates a full implementation of sessions in a backend server and frontend client using NextJS.
### Server code (backend)
```tsx
import { NextResponse } from 'next/server';
import { createOrGetSandbox } from '../../../../../../utils';
const SANDBOX_NAME = 'my-sandbox';
const responseHeaders = {
"Access-Control-Allow-Origin": "http://localhost:3000",
"Access-Control-Allow-Methods": "GET, POST, PUT, DELETE, OPTIONS, PATCH",
"Access-Control-Allow-Headers": "Content-Type, Authorization, X-Requested-With, X-Blaxel-Workspace, X-Blaxel-Preview-Token, X-Blaxel-Authorization",
"Access-Control-Allow-Credentials": "true",
"Access-Control-Expose-Headers": "Content-Length, X-Request-Id",
"Access-Control-Max-Age": "86400",
"Vary": "Origin"
}
export async function GET() {
try {
const sandbox = await createOrGetSandbox(SANDBOX_NAME);
// Here we clean all sessions and previews to test from the begining
const sessions = await sandbox.sessions.list();
for (const session of sessions) {
await sandbox.sessions.delete(session.name);
}
const previews = await sandbox.previews.list();
for (const preview of previews) {
await sandbox.previews.delete(preview.name);
}
const session = await sandbox.sessions.create({
expiresAt: new Date(Date.now() + 1000 * 60 * 60 * 24),
responseHeaders,
});
const preview = await sandbox.previews.create({
metadata: {
name: "preview",
},
spec: {
port: 3000,
public: true,
responseHeaders,
}
});
return NextResponse.json({session, preview_url: preview.spec?.url });
} catch (error) {
console.error(error);
return NextResponse.json({ error: (error as Error).message }, { status: 500 });
}
}
```
### Client code (frontend)
```typescript TypeScript {31-38}
'use client'
import { SandboxInstance } from "@blaxel/core";
import { SessionWithToken } from "@blaxel/core/sandbox/types";
import { useEffect, useRef, useState } from "react";
// Define a type for processes based on what's returned by sandbox.process.list()
interface Process {
name?: string;
command?: string;
status?: string;
pid?: string;
// Add other properties that might be needed
}
export default function Home() {
const [sandbox, setSandbox] = useState(null);
const [previewUrl, setPreviewUrl] = useState(null);
const [loading, setLoading] = useState(true);
const [processes, setProcesses] = useState([]);
const [sessionInfo, setSessionInfo] = useState(null);
const [refreshKey, setRefreshKey] = useState(0);
const iframeRef = useRef(null);
useEffect(() => {
fetchSandbox();
}, []);
async function fetchSandbox() {
try {
const res = await fetch('/api/sandbox', {
method: 'GET',
});
if (!res.ok) {
throw new Error('Failed to fetch sessions');
}
const {session, preview_url}: {session: SessionWithToken, preview_url: string} = await res.json();
const sandbox = await SandboxInstance.fromSession(session);
setPreviewUrl(preview_url);
setSandbox(sandbox);
setSessionInfo(session);
const processList = await sandbox.process.list();
setProcesses(processList);
if (!processList.find(p => p.name === "npm-dev")) {
const result = await sandbox.process.exec({
name: "npm-dev",
command: "npm run dev",
workingDir: "/blaxel/app",
waitForPorts: [3000],
});
console.log(result);
// Update processes list after starting npm dev
setProcesses(await sandbox.process.list());
}
setLoading(false);
} catch (error) {
console.error("Error fetching sandbox:", error);
setLoading(false);
}
}
async function stopProcess(processId: string | undefined) {
if (!sandbox || !processId) return;
try {
await sandbox.process.stop(processId);
// Update process list after stopping
const updatedProcesses = await sandbox.process.list();
setProcesses(updatedProcesses);
} catch (error) {
console.error(`Error stopping process ${processId}:`, error);
}
}
async function killProcess(processId: string | undefined) {
if (!sandbox || !processId) return;
try {
await sandbox.process.kill(processId);
// Update process list after killing
const updatedProcesses = await sandbox.process.list();
setProcesses(updatedProcesses);
} catch (error) {
console.error(`Error killing process ${processId}:`, error);
}
}
async function startNpmDev() {
if (!sandbox) return;
try {
await sandbox.process.exec({
name: "npm-dev",
command: "npm run dev",
workingDir: "/blaxel/app",
waitForPorts: [3000],
});
// Update process list after starting npm dev
const updatedProcesses = await sandbox.process.list();
setProcesses(updatedProcesses);
} catch (error) {
console.error("Error starting npm dev:", error);
}
}
const refreshIframe = () => {
if (iframeRef.current) {
// Increment the refresh key to force a re-render
setRefreshKey(prev => prev + 1);
// For a more direct refresh approach
if (iframeRef.current.src) {
iframeRef.current.src = iframeRef.current.src;
}
}
};
return (
);
}
// InfoCard component for consistent styling
function InfoCard({ title, children }: { title: string, children: React.ReactNode }) {
return (
{title}
{children}
);
}
```
# Access tokens
Source: https://docs.blaxel.ai/Security/Access-tokens
Interact with Blaxel by API or CLI using access tokens.
User access tokens can be used in order to authenticate to Blaxel by API or CLI. They apply for both [users](Workspace-access-control) and [service accounts](Service-accounts). They are generated through a variety of methods, which are documented below.
## Overview of authentication methods on Blaxel
Blaxel employs two main authentication paradigms: **short-lived tokens** (OAuth) and **long-lived tokens** (API keys).
**OAuth tokens** are recommended for security reasons, as their duration is only of 2 hours (short-lived). They are generated through [OAuth 2.0](https://oauth.net/2/) authentication endpoints.
Long-lived tokens are easier to use but are less secure as their validity can go from multiple days to infinite. They are generated as **API keys** from the Blaxel console.
## OAuth 2.0 tokens
These short-lived tokens are based on the [OAuth 2.0](https://oauth.net/2/) authentication protocol, and have a validity period of **2 hours**.
### Use OAuth tokens in the CLI
When using the `bl login YOUR-WORKSPACE` command, you will be asked to authenticate using one of two methods: via **the Blaxel console (OAuth 2.0 Device mode**), or via an API key. The former option makes use of short-lived tokens.

Choosing “***device***” (the OAuth option), you will be redirected to the Blaxel console to finish logging in. Sign in using your Blaxel account if you aren’t already.
Once this is done, return to your terminal: the login will be finalized and you will then be able to run CLI commands.
Your [permissions in each workspace](Workspace-access-control) will be the ones given to your account in each of them.
### Use OAuth tokens in the API via service accounts
[Service accounts](Service-accounts) can retrieve a short-lived token via the *OAuth client credentials grant type* in the authentication API, using their *client ID* and *client secret*. These two keys are generated automatically when creating a service account. Make sure to copy the secret at its generation as you will never be able to see it again after.

Service accounts can also connect to the API using a long-lived API key, as detailed [in the section below](Access-tokens).
To retrieve the token, pass the service account’s *client ID* and *client secret* in the header to the `/oauth/token` endpoint.
```
curl --request POST \
--url https://api.blaxel.ai/v0/oauth/token \
--header 'Authorization: Basic base64(CLIENT_ID:CLIENT_SECRET)' \
--header 'Content-Type: application/json' \
--data '{
"grant_type":"client_credentials"
}'
```
Alternatively, you can also pass pass the *client ID* and *client secret* in the body:
```
curl --request POST \
--url https://api.blaxel.ai/v0/oauth/token \
--header 'Content-Type: application/json' \
--data '{
"grant_type":"client_credentials",
"client_id": CLIENT_ID,
"client_secret": CLIENT_SECRET
}'
```
You will retrieve a bearer token valid for 2 hours, which can then be passed in any call to a Blaxel APIs through any of the following headers: `Authorization` or `X-Blaxel-Authorization`, as such:
```
curl 'https://api.blaxel.ai/v0/models' \
-H 'Accept: application/json, text/plain, */*' \
-H 'X-Blaxel-Authorization: Bearer YOUR_TOKEN'
```
### (Advanced) Use OAuth tokens in the APIs
This section assumes you are a developer experienced with OAuth 2.0. For a simpler guide of how to use short-lived tokens in Blaxel APIs, read the [section on authenticating service accounts](Access-tokens).
Blaxel implements all **grant types** in the OAuth 2.0 convention, including [client credentials](https://www.oauth.com/oauth2-servers/access-tokens/client-credentials/), [authorization code](https://www.oauth.com/oauth2-servers/access-tokens/authorization-code-request/), and [refresh tokens](https://www.oauth.com/oauth2-servers/access-tokens/refreshing-access-tokens/). If you are a developer experienced with OAuth 2.0, you can find the **well-known configuration endpoint** at the following URL:
```
https://api.blaxel.ai/v0/.well-known/openid-configuration
```
Through the endpoints discoverable in the aforementioned URL, you can implement any authentication flow in your application, and use the retrieved tokens in any of the following headers: `Authorization` or `X-Blaxel-Authorization` .
Alternatively, you can retrieve a token using the SDK:
```tsx
import { settings } from ´blaxel/core’
await settings.authenticate() // Refreshes the token only if needed
console.log(settings.token)
```
*Note: when using the Blaxel SDK to operate Blaxel (e.g. to create an agent), token retrieval and refresh [is done automatically based on either being authenticated with CLI or using environment variables](../sdk-reference/introduction).*
## API keys
Long-lived authentication tokens are called **API keys** on Blaxel. Their validity duration is infinite.
### Manage API keys
You can create private API keys for your Blaxel account to authenticate directly when using the Blaxel APIs or CLI. Your [permissions in each workspace](Workspace-access-control) will be the ones given to your account in each of them.
API keys can be managed from the Blaxel console in **Profile > Security**.

For production-grade access to workspace resources that should be independent of individual users, it's strongly recommended to use [service accounts](Service-accounts) in the workspace.
### Using API keys
API keys can be used in both the Blaxel APIs and CLI.
**To authenticate in the APIs**, use the API key as an authorization bearer in the headers `Authorization` or `X-Blaxel-Authorization` in any call to the Blaxel APIs. For example, to list models:
```
curl 'https://api.blaxel.ai/v0/models' \
-H 'Accept: application/json, text/plain, */*' \
-H 'Authorization: Bearer YOUR-API-KEY'
```
**To authenticate in the CLI,** use the `bl login` command. You will be asked to authenticate using one of two methods: via the Blaxel console (OAuth 2.0 device mode), or **via an API key**. Choose the latter, and you will be prompted to enter the API key generated for your user or service account.

You will then be authenticated in this terminal session.
# Service accounts
Source: https://docs.blaxel.ai/Security/Service-accounts
Automate the life-cycle of Blaxel resources via API through service accounts.
Service accounts are workspace users (i.e. identities) that represent an external system that needs to access Blaxel to operate resources in your workspace.
## Authentication of service accounts
### API keys
Service accounts can use [API keys](Access-tokens) to authenticate on Blaxel. These API keys can be created and managed by admins from the service account’s page, in your workspace settings.
API keys have an infinite validity duration.

### Client credentials (OAuth 2.0)
Service accounts can also use the *client credentials* [OAuth 2.0 grant type](Access-tokens), via their **client ID** and **client secret**. A pair client ID / client secret is generated automatically by Blaxel when you create a new service account.

Make sure to copy the client secret when you create the service account as you will never be able to access it again after you leave the page.
## Permissions of service accounts
Service accounts can have [similar permissions](Workspace-access-control) as other users from your team. These permissions are managed by admins in your workspace settings.
# Workspaces, users and roles
Source: https://docs.blaxel.ai/Security/Workspace-access-control
Control authentication and authorization over all resources in your workspace.
All resources on Blaxel are logically regrouped in a **workspace,** which is the highest possible level of tenancy. Your organization will usually operate within one single workspace, but you can work with several workspaces when dealing with multiple business units or end-clients for example.
Users can be either [team members](Workspace-access-control), or [service accounts](Service-accounts) that represent external systems that can operate Blaxel. They are added to a workspace with certain permissions on the workspace resources inherited from their role.
## Workspace ID
The workspace ID (called `name` in Blaxel API) uniquely identifies your workspace. You set it when the workspace is created. Once set, it cannot be changed.
You can find the workspace ID at the top of the left sidebar on Blaxel Console.
Each workspace also has a display name for better organization, which workspace admins can modify.
## User roles
There are two roles that a user or service account can have in a workspace: **admin** and **member**.
Admins have **complete access** in the workspace, on all workspace resources. They can also modify all workspace settings, including inviting other team members. More specifically, admins have all the permissions that members have, in addition to:
* creating and editing policies
* inviting and removing users
* changing user’s permissions
* adding and removing integrations
* changing the workspace name
* deleting the workspace
Members can view the workspace settings but not edit them. They are also able to **view and modify** the following resources inside a workspace (including querying them when applicable):
* [agents](../Agents/Overview)
* [MCP servers](../Functions/Overview)
* [model APIs](../Models/Model-deployment)
* [batch jobs](../Jobs/Overview)
* [sandboxes](../Sandboxes/Overview)
They have read-only access on the following resources:
* [policies](../Model-Governance/Policies)
## Invite a member
Admins can invite team members via their email address. They will be prompted for the role to give the user.

The invitee will receive an email to allow them to accept the invitation on Blaxel console. They will not be able to access workspace resources until they have manually accepted the invitation. If the user doesn’t have a Blaxel account already, they will be asked to signup first.
Invitations to other workspaces are visible from your Profile.
## Delete a workspace
Admins can delete a workspace on Blaxel console from the workspace settings. **This action cannot be undone**.
# Create agent by name
Source: https://docs.blaxel.ai/api-reference/agents/create-agent-by-name
api-reference/controlplane.yml post /agents
# Delete agent by name
Source: https://docs.blaxel.ai/api-reference/agents/delete-agent-by-name
api-reference/controlplane.yml delete /agents/{agentName}
# Get agent by name
Source: https://docs.blaxel.ai/api-reference/agents/get-agent-by-name
api-reference/controlplane.yml get /agents/{agentName}
# List all agent revisions
Source: https://docs.blaxel.ai/api-reference/agents/list-all-agent-revisions
api-reference/controlplane.yml get /agents/{agentName}/revisions
# List all agents
Source: https://docs.blaxel.ai/api-reference/agents/list-all-agents
api-reference/controlplane.yml get /agents
# Update agent by name
Source: https://docs.blaxel.ai/api-reference/agents/update-agent-by-name
api-reference/controlplane.yml put /agents/{agentName}
# Create Sandbox
Source: https://docs.blaxel.ai/api-reference/compute/create-sandbox
api-reference/controlplane.yml post /sandboxes
Creates a Sandbox.
# Create Sandbox Preview
Source: https://docs.blaxel.ai/api-reference/compute/create-sandbox-preview
api-reference/controlplane.yml post /sandboxes/{sandboxName}/previews
Create a preview
# Create token for Sandbox Preview
Source: https://docs.blaxel.ai/api-reference/compute/create-token-for-sandbox-preview
api-reference/controlplane.yml post /sandboxes/{sandboxName}/previews/{previewName}/tokens
Creates a token for a Sandbox Preview.
# Delete Sandbox
Source: https://docs.blaxel.ai/api-reference/compute/delete-sandbox
api-reference/controlplane.yml delete /sandboxes/{sandboxName}
Deletes a Sandbox by name.
# Delete Sandbox Preview
Source: https://docs.blaxel.ai/api-reference/compute/delete-sandbox-preview
api-reference/controlplane.yml delete /sandboxes/{sandboxName}/previews/{previewName}
Deletes a Sandbox Preview by name.
# Delete token for Sandbox Preview
Source: https://docs.blaxel.ai/api-reference/compute/delete-token-for-sandbox-preview
api-reference/controlplane.yml delete /sandboxes/{sandboxName}/previews/{previewName}/tokens/{tokenName}
Deletes a token for a Sandbox Preview by name.
# Get Sandbox
Source: https://docs.blaxel.ai/api-reference/compute/get-sandbox
api-reference/controlplane.yml get /sandboxes/{sandboxName}
Returns a Sandbox by name.
# Get Sandbox Preview
Source: https://docs.blaxel.ai/api-reference/compute/get-sandbox-preview
api-reference/controlplane.yml get /sandboxes/{sandboxName}/previews/{previewName}
Returns a Sandbox Preview by name.
# Get tokens for Sandbox Preview
Source: https://docs.blaxel.ai/api-reference/compute/get-tokens-for-sandbox-preview
api-reference/controlplane.yml get /sandboxes/{sandboxName}/previews/{previewName}/tokens
Gets tokens for a Sandbox Preview.
# List Sandboxes
Source: https://docs.blaxel.ai/api-reference/compute/list-sandboxes
api-reference/controlplane.yml get /sandboxes
Returns a list of all Sandboxes in the workspace.
# List Sandboxes
Source: https://docs.blaxel.ai/api-reference/compute/list-sandboxes-1
api-reference/controlplane.yml get /sandboxes/{sandboxName}/previews
Returns a list of Sandbox Previews in the workspace.
# Start Sandbox
Source: https://docs.blaxel.ai/api-reference/compute/start-sandbox
api-reference/controlplane.yml put /sandboxes/{sandboxName}/start
Starts a Sandbox by name.
# Stop Sandbox
Source: https://docs.blaxel.ai/api-reference/compute/stop-sandbox
api-reference/controlplane.yml put /sandboxes/{sandboxName}/stop
Stops a Sandbox by name.
# Update Sandbox
Source: https://docs.blaxel.ai/api-reference/compute/update-sandbox
api-reference/controlplane.yml put /sandboxes/{sandboxName}
Update a Sandbox by name.
# Update Sandbox Preview
Source: https://docs.blaxel.ai/api-reference/compute/update-sandbox-preview
api-reference/controlplane.yml put /sandboxes/{sandboxName}/previews/{previewName}
Updates a Sandbox Preview by name.
# List all configurations
Source: https://docs.blaxel.ai/api-reference/configurations/list-all-configurations
api-reference/controlplane.yml get /configuration
# Create or update a file or directory
Source: https://docs.blaxel.ai/api-reference/filesystem/create-or-update-a-file-or-directory
https://raw.githubusercontent.com/blaxel-ai/sandbox/refs/heads/main/sandbox-api/docs/openapi.yml put /filesystem/{path}
Create or update a file or directory
# Delete file or directory
Source: https://docs.blaxel.ai/api-reference/filesystem/delete-file-or-directory
https://raw.githubusercontent.com/blaxel-ai/sandbox/refs/heads/main/sandbox-api/docs/openapi.yml delete /filesystem/{path}
Delete a file or directory
# Get file or directory information
Source: https://docs.blaxel.ai/api-reference/filesystem/get-file-or-directory-information
https://raw.githubusercontent.com/blaxel-ai/sandbox/refs/heads/main/sandbox-api/docs/openapi.yml get /filesystem/{path}
Get content of a file or listing of a directory
# Stream file modification events in a directory
Source: https://docs.blaxel.ai/api-reference/filesystem/stream-file-modification-events-in-a-directory
https://raw.githubusercontent.com/blaxel-ai/sandbox/refs/heads/main/sandbox-api/docs/openapi.yml get /watch/filesystem/{path}
Streams the path of modified files (one per line) in the given directory. Closes when the client disconnects.
# Stream file modification events in a directory via WebSocket
Source: https://docs.blaxel.ai/api-reference/filesystem/stream-file-modification-events-in-a-directory-via-websocket
https://raw.githubusercontent.com/blaxel-ai/sandbox/refs/heads/main/sandbox-api/docs/openapi.yml get /ws/watch/filesystem/{path}
Streams JSON events of modified files in the given directory. Closes when the client disconnects.
# Create function
Source: https://docs.blaxel.ai/api-reference/functions/create-function
api-reference/controlplane.yml post /functions
# Delete function by name
Source: https://docs.blaxel.ai/api-reference/functions/delete-function-by-name
api-reference/controlplane.yml delete /functions/{functionName}
# Get function by name
Source: https://docs.blaxel.ai/api-reference/functions/get-function-by-name
api-reference/controlplane.yml get /functions/{functionName}
# List all functions
Source: https://docs.blaxel.ai/api-reference/functions/list-all-functions
api-reference/controlplane.yml get /functions
# List function revisions
Source: https://docs.blaxel.ai/api-reference/functions/list-function-revisions
api-reference/controlplane.yml get /functions/{functionName}/revisions
Returns revisions for a function by name.
# Update function by name
Source: https://docs.blaxel.ai/api-reference/functions/update-function-by-name
api-reference/controlplane.yml put /functions/{functionName}
# Get mcphub
Source: https://docs.blaxel.ai/api-reference/get-mcphub
api-reference/controlplane.yml get /mcp/hub
# Get sandboxhub
Source: https://docs.blaxel.ai/api-reference/get-sandboxhub
api-reference/controlplane.yml get /sandbox/hub
# Get template
Source: https://docs.blaxel.ai/api-reference/get-template
api-reference/controlplane.yml get /templates/{templateName}
Returns a template by name.
# Inference API
Source: https://docs.blaxel.ai/api-reference/inference
Run inferences on your Blaxel deployments.
Whenever you deploy a workload on Blaxel, an **inference endpoint** is generated on Global Agentics Network, the [infrastructure powerhouse](../Infrastructure/Global-Inference-Network) that hosts it.
The inference API URL depends on the type of workload ([agent](../Agents/Overview), [model API](../Models/Overview), [MCP server](../Functions/Overview)) you are trying to request:
```http Query agent
POST https://run.blaxel.ai/{YOUR-WORKSPACE}/agents/{YOUR-AGENT}
```
```http Query model API
POST https://run.blaxel.ai/{YOUR-WORKSPACE}/models/{YOUR-MODEL}
```
```http Connect to an MCP server
wss://run.blaxel.ai/{YOUR-WORKSPACE}/functions/{YOUR-SERVER-NAME}
```
Showing the full request, with the input payload:
```http Query agent
curl -X POST "https://run.blaxel.ai/{your-workspace}/agents/{your-agent}" \
-H 'Content-Type: application/json' \
-H "X-Blaxel-Authorization: Bearer " \
-d '{"inputs":"Hello, world!"}'
```
```http Query model API (example on a chat completion model)
curl -X POST "run.blaxel.ai/{your-workspace}/models/{your-model}/chat/completions" \
-H 'Content-Type: application/json' \
-H "X-Blaxel-Authorization: Bearer " \
-d '{"messages":[{"role":"user","content":"Hello!"}]}'
```
### Connect to MCP servers
**MCP servers** ([Model Context Protocol](https://github.com/modelcontextprotocol)) provide a toolkit of multiple capabilities for agents. These servers can be interacted with using Blaxel’s WebSocket transport implementation on the server’s global endpoint.
Learn how to run invocation requests on your MCP server.
### Manage sessions
To simulate multi-turn conversations, you can pass on request headers. You'll need your client to generate this ID and pass it using any header which you can retrieve via the code (e.g. `Thread-Id`). Without a thread ID, the agent won't maintain nor use any conversation memory when processing the request.
This is only available for agent requests.
```http Query agent with thread ID
curl -X POST "https://run.blaxel.ai/{your-workspace}/agents/{your-agent}" \
-H 'Content-Type: application/json' \
-H "X-Blaxel-Authorization: Bearer " \
-H "X-Blaxel-Thread-Id: " \
-d '{"inputs":"Hello, world!"}'
```
Read our product guide on querying an agent.
# Create integration
Source: https://docs.blaxel.ai/api-reference/integrations/create-integration
api-reference/controlplane.yml post /integrations/connections
Create a connection for an integration.
# Delete integration
Source: https://docs.blaxel.ai/api-reference/integrations/delete-integration
api-reference/controlplane.yml delete /integrations/connections/{connectionName}
Deletes an integration connection by integration name and connection name.
# Get integration
Source: https://docs.blaxel.ai/api-reference/integrations/get-integration
api-reference/controlplane.yml get /integrations/connections/{connectionName}
Returns an integration connection by integration name and connection name.
# Get integration connection model endpoint configurations
Source: https://docs.blaxel.ai/api-reference/integrations/get-integration-connection-model-endpoint-configurations
api-reference/controlplane.yml get /integrations/connections/{connectionName}/endpointConfigurations
Returns a list of all endpoint configurations for a model.
# Get integration model endpoint configurations
Source: https://docs.blaxel.ai/api-reference/integrations/get-integration-model-endpoint-configurations
api-reference/controlplane.yml get /integrations/connections/{connectionName}/models/{modelId}
Returns a model for an integration connection by ID.
# List integration connection models
Source: https://docs.blaxel.ai/api-reference/integrations/list-integration-connection-models
api-reference/controlplane.yml get /integrations/connections/{connectionName}/models
Returns a list of all models for an integration connection.
# List integrations connections
Source: https://docs.blaxel.ai/api-reference/integrations/list-integrations-connections
api-reference/controlplane.yml get /integrations/{integrationName}
Returns integration information by name.
# List integrations connections
Source: https://docs.blaxel.ai/api-reference/integrations/list-integrations-connections-1
api-reference/controlplane.yml get /integrations/connections
Returns a list of all connections integrations in the workspace.
# Update integration connection
Source: https://docs.blaxel.ai/api-reference/integrations/update-integration-connection
api-reference/controlplane.yml put /integrations/connections/{connectionName}
Update an integration connection by integration name and connection name.
# Overview
Source: https://docs.blaxel.ai/api-reference/introduction
Interact with Blaxel through APIs.
Blaxel APIs allow you to interact with all resources inside of and across your workspace(s).
## Get started
Authentication to the Blaxel APIs can either be done using [API keys](../Security/Access-tokens) created from the Blaxel console, or through a [classic OAuth 2.0 flow](../Security/Access-tokens).
**API keys** allow you to get started quickly. Simply [generate an API key](../Security/Access-tokens) for your user or service account and use the API key as a bearer token in place of the authorization headers `Authorization` or `X-Blaxel-Authorization` in any call to the Blaxel APIs.
For example, to list models:
```
curl 'https://api.blaxel.ai/v0/models' \
-H 'accept: application/json, text/plain, */*' \
-H 'X-Blaxel-Authorization: Bearer YOUR-API-KEY'
```
To use **short-lived JWTs**, see [the guide on using an OAuth 2.0 flow](../Security/Access-tokens).
## Blaxel APIs
See the reference for any of the following APIs:
Run inference requests on your deployments by API. API to manage agents, functions, policies and much more.
# List pending invitations
Source: https://docs.blaxel.ai/api-reference/invitations/list-pending-invitations
api-reference/controlplane.yml get /profile/invitations
Returns a list of all pending invitations in the workspace.
# Create job
Source: https://docs.blaxel.ai/api-reference/jobs/create-job
api-reference/controlplane.yml post /jobs
Creates a job.
# Create or update job
Source: https://docs.blaxel.ai/api-reference/jobs/create-or-update-job
api-reference/controlplane.yml put /jobs/{jobId}
Update a job by name.
# Delete job
Source: https://docs.blaxel.ai/api-reference/jobs/delete-job
api-reference/controlplane.yml delete /jobs/{jobId}
Deletes a job by name.
# Get job
Source: https://docs.blaxel.ai/api-reference/jobs/get-job
api-reference/controlplane.yml get /jobs/{jobId}
Returns a job by name.
# List job revisions
Source: https://docs.blaxel.ai/api-reference/jobs/list-job-revisions
api-reference/controlplane.yml get /jobs/{jobId}/revisions
Returns revisions for a job by name.
# List jobs
Source: https://docs.blaxel.ai/api-reference/jobs/list-jobs
api-reference/controlplane.yml get /jobs
Returns a list of all jobs in the workspace.
# Create knowledgebase
Source: https://docs.blaxel.ai/api-reference/knowledgebases/create-knowledgebase
api-reference/controlplane.yml post /knowledgebases
Creates an knowledgebase.
# Delete knowledgebase
Source: https://docs.blaxel.ai/api-reference/knowledgebases/delete-knowledgebase
api-reference/controlplane.yml delete /knowledgebases/{knowledgebaseName}
Deletes an knowledgebase by Name.
# Get knowledgebase
Source: https://docs.blaxel.ai/api-reference/knowledgebases/get-knowledgebase
api-reference/controlplane.yml get /knowledgebases/{knowledgebaseName}
Returns an knowledgebase by Name.
# List knowledgebase revisions
Source: https://docs.blaxel.ai/api-reference/knowledgebases/list-knowledgebase-revisions
api-reference/controlplane.yml get /knowledgebases/{knowledgebaseName}/revisions
Returns revisions for a knowledgebase by name.
# List knowledgebases
Source: https://docs.blaxel.ai/api-reference/knowledgebases/list-knowledgebases
api-reference/controlplane.yml get /knowledgebases
Returns a list of all knowledgebases in the workspace.
# Update knowledgebase
Source: https://docs.blaxel.ai/api-reference/knowledgebases/update-knowledgebase
api-reference/controlplane.yml put /knowledgebases/{knowledgebaseName}
Updates an knowledgebase.
# List locations
Source: https://docs.blaxel.ai/api-reference/locations/list-locations
api-reference/controlplane.yml get /locations
Returns a list of all locations available with status.
# Create model
Source: https://docs.blaxel.ai/api-reference/models/create-model
api-reference/controlplane.yml post /models
Creates a model.
# Create or update model
Source: https://docs.blaxel.ai/api-reference/models/create-or-update-model
api-reference/controlplane.yml put /models/{modelName}
Update a model by name.
# Delete model
Source: https://docs.blaxel.ai/api-reference/models/delete-model
api-reference/controlplane.yml delete /models/{modelName}
Deletes a model by name.
# Get model
Source: https://docs.blaxel.ai/api-reference/models/get-model
api-reference/controlplane.yml get /models/{modelName}
Returns a model by name.
# List model revisions
Source: https://docs.blaxel.ai/api-reference/models/list-model-revisions
api-reference/controlplane.yml get /models/{modelName}/revisions
Returns revisions for a model by name.
# List models
Source: https://docs.blaxel.ai/api-reference/models/list-models
api-reference/controlplane.yml get /models
Returns a list of all models in the workspace.
# Get open ports for a process
Source: https://docs.blaxel.ai/api-reference/network/get-open-ports-for-a-process
https://raw.githubusercontent.com/blaxel-ai/sandbox/refs/heads/main/sandbox-api/docs/openapi.yml get /network/process/{pid}/ports
Get a list of all open ports for a process
# Start monitoring ports for a process
Source: https://docs.blaxel.ai/api-reference/network/start-monitoring-ports-for-a-process
https://raw.githubusercontent.com/blaxel-ai/sandbox/refs/heads/main/sandbox-api/docs/openapi.yml post /network/process/{pid}/monitor
Start monitoring for new ports opened by a process
# Stop monitoring ports for a process
Source: https://docs.blaxel.ai/api-reference/network/stop-monitoring-ports-for-a-process
https://raw.githubusercontent.com/blaxel-ai/sandbox/refs/heads/main/sandbox-api/docs/openapi.yml delete /network/process/{pid}/monitor
Stop monitoring for new ports opened by a process
# Create policy
Source: https://docs.blaxel.ai/api-reference/policies/create-policy
api-reference/controlplane.yml post /policies
Creates a policy.
# Delete policy
Source: https://docs.blaxel.ai/api-reference/policies/delete-policy
api-reference/controlplane.yml delete /policies/{policyName}
Deletes a policy by name.
# Get policy
Source: https://docs.blaxel.ai/api-reference/policies/get-policy
api-reference/controlplane.yml get /policies/{policyName}
Returns a policy by name.
# List policies
Source: https://docs.blaxel.ai/api-reference/policies/list-policies
api-reference/controlplane.yml get /policies
Returns a list of all policies in the workspace.
# Update policy
Source: https://docs.blaxel.ai/api-reference/policies/update-policy
api-reference/controlplane.yml put /policies/{policyName}
Updates a policy.
# Create private cluster
Source: https://docs.blaxel.ai/api-reference/privateclusters/create-private-cluster
api-reference/controlplane.yml post /privateclusters
# Delete private cluster
Source: https://docs.blaxel.ai/api-reference/privateclusters/delete-private-cluster
api-reference/controlplane.yml delete /privateclusters/{privateClusterName}
# Get private cluster by name
Source: https://docs.blaxel.ai/api-reference/privateclusters/get-private-cluster-by-name
api-reference/controlplane.yml get /privateclusters/{privateClusterName}
# Get private cluster health
Source: https://docs.blaxel.ai/api-reference/privateclusters/get-private-cluster-health
api-reference/controlplane.yml get /privateclusters/{privateClusterName}/health
# List all private clusters
Source: https://docs.blaxel.ai/api-reference/privateclusters/list-all-private-clusters
api-reference/controlplane.yml get /privateclusters
# Update private cluster
Source: https://docs.blaxel.ai/api-reference/privateclusters/update-private-cluster
api-reference/controlplane.yml put /privateclusters/{privateClusterName}
# Update private cluster health
Source: https://docs.blaxel.ai/api-reference/privateclusters/update-private-cluster-health
api-reference/controlplane.yml post /privateclusters/{privateClusterName}/health
# Execute a command
Source: https://docs.blaxel.ai/api-reference/process/execute-a-command
https://raw.githubusercontent.com/blaxel-ai/sandbox/refs/heads/main/sandbox-api/docs/openapi.yml post /process
Execute a command and return process information
# Get process by identifier
Source: https://docs.blaxel.ai/api-reference/process/get-process-by-identifier
https://raw.githubusercontent.com/blaxel-ai/sandbox/refs/heads/main/sandbox-api/docs/openapi.yml get /process/{identifier}
Get information about a process by its PID or name
# Get process logs
Source: https://docs.blaxel.ai/api-reference/process/get-process-logs
https://raw.githubusercontent.com/blaxel-ai/sandbox/refs/heads/main/sandbox-api/docs/openapi.yml get /process/{identifier}/logs
Get the stdout and stderr output of a process
# Kill a process
Source: https://docs.blaxel.ai/api-reference/process/kill-a-process
https://raw.githubusercontent.com/blaxel-ai/sandbox/refs/heads/main/sandbox-api/docs/openapi.yml delete /process/{identifier}/kill
Forcefully kill a running process
# List all processes
Source: https://docs.blaxel.ai/api-reference/process/list-all-processes
https://raw.githubusercontent.com/blaxel-ai/sandbox/refs/heads/main/sandbox-api/docs/openapi.yml get /process
Get a list of all running and completed processes
# Stop a process
Source: https://docs.blaxel.ai/api-reference/process/stop-a-process
https://raw.githubusercontent.com/blaxel-ai/sandbox/refs/heads/main/sandbox-api/docs/openapi.yml delete /process/{identifier}
Gracefully stop a running process
# Stream process logs in real time
Source: https://docs.blaxel.ai/api-reference/process/stream-process-logs-in-real-time
https://raw.githubusercontent.com/blaxel-ai/sandbox/refs/heads/main/sandbox-api/docs/openapi.yml get /process/{identifier}/logs/stream
Streams the stdout and stderr output of a process in real time, one line per log, prefixed with 'stdout:' or 'stderr:'. Closes when the process exits or the client disconnects.
# Stream process logs in real time via WebSocket
Source: https://docs.blaxel.ai/api-reference/process/stream-process-logs-in-real-time-via-websocket
https://raw.githubusercontent.com/blaxel-ai/sandbox/refs/heads/main/sandbox-api/docs/openapi.yml get /ws/process/{identifier}/logs/stream
Streams the stdout and stderr output of a process in real time as JSON messages.
# Create API key for service account
Source: https://docs.blaxel.ai/api-reference/service_accounts/create-api-key-for-service-account
api-reference/controlplane.yml post /service_accounts/{clientId}/api_keys
Creates an API key for a service account.
# Create workspace service account
Source: https://docs.blaxel.ai/api-reference/service_accounts/create-workspace-service-account
api-reference/controlplane.yml post /service_accounts
Creates a service account in the workspace.
# Delete API key for service account
Source: https://docs.blaxel.ai/api-reference/service_accounts/delete-api-key-for-service-account
api-reference/controlplane.yml delete /service_accounts/{clientId}/api_keys/{apiKeyId}
Deletes an API key for a service account.
# Delete workspace service account
Source: https://docs.blaxel.ai/api-reference/service_accounts/delete-workspace-service-account
api-reference/controlplane.yml delete /service_accounts/{clientId}
Deletes a service account.
# Get workspace service accounts
Source: https://docs.blaxel.ai/api-reference/service_accounts/get-workspace-service-accounts
api-reference/controlplane.yml get /service_accounts
Returns a list of all service accounts in the workspace.
# List API keys for service account
Source: https://docs.blaxel.ai/api-reference/service_accounts/list-api-keys-for-service-account
api-reference/controlplane.yml get /service_accounts/{clientId}/api_keys
Returns a list of all API keys for a service account.
# Update workspace service account
Source: https://docs.blaxel.ai/api-reference/service_accounts/update-workspace-service-account
api-reference/controlplane.yml put /service_accounts/{clientId}
Updates a service account.
# List templates
Source: https://docs.blaxel.ai/api-reference/templates/list-templates
api-reference/controlplane.yml get /templates
Returns a list of all templates.
# Accept invitation to workspace
Source: https://docs.blaxel.ai/api-reference/workspaces/accept-invitation-to-workspace
api-reference/controlplane.yml post /workspaces/{workspaceName}/join
Accepts an invitation to a workspace.
# Check workspace availability
Source: https://docs.blaxel.ai/api-reference/workspaces/check-workspace-availability
api-reference/controlplane.yml post /workspaces/availability
Check if a workspace is available.
# Create worspace
Source: https://docs.blaxel.ai/api-reference/workspaces/create-worspace
api-reference/controlplane.yml post /workspaces
Creates a workspace.
# Decline invitation to workspace
Source: https://docs.blaxel.ai/api-reference/workspaces/decline-invitation-to-workspace
api-reference/controlplane.yml post /workspaces/{workspaceName}/decline
Declines an invitation to a workspace.
# Delete workspace
Source: https://docs.blaxel.ai/api-reference/workspaces/delete-workspace
api-reference/controlplane.yml delete /workspaces/{workspaceName}
Deletes a workspace by name.
# Get workspace
Source: https://docs.blaxel.ai/api-reference/workspaces/get-workspace
api-reference/controlplane.yml get /workspaces/{workspaceName}
Returns a workspace by name.
# Invite user to workspace
Source: https://docs.blaxel.ai/api-reference/workspaces/invite-user-to-workspace
api-reference/controlplane.yml post /users
Invites a user to the workspace by email.
# Leave workspace
Source: https://docs.blaxel.ai/api-reference/workspaces/leave-workspace
api-reference/controlplane.yml delete /workspaces/{workspaceName}/leave
Leaves a workspace.
# List users in workspace
Source: https://docs.blaxel.ai/api-reference/workspaces/list-users-in-workspace
api-reference/controlplane.yml get /users
Returns a list of all users in the workspace.
# List workspaces
Source: https://docs.blaxel.ai/api-reference/workspaces/list-workspaces
api-reference/controlplane.yml get /workspaces
Returns a list of all workspaces.
# Remove user from workspace or revoke invitation
Source: https://docs.blaxel.ai/api-reference/workspaces/remove-user-from-workspace-or-revoke-invitation
api-reference/controlplane.yml delete /users/{subOrEmail}
Removes a user from the workspace (or revokes an invitation if the user has not accepted the invitation yet).
# Update user role in workspace
Source: https://docs.blaxel.ai/api-reference/workspaces/update-user-role-in-workspace
api-reference/controlplane.yml put /users/{subOrEmail}
Updates the role of a user in the workspace.
# Update workspace
Source: https://docs.blaxel.ai/api-reference/workspaces/update-workspace
api-reference/controlplane.yml put /workspaces/{workspaceName}
Updates a workspace by name.
# bl apply
Source: https://docs.blaxel.ai/cli-reference/bl_apply
## bl apply
Apply a configuration to a resource by file
### Synopsis
Apply a configuration to a resource by file
```
bl apply [flags]
```
### Examples
```
bl apply -f ./my-deployment.yaml
# Or using stdin
cat file.yaml | bl apply -f -
```
### Options
```
-e, --env-file strings Environment file to load (default [.env])
-f, --filename string Path to YAML file to apply
-h, --help help for apply
-R, --recursive Process the directory used in -f, --filename recursively. Useful when you want to manage related manifests organized within the same directory.
-s, --secrets strings Secrets to deploy
```
### Options inherited from parent commands
```
-o, --output string Output format. One of: pretty,yaml,json,table
--skip-version-warning Skip version warning
-u, --utc Enable UTC timezone
-v, --verbose Enable verbose output
-w, --workspace string Specify the workspace name
```
### SEE ALSO
* [bl](bl.md) - Blaxel CLI is a command line tool to interact with Blaxel APIs.
# bl chat
Source: https://docs.blaxel.ai/cli-reference/bl_chat
## bl chat
Chat with an agent
```
bl chat [agent-name] [flags]
```
### Examples
```
bl chat my-agent
```
### Options
```
--debug Debug mode
--header strings Request headers in 'Key: Value' format. Can be specified multiple times
-h, --help help for chat
--local Run locally
```
### Options inherited from parent commands
```
-o, --output string Output format. One of: pretty,yaml,json,table
--skip-version-warning Skip version warning
-u, --utc Enable UTC timezone
-v, --verbose Enable verbose output
-w, --workspace string Specify the workspace name
```
### SEE ALSO
* [bl](bl.md) - Blaxel CLI is a command line tool to interact with Blaxel APIs.
# bl completion
Source: https://docs.blaxel.ai/cli-reference/bl_completion
## bl completion
Generate the autocompletion script for the specified shell
### Synopsis
Generate the autocompletion script for bl for the specified shell.
See each sub-command's help for details on how to use the generated script.
### Options
```
-h, --help help for completion
```
### Options inherited from parent commands
```
-o, --output string Output format. One of: pretty,yaml,json,table
--skip-version-warning Skip version warning
-u, --utc Enable UTC timezone
-v, --verbose Enable verbose output
-w, --workspace string Specify the workspace name
```
### SEE ALSO
* [bl](bl.md) - Blaxel CLI is a command line tool to interact with Blaxel APIs.
* [bl completion bash](bl_completion_bash.md) - Generate the autocompletion script for bash
* [bl completion fish](bl_completion_fish.md) - Generate the autocompletion script for fish
* [bl completion powershell](bl_completion_powershell.md) - Generate the autocompletion script for powershell
* [bl completion zsh](bl_completion_zsh.md) - Generate the autocompletion script for zsh
# bl completion fish
Source: https://docs.blaxel.ai/cli-reference/bl_completion_fish
## bl completion fish
Generate the autocompletion script for fish
### Synopsis
Generate the autocompletion script for the fish shell.
To load completions in your current shell session:
bl completion fish | source
To load completions for every new session, execute once:
bl completion fish > \~/.config/fish/completions/bl.fish
You will need to start a new shell for this setup to take effect.
```
bl completion fish [flags]
```
### Options
```
-h, --help help for fish
--no-descriptions disable completion descriptions
```
### Options inherited from parent commands
```
-o, --output string Output format. One of: pretty,yaml,json,table
--skip-version-warning Skip version warning
-u, --utc Enable UTC timezone
-v, --verbose Enable verbose output
-w, --workspace string Specify the workspace name
```
### SEE ALSO
* [bl completion](bl_completion.md) - Generate the autocompletion script for the specified shell
# bl completion powershell
Source: https://docs.blaxel.ai/cli-reference/bl_completion_powershell
## bl completion powershell
Generate the autocompletion script for powershell
### Synopsis
Generate the autocompletion script for powershell.
To load completions in your current shell session:
bl completion powershell | Out-String | Invoke-Expression
To load completions for every new session, add the output of the above command
to your powershell profile.
```
bl completion powershell [flags]
```
### Options
```
-h, --help help for powershell
--no-descriptions disable completion descriptions
```
### Options inherited from parent commands
```
-o, --output string Output format. One of: pretty,yaml,json,table
--skip-version-warning Skip version warning
-u, --utc Enable UTC timezone
-v, --verbose Enable verbose output
-w, --workspace string Specify the workspace name
```
### SEE ALSO
* [bl completion](bl_completion.md) - Generate the autocompletion script for the specified shell
# bl create-agent-app
Source: https://docs.blaxel.ai/cli-reference/bl_create-agent-app
## bl create-agent-app
Create a new blaxel agent app
### Synopsis
Create a new blaxel agent app
```
bl create-agent-app directory [flags]
```
### Examples
```
bl create-agent-app my-agent-app
```
### Options
```
-h, --help help for create-agent-app
```
### Options inherited from parent commands
```
-o, --output string Output format. One of: pretty,yaml,json,table
--skip-version-warning Skip version warning
-u, --utc Enable UTC timezone
-v, --verbose Enable verbose output
-w, --workspace string Specify the workspace name
```
### SEE ALSO
* [bl](bl.md) - Blaxel CLI is a command line tool to interact with Blaxel APIs.
# bl create-job
Source: https://docs.blaxel.ai/cli-reference/bl_create-job
## bl create-job
Create a new blaxel job
### Synopsis
Create a new blaxel job
```
bl create-job directory [flags]
```
### Examples
```
bl create-job my-job
```
### Options
```
-h, --help help for create-job
```
### Options inherited from parent commands
```
-o, --output string Output format. One of: pretty,yaml,json,table
--skip-version-warning Skip version warning
-u, --utc Enable UTC timezone
-v, --verbose Enable verbose output
-w, --workspace string Specify the workspace name
```
### SEE ALSO
* [bl](bl.md) - Blaxel CLI is a command line tool to interact with Blaxel APIs.
# bl create-mcp-server
Source: https://docs.blaxel.ai/cli-reference/bl_create-mcp-server
## bl create-mcp-server
Create a new blaxel mcp server
### Synopsis
Create a new blaxel mcp server
```
bl create-mcp-server directory [flags]
```
### Examples
```
bl create-mcpserver my-mcp-server
```
### Options
```
-h, --help help for create-mcp-server
```
### Options inherited from parent commands
```
-o, --output string Output format. One of: pretty,yaml,json,table
--skip-version-warning Skip version warning
-u, --utc Enable UTC timezone
-v, --verbose Enable verbose output
-w, --workspace string Specify the workspace name
```
### SEE ALSO
* [bl](bl.md) - Blaxel CLI is a command line tool to interact with Blaxel APIs.
# bl delete
Source: https://docs.blaxel.ai/cli-reference/bl_delete
## bl delete
Delete a resource
```
bl delete [flags]
```
### Examples
```
bl delete -f ./my-resource.yaml
# Or using stdin
cat file.yaml | blaxel delete -f -
```
### Options
```
-f, --filename string containing the resource to delete.
-h, --help help for delete
-R, --recursive Process the directory used in -f, --filename recursively. Useful when you want to manage related manifests organized within the same directory.
```
### Options inherited from parent commands
```
-o, --output string Output format. One of: pretty,yaml,json,table
--skip-version-warning Skip version warning
-u, --utc Enable UTC timezone
-v, --verbose Enable verbose output
-w, --workspace string Specify the workspace name
```
### SEE ALSO
* [bl](bl.md) - Blaxel CLI is a command line tool to interact with Blaxel APIs.
* [bl delete agent](bl_delete_agent.md) - Delete agent
* [bl delete function](bl_delete_function.md) - Delete function
* [bl delete integrationconnection](bl_delete_integrationconnection.md) - Delete integrationconnection
* [bl delete job](bl_delete_job.md) - Delete job
* [bl delete model](bl_delete_model.md) - Delete model
* [bl delete policy](bl_delete_policy.md) - Delete policy
* [bl delete sandbox](bl_delete_sandbox.md) - Delete sandbox
# bl delete agent
Source: https://docs.blaxel.ai/cli-reference/bl_delete_agent
## bl delete agent
Delete agent
```
bl delete agent name [flags]
```
### Options
```
-h, --help help for agent
```
### Options inherited from parent commands
```
-o, --output string Output format. One of: pretty,yaml,json,table
--skip-version-warning Skip version warning
-u, --utc Enable UTC timezone
-v, --verbose Enable verbose output
-w, --workspace string Specify the workspace name
```
### SEE ALSO
* [bl delete](bl_delete.md) - Delete a resource
# bl delete function
Source: https://docs.blaxel.ai/cli-reference/bl_delete_function
## bl delete function
Delete function
```
bl delete function name [flags]
```
### Options
```
-h, --help help for function
```
### Options inherited from parent commands
```
-o, --output string Output format. One of: pretty,yaml,json,table
--skip-version-warning Skip version warning
-u, --utc Enable UTC timezone
-v, --verbose Enable verbose output
-w, --workspace string Specify the workspace name
```
### SEE ALSO
* [bl delete](bl_delete.md) - Delete a resource
# bl delete integrationconnection
Source: https://docs.blaxel.ai/cli-reference/bl_delete_integrationconnection
## bl delete integrationconnection
Delete integrationconnection
```
bl delete integrationconnection name [flags]
```
### Options
```
-h, --help help for integrationconnection
```
### Options inherited from parent commands
```
-o, --output string Output format. One of: pretty,yaml,json,table
--skip-version-warning Skip version warning
-u, --utc Enable UTC timezone
-v, --verbose Enable verbose output
-w, --workspace string Specify the workspace name
```
### SEE ALSO
* [bl delete](bl_delete.md) - Delete a resource
# bl delete job
Source: https://docs.blaxel.ai/cli-reference/bl_delete_job
## bl delete job
Delete job
```
bl delete job name [flags]
```
### Options
```
-h, --help help for job
```
### Options inherited from parent commands
```
-o, --output string Output format. One of: pretty,yaml,json,table
--skip-version-warning Skip version warning
-u, --utc Enable UTC timezone
-v, --verbose Enable verbose output
-w, --workspace string Specify the workspace name
```
### SEE ALSO
* [bl delete](bl_delete.md) - Delete a resource
# bl delete model
Source: https://docs.blaxel.ai/cli-reference/bl_delete_model
## bl delete model
Delete model
```
bl delete model name [flags]
```
### Options
```
-h, --help help for model
```
### Options inherited from parent commands
```
-o, --output string Output format. One of: pretty,yaml,json,table
--skip-version-warning Skip version warning
-u, --utc Enable UTC timezone
-v, --verbose Enable verbose output
-w, --workspace string Specify the workspace name
```
### SEE ALSO
* [bl delete](bl_delete.md) - Delete a resource
# bl delete policy
Source: https://docs.blaxel.ai/cli-reference/bl_delete_policy
## bl delete policy
Delete policy
```
bl delete policy name [flags]
```
### Options
```
-h, --help help for policy
```
### Options inherited from parent commands
```
-o, --output string Output format. One of: pretty,yaml,json,table
--skip-version-warning Skip version warning
-u, --utc Enable UTC timezone
-v, --verbose Enable verbose output
-w, --workspace string Specify the workspace name
```
### SEE ALSO
* [bl delete](bl_delete.md) - Delete a resource
# bl delete sandbox
Source: https://docs.blaxel.ai/cli-reference/bl_delete_sandbox
## bl delete sandbox
Delete sandbox
```
bl delete sandbox name [flags]
```
### Options
```
-h, --help help for sandbox
```
### Options inherited from parent commands
```
-o, --output string Output format. One of: pretty,yaml,json,table
--skip-version-warning Skip version warning
-u, --utc Enable UTC timezone
-v, --verbose Enable verbose output
-w, --workspace string Specify the workspace name
```
### SEE ALSO
* [bl delete](bl_delete.md) - Delete a resource
# bl deploy
Source: https://docs.blaxel.ai/cli-reference/bl_deploy
## bl deploy
Deploy on blaxel
### Synopsis
Deploy agent, mcp or job on blaxel, you must be in a blaxel directory.
```
bl deploy [flags]
```
### Examples
```
bl deploy
```
### Options
```
-d, --directory string Deployment app path, can be a sub directory
--dryrun Dry run the deployment
-e, --env-file strings Environment file to load (default [.env])
-h, --help help for deploy
-n, --name string Optional name for the deployment
-r, --recursive Deploy recursively (default true)
-s, --secrets strings Secrets to deploy
```
### Options inherited from parent commands
```
-o, --output string Output format. One of: pretty,yaml,json,table
--skip-version-warning Skip version warning
-u, --utc Enable UTC timezone
-v, --verbose Enable verbose output
-w, --workspace string Specify the workspace name
```
### SEE ALSO
* [bl](bl.md) - Blaxel CLI is a command line tool to interact with Blaxel APIs.
# bl get
Source: https://docs.blaxel.ai/cli-reference/bl_get
## bl get
Get a resource
### Options
```
-h, --help help for get
--watch After listing/getting the requested object, watch for changes.
```
### Options inherited from parent commands
```
-o, --output string Output format. One of: pretty,yaml,json,table
--skip-version-warning Skip version warning
-u, --utc Enable UTC timezone
-v, --verbose Enable verbose output
-w, --workspace string Specify the workspace name
```
### SEE ALSO
* [bl](bl.md) - Blaxel CLI is a command line tool to interact with Blaxel APIs.
* [bl get agents](bl_get_agents.md) - Get a Agent
* [bl get functions](bl_get_functions.md) - Get a Function
* [bl get integrationconnections](bl_get_integrationconnections.md) - Get a IntegrationConnection
* [bl get jobs](bl_get_jobs.md) - Get a Job
* [bl get models](bl_get_models.md) - Get a Model
* [bl get policies](bl_get_policies.md) - Get a Policy
* [bl get sandboxes](bl_get_sandboxes.md) - Get a Sandbox
# bl get agents
Source: https://docs.blaxel.ai/cli-reference/bl_get_agents
## bl get agents
Get a Agent
```
bl get agents [flags]
```
### Options
```
-h, --help help for agents
```
### Options inherited from parent commands
```
-o, --output string Output format. One of: pretty,yaml,json,table
--skip-version-warning Skip version warning
-u, --utc Enable UTC timezone
-v, --verbose Enable verbose output
--watch After listing/getting the requested object, watch for changes.
-w, --workspace string Specify the workspace name
```
### SEE ALSO
* [bl get](bl_get.md) - Get a resource
# bl get functions
Source: https://docs.blaxel.ai/cli-reference/bl_get_functions
## bl get functions
Get a Function
```
bl get functions [flags]
```
### Options
```
-h, --help help for functions
```
### Options inherited from parent commands
```
-o, --output string Output format. One of: pretty,yaml,json,table
--skip-version-warning Skip version warning
-u, --utc Enable UTC timezone
-v, --verbose Enable verbose output
--watch After listing/getting the requested object, watch for changes.
-w, --workspace string Specify the workspace name
```
### SEE ALSO
* [bl get](bl_get.md) - Get a resource
# bl get integrationconnections
Source: https://docs.blaxel.ai/cli-reference/bl_get_integrationconnections
## bl get integrationconnections
Get a IntegrationConnection
```
bl get integrationconnections [flags]
```
### Options
```
-h, --help help for integrationconnections
```
### Options inherited from parent commands
```
-o, --output string Output format. One of: pretty,yaml,json,table
--skip-version-warning Skip version warning
-u, --utc Enable UTC timezone
-v, --verbose Enable verbose output
--watch After listing/getting the requested object, watch for changes.
-w, --workspace string Specify the workspace name
```
### SEE ALSO
* [bl get](bl_get.md) - Get a resource
# bl get jobs
Source: https://docs.blaxel.ai/cli-reference/bl_get_jobs
## bl get jobs
Get a Job
```
bl get jobs [flags]
```
### Options
```
-h, --help help for jobs
```
### Options inherited from parent commands
```
-o, --output string Output format. One of: pretty,yaml,json,table
--skip-version-warning Skip version warning
-u, --utc Enable UTC timezone
-v, --verbose Enable verbose output
--watch After listing/getting the requested object, watch for changes.
-w, --workspace string Specify the workspace name
```
### SEE ALSO
* [bl get](bl_get.md) - Get a resource
# bl get models
Source: https://docs.blaxel.ai/cli-reference/bl_get_models
## bl get models
Get a Model
```
bl get models [flags]
```
### Options
```
-h, --help help for models
```
### Options inherited from parent commands
```
-o, --output string Output format. One of: pretty,yaml,json,table
--skip-version-warning Skip version warning
-u, --utc Enable UTC timezone
-v, --verbose Enable verbose output
--watch After listing/getting the requested object, watch for changes.
-w, --workspace string Specify the workspace name
```
### SEE ALSO
* [bl get](bl_get.md) - Get a resource
# bl get policies
Source: https://docs.blaxel.ai/cli-reference/bl_get_policies
## bl get policies
Get a Policy
```
bl get policies [flags]
```
### Options
```
-h, --help help for policies
```
### Options inherited from parent commands
```
-o, --output string Output format. One of: pretty,yaml,json,table
--skip-version-warning Skip version warning
-u, --utc Enable UTC timezone
-v, --verbose Enable verbose output
--watch After listing/getting the requested object, watch for changes.
-w, --workspace string Specify the workspace name
```
### SEE ALSO
* [bl get](bl_get.md) - Get a resource
# bl get sandboxes
Source: https://docs.blaxel.ai/cli-reference/bl_get_sandboxes
## bl get sandboxes
Get a Sandbox
```
bl get sandboxes [flags]
```
### Options
```
-h, --help help for sandboxes
```
### Options inherited from parent commands
```
-o, --output string Output format. One of: pretty,yaml,json,table
--skip-version-warning Skip version warning
-u, --utc Enable UTC timezone
-v, --verbose Enable verbose output
--watch After listing/getting the requested object, watch for changes.
-w, --workspace string Specify the workspace name
```
### SEE ALSO
* [bl get](bl_get.md) - Get a resource
# bl login
Source: https://docs.blaxel.ai/cli-reference/bl_login
## bl login
Login to Blaxel
```
bl login [workspace] [flags]
```
### Options
```
-h, --help help for login
```
### Options inherited from parent commands
```
-o, --output string Output format. One of: pretty,yaml,json,table
--skip-version-warning Skip version warning
-u, --utc Enable UTC timezone
-v, --verbose Enable verbose output
-w, --workspace string Specify the workspace name
```
### SEE ALSO
* [bl](bl.md) - Blaxel CLI is a command line tool to interact with Blaxel APIs.
# bl logout
Source: https://docs.blaxel.ai/cli-reference/bl_logout
## bl logout
Logout from Blaxel
```
bl logout [workspace] [flags]
```
### Options
```
-h, --help help for logout
```
### Options inherited from parent commands
```
-o, --output string Output format. One of: pretty,yaml,json,table
--skip-version-warning Skip version warning
-u, --utc Enable UTC timezone
-v, --verbose Enable verbose output
-w, --workspace string Specify the workspace name
```
### SEE ALSO
* [bl](bl.md) - Blaxel CLI is a command line tool to interact with Blaxel APIs.
# bl run
Source: https://docs.blaxel.ai/cli-reference/bl_run
## bl run
Run a resource on blaxel
```
bl run resource-type resource-name [flags]
```
### Examples
```
bl run agent my-agent --data '{"inputs": "Hello, world!"}'
bl run model my-model --data '{"inputs": "Hello, world!"}'
bl run job my-job --file myjob.json
```
### Options
```
-d, --data string JSON body data for the inference request
--debug Debug mode
--directory string Directory to run the command from
-e, --env-file strings Environment file to load (default [.env])
-f, --file string Input from a file
--header stringArray Request headers in 'Key: Value' format. Can be specified multiple times
-h, --help help for run
--local Run locally
--method string HTTP method for the inference request (default "POST")
--params strings Query params sent to the inference request
--path string path for the inference request
-s, --secrets strings Secrets to deploy
--upload-file string This transfers the specified local file to the remote URL
```
### Options inherited from parent commands
```
-o, --output string Output format. One of: pretty,yaml,json,table
--skip-version-warning Skip version warning
-u, --utc Enable UTC timezone
-v, --verbose Enable verbose output
-w, --workspace string Specify the workspace name
```
### SEE ALSO
* [bl](bl.md) - Blaxel CLI is a command line tool to interact with Blaxel APIs.
# bl serve
Source: https://docs.blaxel.ai/cli-reference/bl_serve
## bl serve
Serve a blaxel project
### Synopsis
Serve a blaxel project
```
bl serve [flags]
```
### Examples
```
bl serve --remote --hotreload --port 1338
```
### Options
```
-d, --directory string Serve the project from a sub directory
-e, --env-file strings Environment file to load (default [.env])
-h, --help help for serve
-H, --host string Bind socket to this port. If 0, an available port will be picked (default "0.0.0.0")
--hotreload Watch for changes in the project
-p, --port int Bind socket to this host (default 1338)
-r, --recursive Serve the project recursively (default true)
-s, --secrets strings Secrets to deploy
```
### Options inherited from parent commands
```
-o, --output string Output format. One of: pretty,yaml,json,table
--skip-version-warning Skip version warning
-u, --utc Enable UTC timezone
-v, --verbose Enable verbose output
-w, --workspace string Specify the workspace name
```
### SEE ALSO
* [bl](bl.md) - Blaxel CLI is a command line tool to interact with Blaxel APIs.
# bl version
Source: https://docs.blaxel.ai/cli-reference/bl_version
## bl version
Print the version number
```
bl version [flags]
```
### Options
```
-h, --help help for version
```
### Options inherited from parent commands
```
-o, --output string Output format. One of: pretty,yaml,json,table
--skip-version-warning Skip version warning
-u, --utc Enable UTC timezone
-v, --verbose Enable verbose output
-w, --workspace string Specify the workspace name
```
### SEE ALSO
* [bl](bl.md) - Blaxel CLI is a command line tool to interact with Blaxel APIs.
# bl workspaces
Source: https://docs.blaxel.ai/cli-reference/bl_workspaces
## bl workspaces
List all workspaces with the current workspace highlighted, set optionally a new current workspace
```
bl workspaces [workspace] [flags]
```
### Options
```
-h, --help help for workspaces
```
### Options inherited from parent commands
```
-o, --output string Output format. One of: pretty,yaml,json,table
--skip-version-warning Skip version warning
-u, --utc Enable UTC timezone
-v, --verbose Enable verbose output
-w, --workspace string Specify the workspace name
```
### SEE ALSO
* [bl](bl.md) - Blaxel CLI is a command line tool to interact with Blaxel APIs.
# Blaxel CLI
Source: https://docs.blaxel.ai/cli-reference/introduction
Interact with Blaxel through a command line interface.
Blaxel CLI is a command line tool to interact with the Blaxel APIs.
## Install
To install Blaxel CLI, you must use [Homebrew](https://brew.sh/): make sure it is installed on your machine. We are currently in the process of supporting additional installers. Check out the cURL method down below for general installation.
Install Blaxel CLI by running the two following commands successively in a terminal:
```shell
brew tap blaxel-ai/blaxel
```
```shell
brew install blaxel
```
Install Blaxel CLI by running the following command in a terminal (alternatives below):
```shell
curl -fsSL \
https://raw.githubusercontent.com/blaxel-ai/toolkit/main/install.sh \
| BINDIR=/usr/local/bin sudo -E sh
```
If you need to specify a version (e.g. v0.1.21):
```shell
curl -fsSL \
https://raw.githubusercontent.com/blaxel-ai/toolkit/main/install.sh \
| VERSION=v0.1.21 BINDIR=/usr/local/bin sudo -E sh
```
Install Blaxel CLI by running the following command in a terminal (alternatives below):
```shell
curl -fsSL \
https://raw.githubusercontent.com/blaxel-ai/toolkit/main/install.sh \
| BINDIR=/usr/local/bin sudo -E sh
```
If you need to specify a version (e.g. v0.1.21):
```shell
curl -fsSL \
https://raw.githubusercontent.com/blaxel-ai/toolkit/main/install.sh \
| VERSION=v0.1.21 BINDIR=/usr/local/bin sudo -E sh
```
For the most reliable solution, we recommend adapting the aforementioned Linux commands by using Windows Subsystem for Linux.
First install WSL (Windows Subsystem for Linux) if not already installed. This can be done by:
* Opening PowerShell as Administrator
* Running: `wsl --install -d Ubuntu-20.04`
* Restarting the computer
* From the Microsoft Store, install the Ubuntu app
* Run the command line using the aforementioned Linux installation process. Make sure to install using **sudo**.
## Update
To update Blaxel CLI, you must use [Homebrew](https://brew.sh/): make sure it is installed on your machine. We are currently in the process of supporting additional installers. Check out the cURL method down below for general installation.
```shell
brew upgrade blaxel
```
Update Blaxel CLI by running the following command in a terminal (alternatives below):
```shell
curl -fsSL \
https://raw.githubusercontent.com/blaxel-ai/toolkit/main/install.sh \
| BINDIR=/usr/local/bin sudo -E sh
```
If you need to specify a version (e.g. 0.1.21):
```shell
curl -fsSL \
https://raw.githubusercontent.com/blaxel-ai/toolkit/main/install.sh \
| VERSION=v0.1.21 BINDIR=/usr/local/bin sudo -E sh
```
For the most reliable solution, we recommend adapting the aforementioned Linux commands by using Windows Subsystem for Linux.
First make sure WSL (Windows Subsystem for Linux) is installed if not already. This can be done by:
* Opening PowerShell as Administrator
* Running: `wsl --install -d Ubuntu-20.04`
* Restarting the computer
* From the Microsoft Store, install the Ubuntu app
* Run the command line using the aforementioned Linux installation process. Make sure to install using **sudo**.
## Get started
To get started with Blaxel CLI, your must first create a [workspace](../Security/Workspace-access-control) on the Blaxel console. Then, login to Blaxel using this command. Find your **workspace ID in the top left sidebar corner** of Blaxel Console:
```bash
bl login <>
```
You will be prompted to finish login using either an [API key](../Security/Access-tokens), or through your browser.
Set a workspace to use as a context for the session by using the following command:
```bash
bl workspaces your-workspace
### You can retrieve the list of all your workspaces by running:
bl workspaces
```
You can now run any command to interact with Blaxel resources in your workspace. For example, to list agents:
```bash
bl get agents
```
## **Options**
```
-h, --help Get the help for Blaxel
-w, --workspace string Specify the Blaxel workspace to work on.
-o, --output string Output format. One of: pretty, yaml, json, table
-v, --verbose Enable verbose output
```
# Blaxel SDK
Source: https://docs.blaxel.ai/sdk-reference/introduction
Manage Blaxel resources programmatically using our SDKs.
Blaxel features a SDK in two languages: **Python and TypeScript**. Check out down below the installation instructions, as well as documentation on **how the SDK** **authenticates** to Blaxel.
## Install
Install the TypeScript SDK.
Install the Python SDK.
## How authentication works
The Blaxel SDK authenticates with your workspace using credentials from these sources, in priority order:
1. when running on Blaxel, authentication is handled automatically
2. variables in your `.env` file (`BL_WORKSPACE` and `BL_API_KEY`, or see [this page](../Agents/Variables-and-secrets) for other authentication options).
3. environment variables from your machine
4. configuration file created locally when you log in through [Blaxel CLI](../cli-reference/introduction) (or deploy on Blaxel)
When developing locally, the recommended method is to just **log in to your workspace with Blaxel CLI.** This allows you to run Blaxel SDK functions that will automatically connect to your workspace without additional setup. When you deploy on Blaxel, this connection persists automatically.
When running Blaxel SDK from a remote server that is not Blaxel-hosted, we recommend using environment variables as described in the third option above.
## Complete SDK reference
Visit the GitHub pages below for detailed documentation on each SDK's commands and classes.
Open the GitHub repository for Blaxel SDK in TypeScript.
Open the GitHub repository for Blaxel SDK in Python.
# Python SDK
Source: https://docs.blaxel.ai/sdk-reference/sdk-python
Manage Blaxel resources programmatically using our Python SDK.
Blaxel features a SDK in **Python**. Check out down below the installation instructions down below.
The Blaxel SDK authenticates with your workspace using credentials from these sources, in priority order:
1. when running on Blaxel, authentication is handled automatically
2. variables in your `.env` file (`BL_WORKSPACE` and `BL_API_KEY`, or see [this page](../Agents/Variables-and-secrets) for other authentication options).
3. environment variables from your machine
4. configuration file created locally when you log in through [Blaxel CLI](../cli-reference/introduction) (or deploy on Blaxel)
When developing locally, the recommended method is to just **log in to your workspace with Blaxel CLI.** This allows you to run Blaxel SDK functions that will automatically connect to your workspace without additional setup. When you deploy on Blaxel, this connection persists automatically.
When running Blaxel SDK from a remote server that is not Blaxel-hosted, we recommend using environment variables as described in the third option above.
## Install
```shell Python (pip)
pip install blaxel
```
```shell Python (uv)
uv pip install blaxel
```
```shell Python (uv add)
uv init && uv add blaxel
```
Guides
Use Blaxel SDK to create and connect to sandboxes and sandbox previews.
Use Blaxel SDK to manage the filesystem, processes and logs of a sandbox.
Use Blaxel SDK to retrieve tools from a deployed MCP server.
Use Blaxel SDK to retrieve an LLM client when building agents.
Use Blaxel SDK to create and host a custom MCP server.
Use Blaxel SDK to chain calls to multiple agents.
## Complete SDK reference
Visit the GitHub page below for detailed documentation on the SDK's commands and classes.
Open the GitHub repository for Blaxel SDK in Python.
# TypeScript SDK
Source: https://docs.blaxel.ai/sdk-reference/sdk-ts
Manage Blaxel resources programmatically using our TypeScript SDK.
Blaxel features a SDK in **TypeScript**. Check out down below the installation instructions down below.
The Blaxel SDK authenticates with your workspace using credentials from these sources, in priority order:
1. when running on Blaxel, authentication is handled automatically
2. variables in your `.env` file (`BL_WORKSPACE` and `BL_API_KEY`, or see [this page](../Agents/Variables-and-secrets) for other authentication options).
3. environment variables from your machine
4. configuration file created locally when you log in through [Blaxel CLI](../cli-reference/introduction) (or deploy on Blaxel)
When developing locally, the recommended method is to just **log in to your workspace with Blaxel CLI.** This allows you to run Blaxel SDK functions that will automatically connect to your workspace without additional setup. When you deploy on Blaxel, this connection persists automatically.
When running Blaxel SDK from a remote server that is not Blaxel-hosted, we recommend using environment variables as described in the third option above.
## Install
To manage Blaxel resources, use the core SDK `@blaxel/core`:
```shell TypeScript (pnpm)
pnpm install @blaxel/core
```
```shell TypeScript (npm)
npm install @blaxel/core
```
```shell TypeScript (yarn)
yarn add @blaxel/core
```
```shell TypeScript (bun)
bun add @blaxel/core
```
For automatic trace and metric exports when running workloads with Blaxel SDK, you'll want to use `@blaxel/telemetry`. Import this SDK at your project's entry point.
```shell TypeScript (pnpm)
pnpm install @blaxel/telemetry
```
```shell TypeScript (npm)
npm install @blaxel/telemetry
```
```shell TypeScript (yarn)
yarn add @blaxel/telemetry
```
```shell TypeScript (bun)
bun add @blaxel/telemetry
```
For compatibility with agent’s frameworks (i.e. to import tools and models in the framework’s format), import the corresponding SDK:
```shell TypeScript (pnpm)
pnpm install @blaxel/langgraph
pnpm install @blaxel/vercel
pnpm install @blaxel/mastra
pnpm install @blaxel/llamaindex
```
```shell TypeScript (npm)
npm install @blaxel/telemetry
npm install @blaxel/vercel
npm install @blaxel/mastra
npm install @blaxel/llamaindex
```
```shell TypeScript (yarn)
yarn add @blaxel/telemetry
yarn add @blaxel/vercel
yarn add @blaxel/mastra
yarn add @blaxel/llamaindex
```
```shell TypeScript (bun)
bun add @blaxel/telemetry
bun add @blaxel/vercel
bun add @blaxel/mastra
bun add @blaxel/llamaindex
```
## Guides
Use Blaxel SDK to create and connect to sandboxes and sandbox previews.
Use Blaxel SDK to manage the filesystem, processes and logs of a sandbox.
Use Blaxel SDK to retrieve tools from a deployed MCP server.
Use Blaxel SDK to retrieve an LLM client when building agents.
Use Blaxel SDK to create and host a custom MCP server.
Use Blaxel SDK to chain calls to multiple agents.
## Complete SDK reference
Visit the GitHub page below for detailed documentation on the SDK's commands and classes.
Open the GitHub repository for Blaxel SDK in TypeScript.