
Concepts
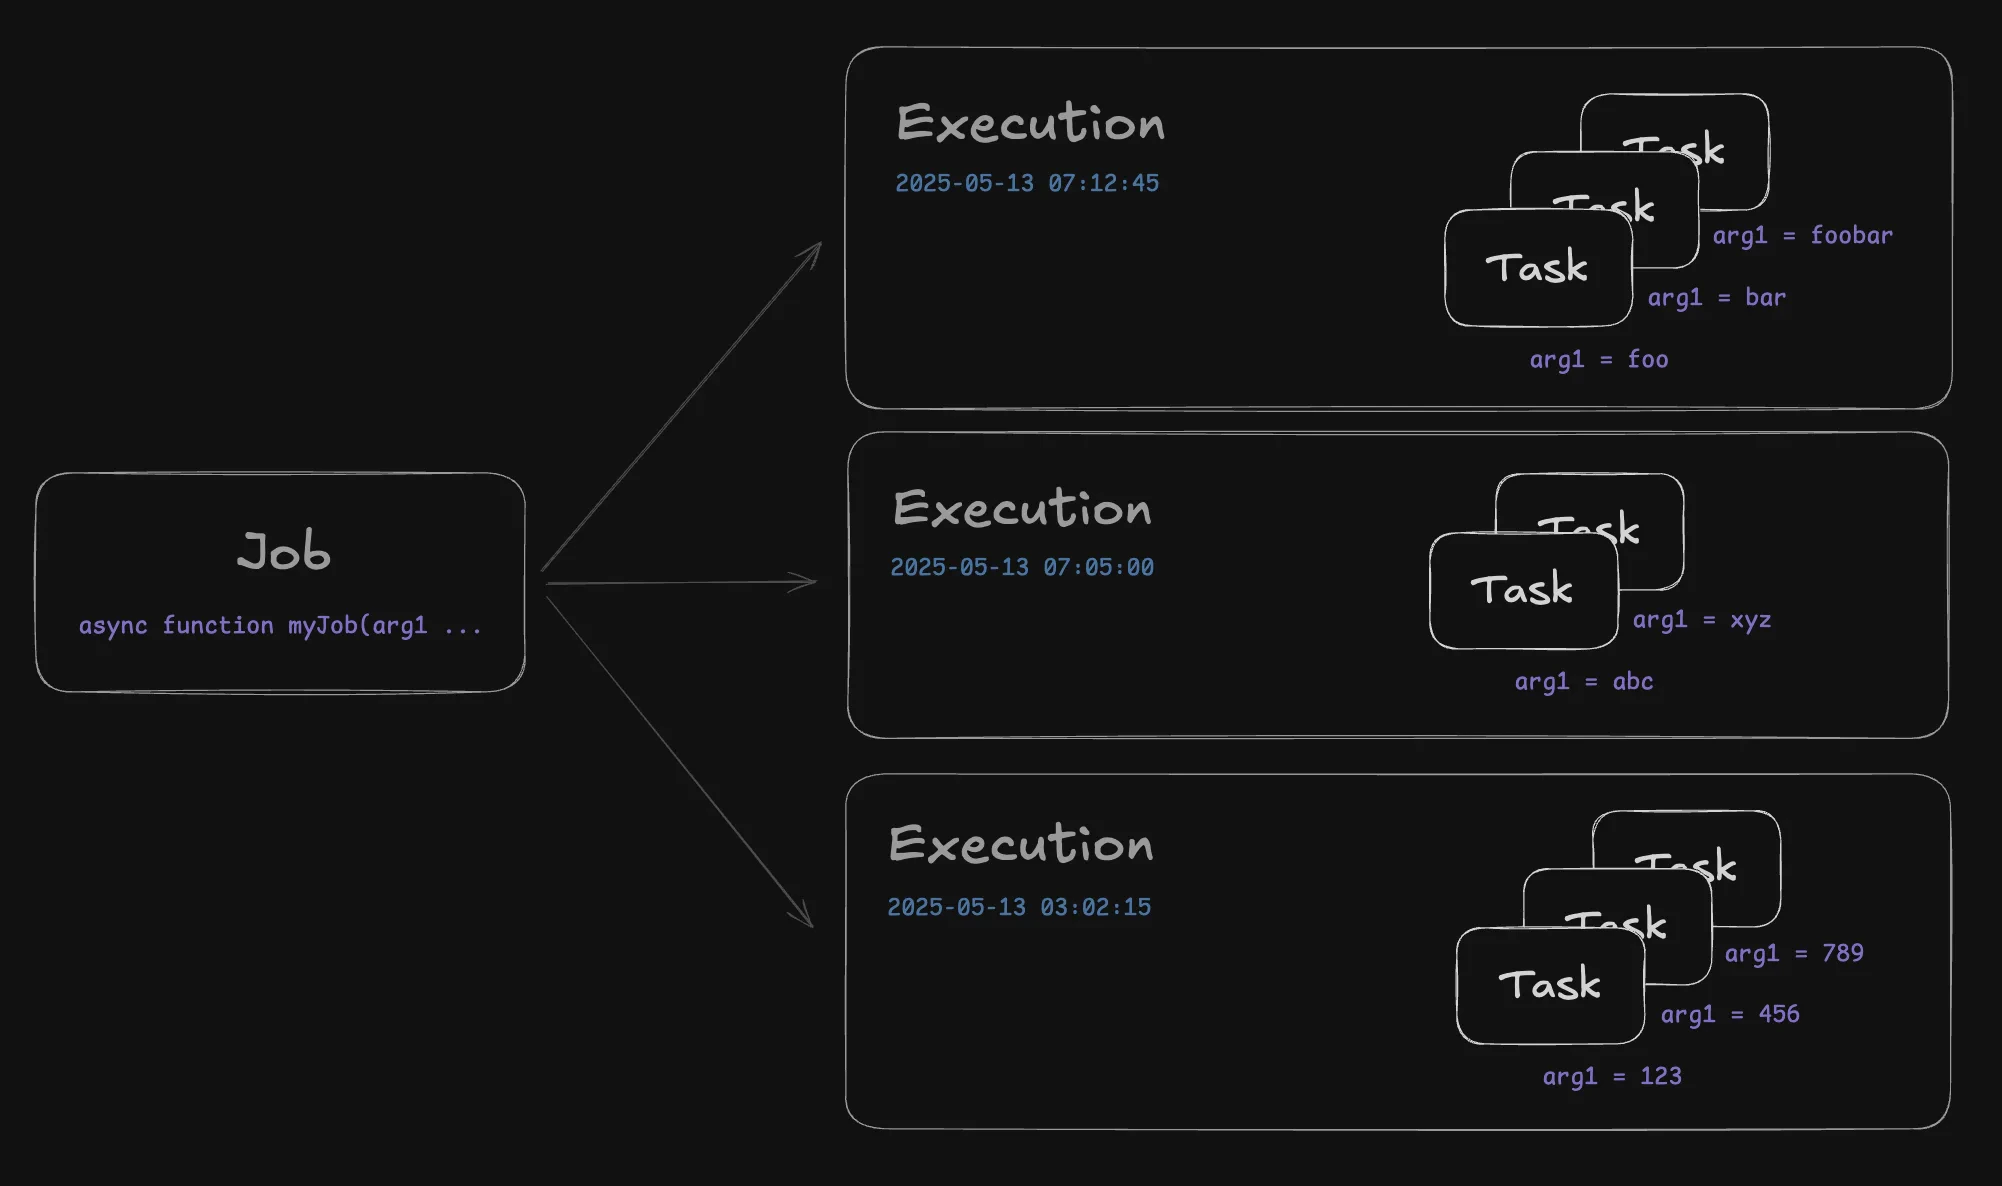
- Job: A code definition that specifies a batch processing task. Jobs can run multiple times within a single execution and accept optional input parameters.
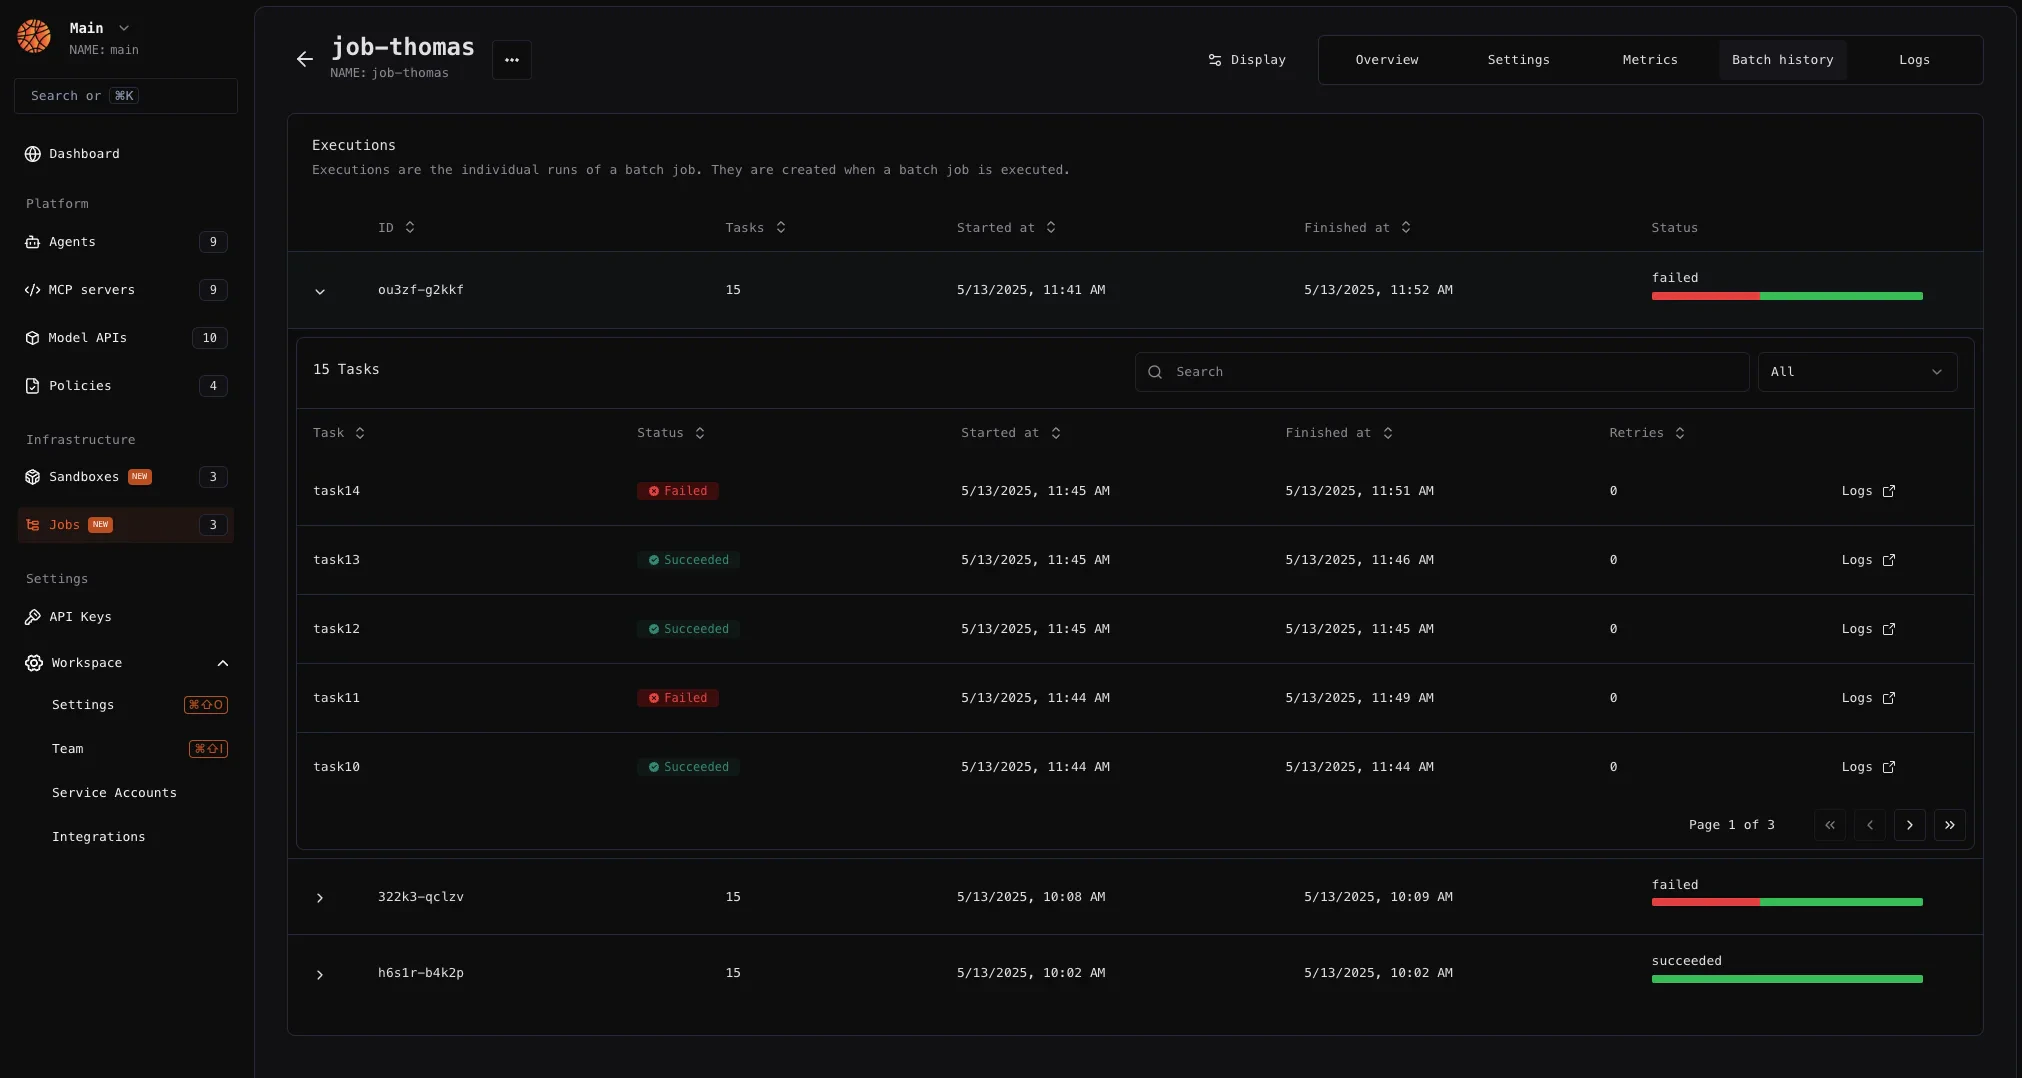
- Execution: A specific instance of running a batch job at a given timestamp. Each execution consists of multiple tasks running in parallel.
- Task: A single instance of a job definition running as part of an execution.

Quickstart
It is required to have npm (TypeScript) or uv (Python) installed to use the following command.
bl new
.
index.ts
.
Deploy a job with Blaxel CLI
This section assumes you have developed a job locally. The Blaxel SDK allows you to connect to and orchestrate other resources (such as model APIs, tool servers, multi-agents) during development, and ensures telemetry, secure connections to third-party systems or private networks, smart global placement of workflows, and much more when jobs are deployed.Set up authentication to Blaxel
Set up authentication to Blaxel
The Blaxel SDK authenticates with your workspace using credentials from these sources, in priority order:
- when running on Blaxel, authentication is handled automatically
- variables in your
.env
file (BL_WORKSPACE
andBL_API_KEY
, or see this page for other authentication options). - environment variables from your machine
- configuration file created locally when you log in through Blaxel CLI (or deploy on Blaxel)
Serve locally
You can serve the job locally in order to make the entrypoint function (by default:index.py
/ index.ts
) available on a local endpoint.
Run the following command to serve the job:
--hotreload
to get live changes.
Deploy on production
You can deploy the job in order to make the entrypoint function (by default:index.ts
/ server.py
) callable on a global endpoint. When deploying to Blaxel, you get a dedicated endpoint that enforces your deployment policies.
Run the following command to build and deploy a local job on Blaxel:
Run a job
You can run a job via API or using Blaxel CLI, or schedule it to run periodically via a cron. API Start a batch job execution by calling the inference API for your batch job.Execute a job
Example of using this API in TypeScript
blaxel.toml
configuration file (read full reference on blaxel.toml down below):
Retries
You can set a maximum number of retries per task in the job definition. Check out the reference forblaxel.toml
configuration file down below.
Deploy with a Dockerfile
While Blaxel uses predefined, optimized container images to build and deploy your code, you can also deploy your workload using your own Dockerfile.Deploy using Dockerfile
Deploy resources using a custom Dockerfile.
Template directory reference
Overview
package.json
Here the most notable imports are the scripts. They are used for thebl serve
and bl deploy
commands.
scripts
are not required. With TypeScript, all 4 of them are used.
start
: start the job locally through the TypeScript command, to avoid having to build the project when developing.prod
: start the job remotely from the dist folder, the project needs to be have been built before.build
: build the project. It is done automatically when deploying.
blaxel.toml
This file is used to configure the deployment of the job on Blaxel. The only mandatory parameter is thetype
so Blaxel knows which kind of entity to deploy. Others are not mandatory but allow you to customize the deployment.
name
,workspace
, andtype
fields are optional and serve as default values. Any bl command run in the folder will use these defaults rather than prompting you for input.policies
fields is also optional. It allow you to specify a Blaxel policy to customize the deployment. For example, deploy it only in a specific region of the world.[env]
section defines environment variables that the job can access via the SDK. Note that these are NOT secrets.[runtime]
section allows to override job execution parameters: maximum number of concurrent tasks, maximum number of retries for each task, timeout (in s), or memory (in MB) to allocate.[tasks]
sections allows to specify[[triggers]]
and[triggers.configuration]
sections defines ways to schedule job executions.type = "http"
lets you create an HTTP endpoint to execute the jobtype = "cron"
lets you create a cron schedule for the job to run periodically. The job will be executed without any argument by default. You can override this by passing:tasks = [{my_arg="my_value"}]
containing a list of task to execute at each occurence of the cron (default value is one task, without arguments) A private HTTP endpoint is always created by default, even if you donβt define any trigger here.