Learn more about authentication on Blaxel
Learn more about authentication on Blaxel
The Blaxel SDK requires two environment variables to authenticate:When developing locally, you can also log in to your workspace with Blaxel CLI (as shown above). This allows you to run Blaxel SDK functions that will automatically connect to your workspace without additional setup. When you deploy on Blaxel, authentication is handled automatically — no environment variables needed.
You can create an API key from the Blaxel console. Your workspace name is visible in the URL when you log in to the console (e.g.
app.blaxel.ai/{workspace}).Set them as environment variables or add them to a .env file at the root of your project:Deploy on production
You can deploy the job in order to make the entrypoint function (by default:index.ts / server.py) callable on a global endpoint. When deploying to Blaxel, you get a dedicated endpoint that enforces your deployment policies.
Run the following command to build and deploy a local job on Blaxel:
bl push to build and push the job container image to the Blaxel registry. bl push only publishes the image; it does not create a new sandbox deployment, update existing deployments, or restart running processes. This is useful for preparing images in advance.
Run a job
Each deployed job has an HTTP endpoint to trigger a batch execution. You can find this endpoint in the Blaxel console, on the detail page for your deployed job.HTTP endpoints are only available for deployed jobs.
- using the Blaxel SDK, API, or language-native HTTP client (only for deployed jobs);
- using the Blaxel CLI;
- scheduling it to run periodically via a cron.
SDK
Start batch job execution using the SDK:API
Start batch job execution by calling the inference API for your deployed batch job. Here is an example usingcurl:
Execute a job
CLI
For deployed jobs, you can start a batch job execution by running:--local argument:
Cron schedule
Set a job on a cron schedule by adding the following to theblaxel.toml configuration file (read full reference on blaxel.toml down below):
Retries
You can set a maximum number of retries per task in the job definition. Check out the reference forblaxel.toml configuration file down below.
Metrics
The Blaxel Console > Dashboard displays detailed job metrics, including the number of active jobs, failures, and requests (both count and requests per second (RPS)) across all deployments.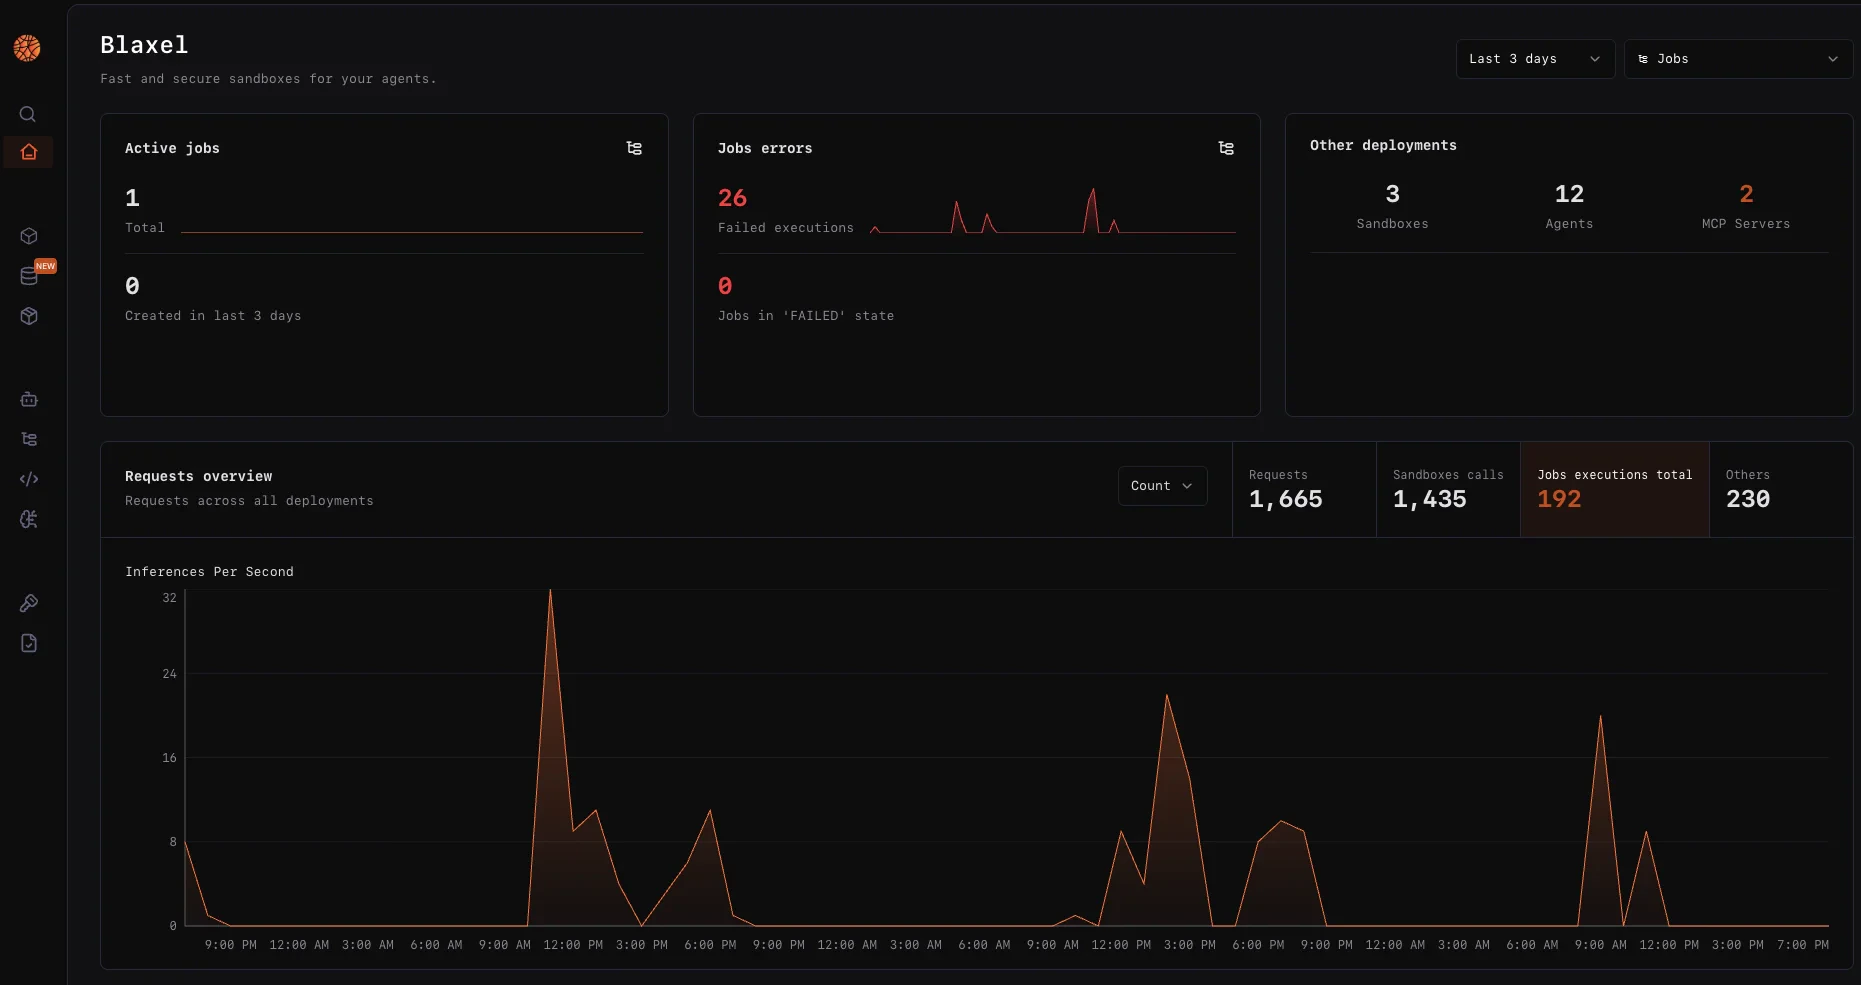
List jobs
To retrieve all jobs in your workspace, use the Management API list endpoint with pagination.Pagination is recommended for list operations because retrieving all available resources in a single request is slow and resource-intensive, and therefore does not scale well.
data array and a meta object:
meta.nextCursor as cursor on the next request and repeat until meta.hasMore is false:
Deploy with a Dockerfile
While Blaxel uses predefined, optimized container images to build and deploy your code, you can also deploy your workload using your own Dockerfile.Deploy using Dockerfile
Deploy resources using a custom Dockerfile.
Deploy multiple jobs at once
Using a custom Dockerfile allows for deploying multiple jobs from the same repository with shared dependencies.Deploy multiple resources with shared files
Deploy multiple jobs with shared context from a single repository.
Deploy multiple jobs from a single image
Reuse a job image across multiple job definitions.
Template directory reference
Overview
package.json
Here the most notable imports are the scripts. They are used for thebl serve and bl deploy commands.
scripts are not required. With TypeScript, all 4 of them are used.
start: start the job locally through the TypeScript command, to avoid having to build the project when developing.prod: start the job remotely from the dist folder, the project needs to have been built before.build: build the project. It is done automatically when deploying.
blaxel.toml
The deployment can be configured via theblaxel.toml file in your agent directory. This file is not mandatory; if the file is not found or a required option is not set, you will be prompted for the information during deployment.
name,workspace, andtypefields are optional and serve as default values. Any bl command run in the folder will use these defaults rather than prompting you for input.policiesfield is also optional. It allows you to specify a Blaxel policy to customize the deployment. For example, deploy it only in a specific region of the world.[env]section defines environment variables that the job can access via the SDK. Note that these are NOT secrets.[runtime]section lets you override job execution parameters: maximum number of concurrent tasks, maximum number of retries for each task, timeout (in s), or memory (in MB) to allocate.[tasks]sections let you specify[[triggers]]and[triggers.configuration]sections define ways to schedule job executions.type = "cron"lets you create a cron schedule for the job to run periodically. The job will be executed without any argument by default. You can override this by passing:tasks = [{my_arg="my_value"}]containing a list of task to execute at each occurrence of the cron (default value is one task, without arguments)
https://api.blaxel.ai/v0/jobs/my-job/executions?workspace=my-workspace.
Ephemeral volumes
Ephemeral volumes are temporary disk-backed storage attached to a job at startup and automatically destroyed when the job completes. Ephemeral volumes have separate quotas from persistent volumes. Limits depend on your plan.Ephemeral volumes are only available for jobs. Sandboxes and agents should use persistent volumes instead.