All resources on Blaxel are logically regrouped in an account, which is the highest possible level of tenancy. An account can have multiple workspaces — a common pattern when dealing with multiple environments (e.g. development vs. production), business units, or end-clients.
Users can be either team members, or service accounts that represent external systems that can operate Blaxel. They are added to a workspace with certain permissions on the workspace resources inherited from their role.
Workspace name
The workspace name (called name in the Blaxel API) uniquely identifies your workspace. You set it when the workspace is created. Once set, it cannot be changed. The workspace name appears at the bottom of the left sidebar in the Blaxel Console.
Each workspace also has a display name for better organization, which workspace admins can modify.
User roles
There are two roles that a user or service account can have in a workspace: admin and member.
Admins have complete access in the workspace, on all workspace resources. They can also modify all workspace settings, including inviting other team members. More specifically, admins have all the permissions that members have, in addition to:
- creating and editing policies
- inviting and removing users
- changing user’s permissions
- adding and removing integrations
- changing the workspace name
- deleting the workspace
Members can view the workspace settings but not edit them. They are also able to view and modify the following resources inside a workspace (including querying them when applicable):
They have read-only access on the following resources:
Shared account settings
A Blaxel account is the top-level entity that owns one or more workspaces. The following are managed at the account level and are shared across all workspaces in an account:
- Quota tier and limits
- Credits
- SSO/SAML configuration
- Usage analytics
This means that resource usage in any workspace draws from the common credit balance and counts toward the same quotas. See the usage and quotas documentation for more information.
Create a workspace
Workspaces can be created, managed, and deleted using the Blaxel Console and the Blaxel SDKs.
Blaxel Console
To create a new workspace using the Blaxel Console:
-
Click the workspace name at the bottom left corner.
-
In the rollout menu, click Switch > +.

-
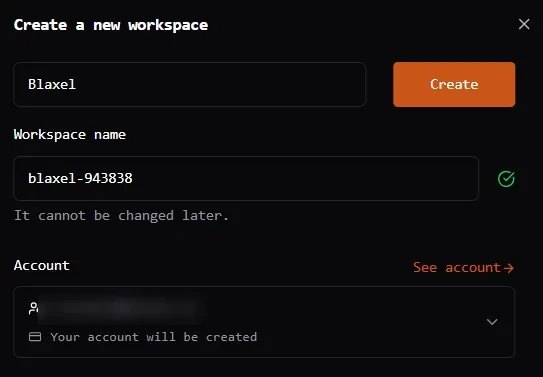
In the Create a new workspace dialog, enter a workspace name and label.
-
Click Create to create the workspace.
Blaxel SDKs
Delete a workspace
Deleting a workspace is permanent and cannot be undone.
Blaxel Console
To delete a workspace using the Blaxel Console:
-
Click the workspace name at the bottom left corner.
-
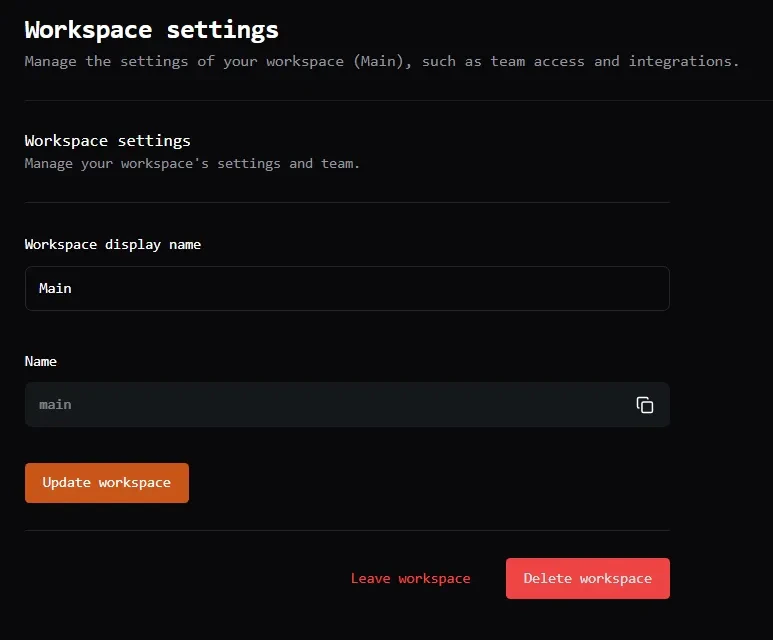
Click Workspace settings.
-
Review the information and click Delete workspace to delete the workspace.
Blaxel SDKs
Invite a member
Admins can invite team members via their email address. They will be prompted for the role to give the user.
To invite a team member:
-
Click Workspace > Team.
-
Click Invite user.
-
Enter the invitee’s email address and role.
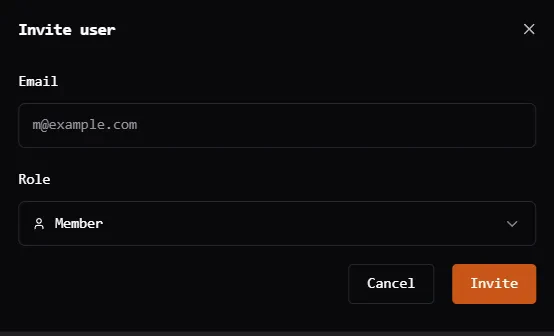
The invitee will receive an email to allow them to accept the invitation on Blaxel console. They will not be able to access workspace resources until they have manually accepted the invitation. If the user doesn’t have a Blaxel account already, they will be asked to sign up first.
Invitations to other workspaces are visible from your profile.