Overview
Domain capture lets you claim ownership of your organization’s email domain (e.g.acme.com) and then decide exactly how users from that domain can sign in. You can restrict logins to specific methods (Google, SSO (SAML), or email passwordless) and automatically add new users to your workspaces when they first sign in.
This feature is available to all account administrators at no extra cost.
SAML SSO and Directory Sync are enterprise features built on top of domain verification. See SSO & Directory Sync if you need those.
Prerequisites
- You must be an account administrator.
- You must have access to your domain’s DNS settings to add a TXT record.
Step 1: Add a domain
1
Open Identity & Access settings
Go to Account Settings → Identity & Access.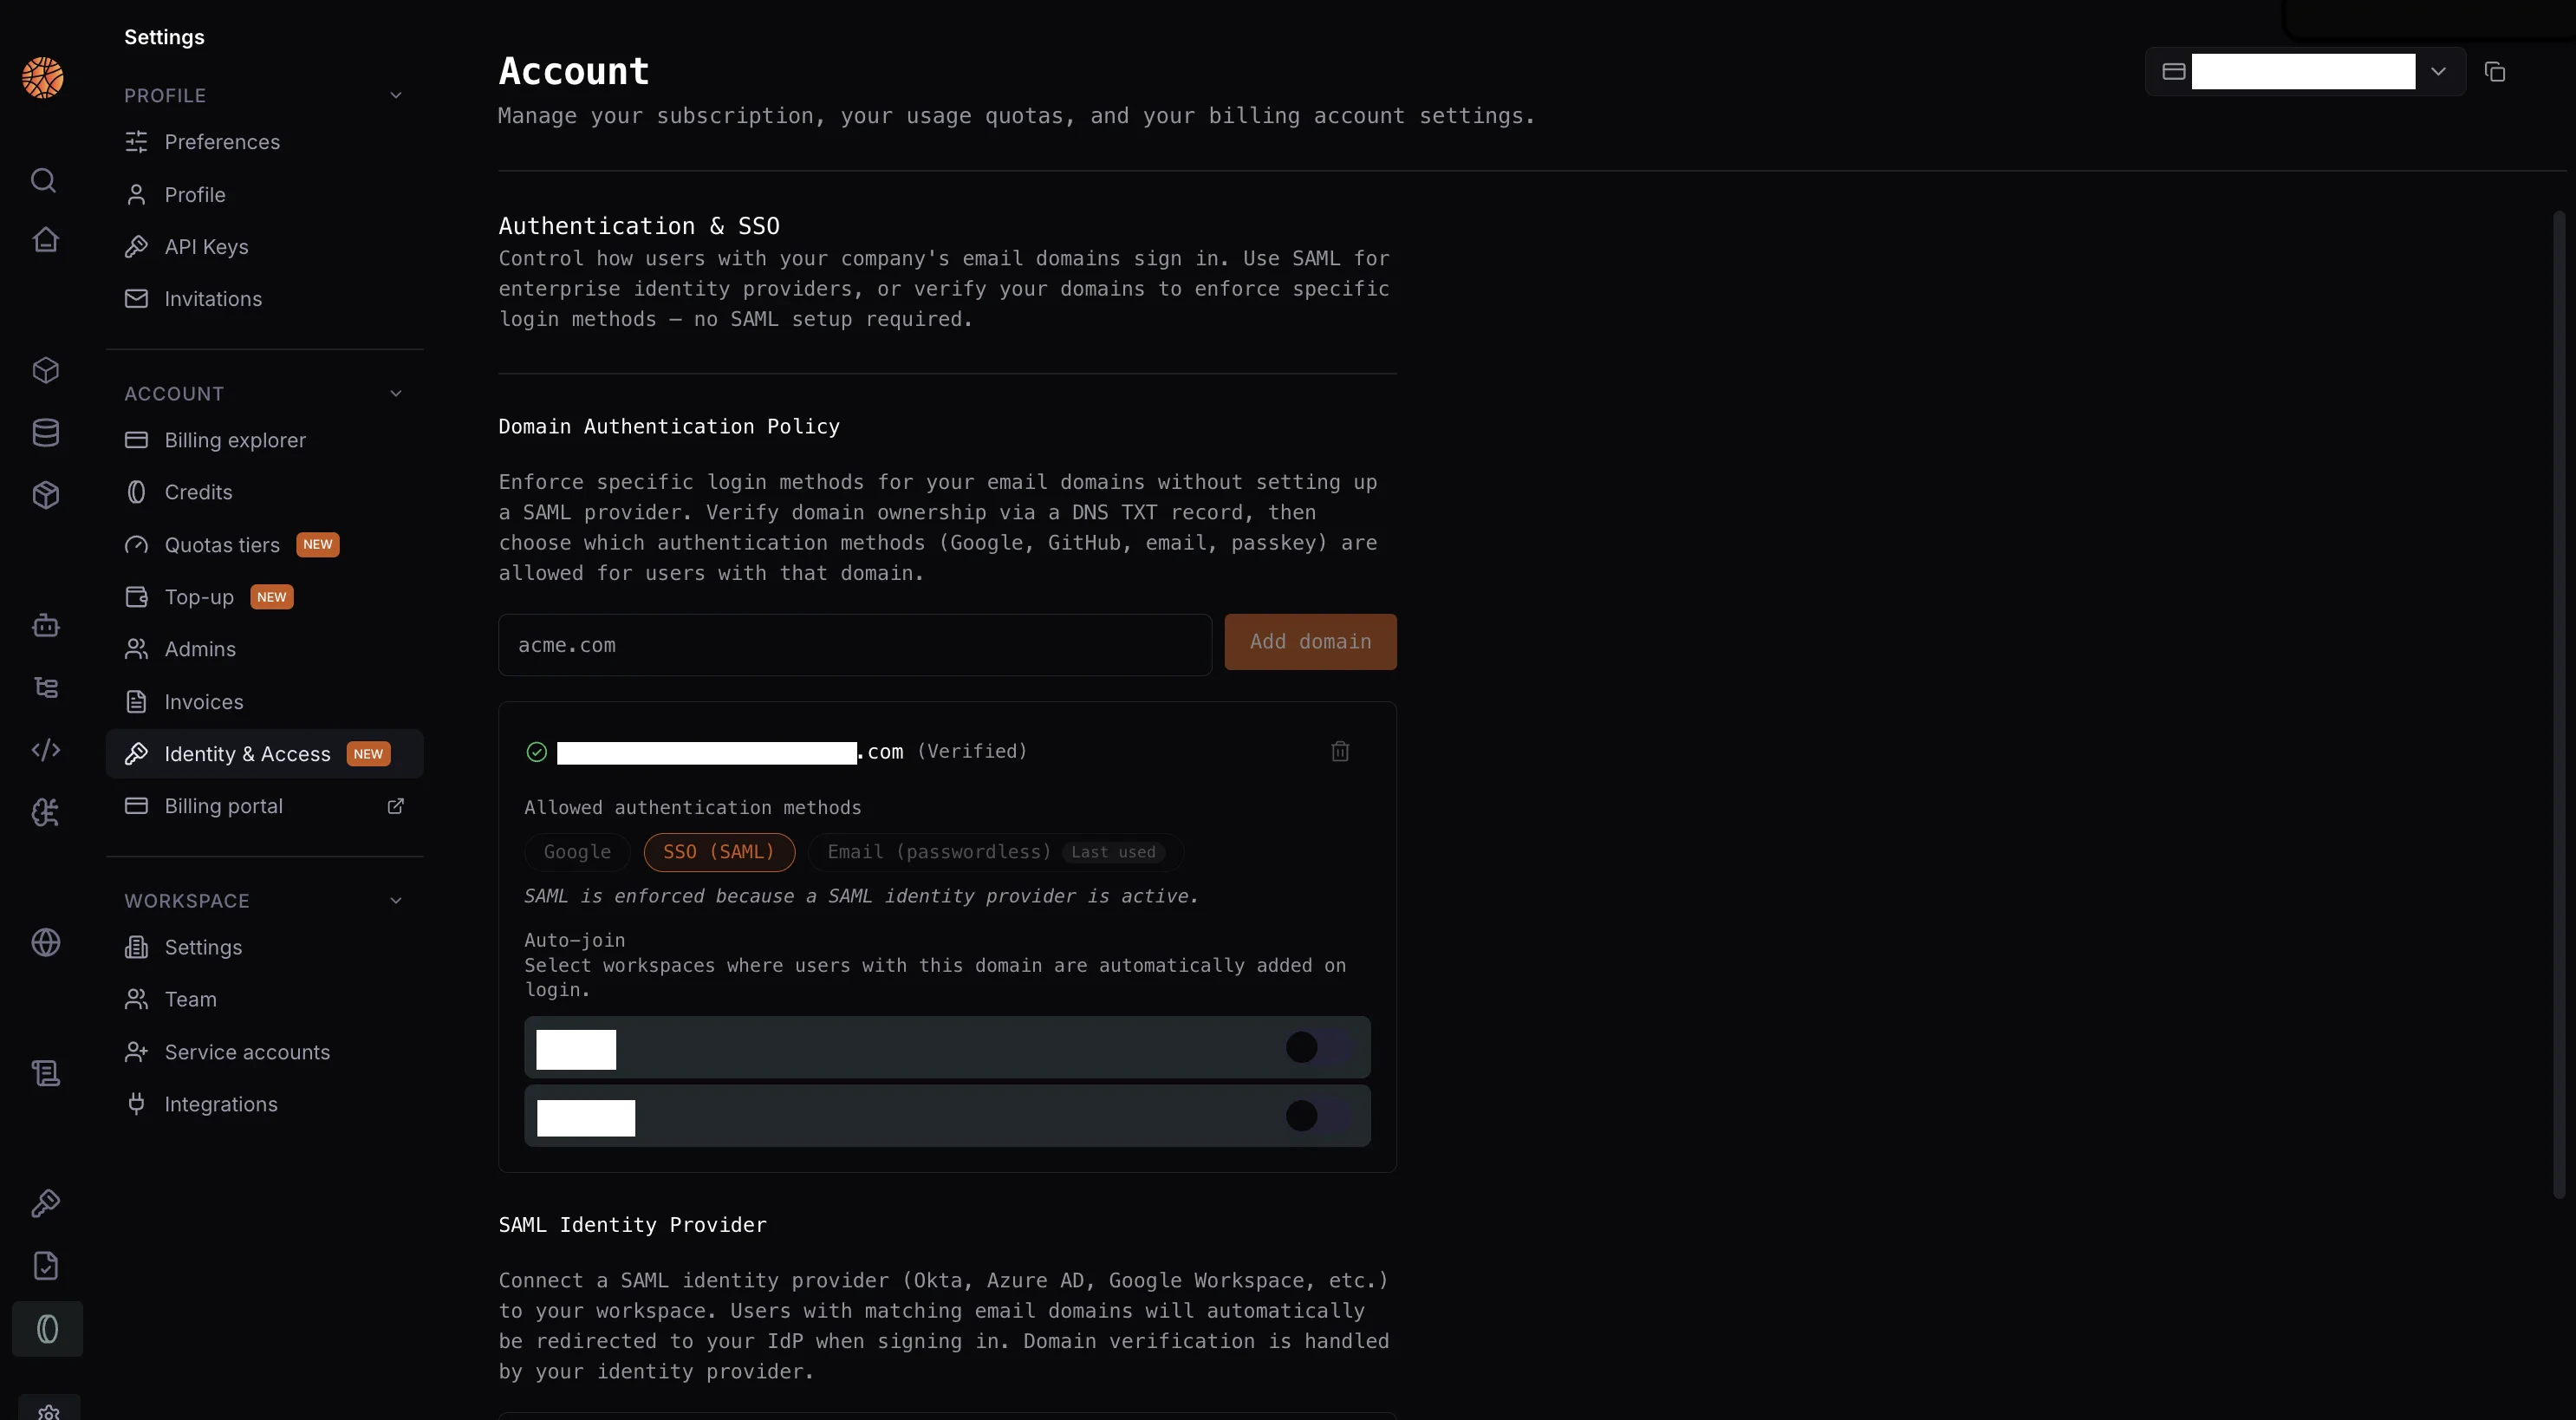
2
Enter your domain
Type your company’s email domain (e.g.
acme.com) in the input field and click Add domain.Step 2: Verify via DNS TXT record
To prove you own the domain, add a DNS TXT record provided by Blaxel.1
Reveal the DNS record
Click Show DNS on the pending domain row.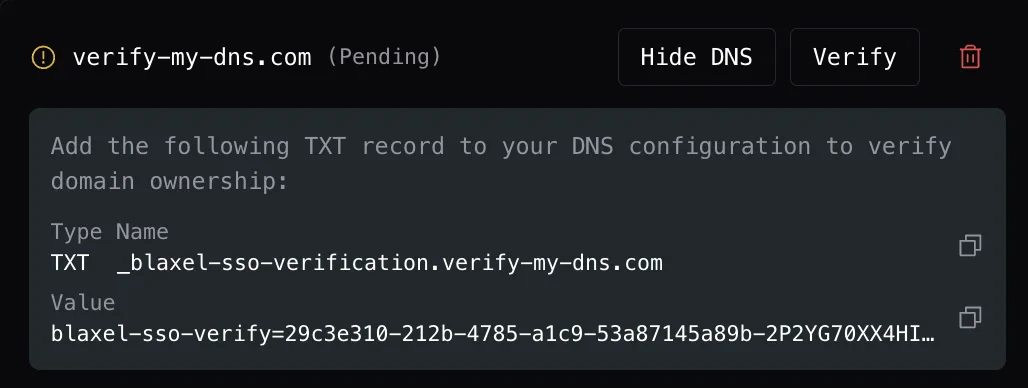
2
Copy the record values
You’ll see two values:
- Name: the hostname to add the record to (e.g.
_blaxel-sso-verification.yourdomain.com) - Value: the verification string starting with
blaxel-sso-verify=...
3
Add the TXT record in your DNS provider
Log in to your DNS provider (Cloudflare, Route 53, GoDaddy, etc.) and add a new TXT record with the name and value you copied.DNS propagation typically takes a few minutes, but can take up to 48 hours in rare cases.
4
Trigger verification
Return to Account Settings → Identity & Access and click Verify on the domain row.
Step 3: Set allowed auth methods
After your domain is verified, you can restrict which login methods users from that domain can use.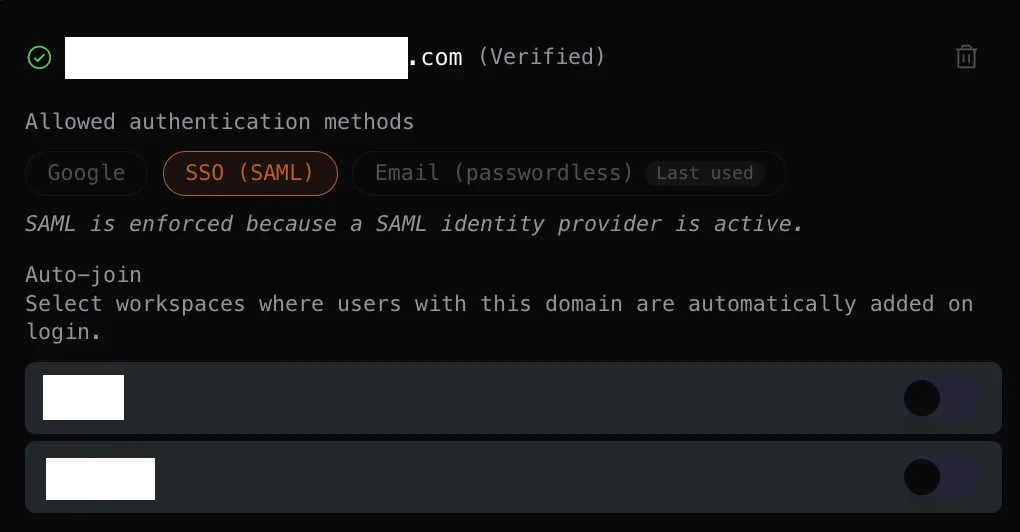
If no methods are selected, there is no restriction and users can sign in with any available method.
If SAML SSO is configured and active on your account, SSO (SAML) becomes the only allowed method automatically and the other toggles are locked. See SSO & Directory Sync.
Step 4: Configure auto-join workspaces
You can automatically add new users to one or more workspaces the first time they sign in with your verified domain. Under Auto-join, toggle on any workspace to enable automatic membership for users from that domain.Removing a domain
Click the trash icon on any domain row to remove it. You’ll be asked to confirm before deletion.A domain that is actively linked to a SAML SSO connection cannot be deleted until the SSO connection is removed first.